This article applies to customers with a Premium or Corporate subscription license.
Platform requirements
Platform Version Requirements: 9.3.2 or later.
Out-of-the-Box Content Version Requirements: 9.3.2 or later (exception 9.4.0a)
Overview
The TeamViewer mergeable application (mApp™) integrates TeamViewer remote control and chat capabilities with CSM. The integration allows CSM users to initiate remote control sessions from within an Incident.
This mApp includes multiple features, including Stored Values (Client ID, Client Secret, State Value for Browser, Browser Close TeamViewer Session), Web Services (TeamViewer Authorization, TeamViewer Sessions, TeamViewer retrieve code), and One-Steps (Create TeamViewer Session, Close TeamViewer Session, Send TeamViewer Session Email, Automated Delete of TeamViewer Session, Browser Client TeamViewer Token Section, Browser Close TeamViewer Session), Business Objects to store TeamViewer Data (TeamViewer Session, TeamViewer Token), Stored Expression (CurrentDatePlusOneDay) Images (TeamViewer.jpg), and an Automation Process (Automated TeamViewer Cleanup) .
How the mApp Works
CSM provides the TeamViewer integration as a mApp so that Users can easily incorporate remote session functionality into their existing CSM system.
The mApp includes the following items:
Applying the TeamViewer mApp
To apply the mApp, perform the following high-level steps (the screenshots provided may vary, depending on systems and versions):
1) Download the mApp from the CSM mApp Exchange and save it to a location where you have access to apply it to your system.
2) Apply the mApp using the Apply mApp wizard in CSM Administrator. The Apply mApp wizard generates a Blueprint.
3) While in the newly created Blueprint, select the Business Object, select , scroll to the bottom of the forms on the left pane and drag the TeamViewer form to the Tabs section of the screen. Right click on the TeamViewer tab and you are able to select or deselect an icon for the tab. Select the Green Checkbox to add this action to the Blueprint.
4) This Blueprint can now be viewed and published to a test or live system to commit the changes.
TeamViewer mApp for CSM Desktop Client
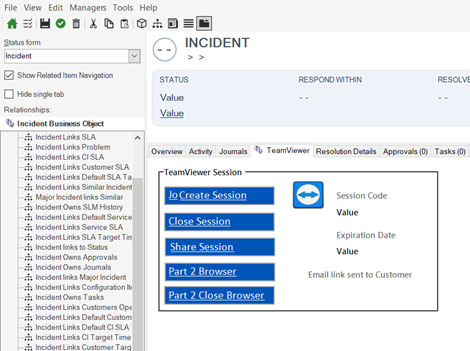
When complete, there will be a new Tab on the Incident business object with the integration controls ready to use.
Using the TeamViewer mApp
To use the TeamViewer mApp, you must have a licensed CSM user and valid TeamViewer credentials. You must be viewing a saved incident from either the Desktop or Browser Client.
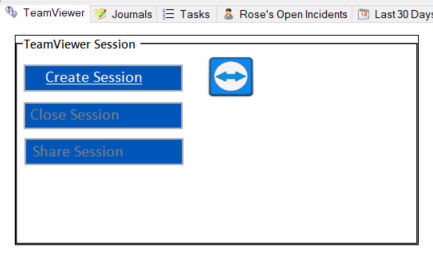
To Create a TeamViewer session within CSM:
- While in the Incident ticket, run the One-Step™ from the button on the TeamViewer Tab on the Incident form (Desktop Client or CSM Browser Client 10.0). If a requestor is defined in the ticket, their email address will be used for the TeamViewer session invitation email.
- When using the Desktop client, a pop-up will appear within CSM, asking you to logon via a browser session to TeamViewer, prompting you for your TeamViewer credentials, after that process has completed and your information is validated, you will receive a message from TeamViewer to return to the Cherwell record you were working on. In that record, click the Close on the Pop up and the process will continue. An email will be generated to be sent to the customer of that record with the link. After sending the email, the Join As Admin button will appear and you can then launch the TeamViewer Session.
When using the Browser client, a pop-up will appear within CSM, asking you to login via a browser session to TeamViewer, prompting you for your TeamViewer credentials, click ok. After that process has completed and your information is validated, you will receive a message from TeamViewer to return to the Cherwell record you were working on. In that record, click the Refresh button then go back to the TeamViewer Tab and click the Part 2 Browser button and the process will continue. An email will be generated to be sent to the customer of that record with the link. After sending the email, the Join As Admin button will appear and you can then launch the TeamViewer Session.
When the customer accesses the URL in the email, the TeamViewer session will be active.
To Close a TeamViewer session within CSM:
- While in the Incident ticket, run the One-Step™ from the button on the form (Desktop Client or CSM Browser Client). The related Session will send a Close to TeamViewer and will delete the related TeamViewer Session. (note: if a user does not have a current Active Token record, the close button will need to be pressed a second time due to a bug found in the process).
To Send an Email link to the current session within CSM:
- While in the Incident ticket, run the Share Session One-Step™ from the button on the form (Desktop Client or CSM Browser Client). The related Session will send an email to the current customer with the Customer Link.