Automating your scripts saves time on repetitive tasks, such as uploading your batch, PowerShell, or shell scripts encrypted into secure storage within the Management Console.
Select the saved scripts from the menu during remote sessions and start the execution with one click.
You can also standardize maintenance and support while reducing time to resolution, using your saved time to focus more on essential tasks or resolving other support requests.
With OneClick remote script execution, you can regain productivity and help more clients.
This article applies to all TeamViewer customers with a Business, Premium, Corporate or Tensor plan.
OneClick remote script execution - Introduction video
General Requirements
The following requirements must be met to upload scripts to the Management Console. Please make sure that you fulfill all:
- A valid TeamViewer subscription
- Scripts already created and saved locally on your current device (that you intend to use to upload the scripts to the Management Console)
- The script file size is less than 100 kB.
How to upload scripts
To upload scripts, please follow the instructions below:
- Log in to the Management Console: https://login.teamviewer.com/.
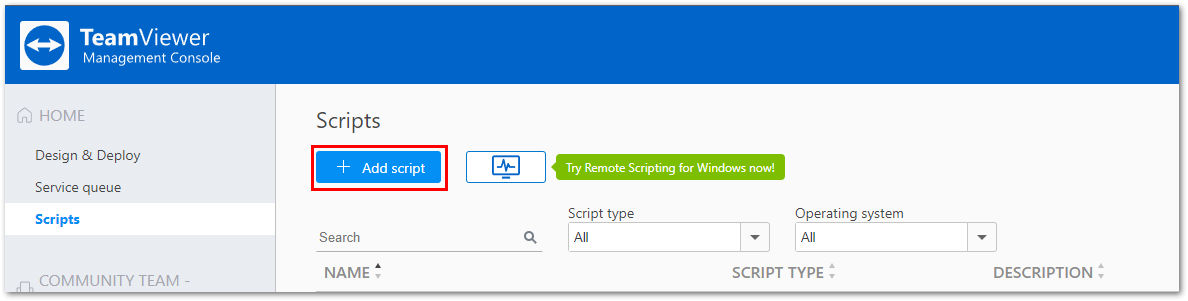
- Click on Scripts at the top left of the side menu.
- Click +Add script to upload your script.
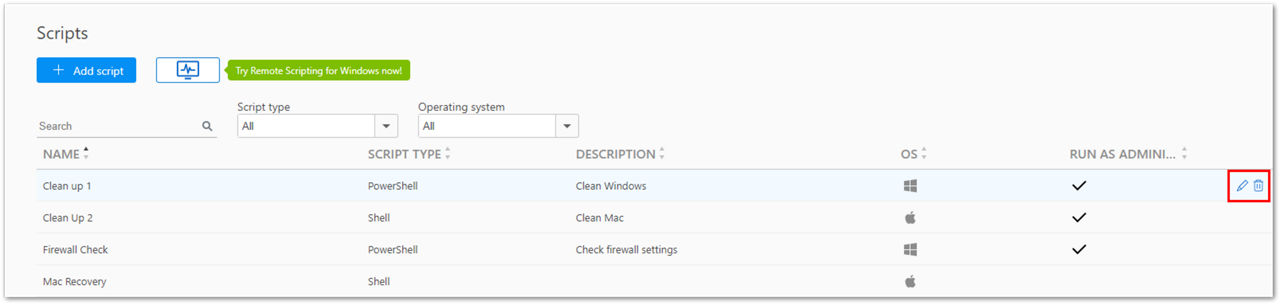
- If you have already uploaded some scripts, they will be displayed in a table.
- Select the script file, enter the required information in the dedicated fields and click Save.
Run as administrator
Check this box to run the script as administrator. Scripts using at least one command that requires elevated rights should have this box checked.
When initiating a script, a prompt appears once at the start of execution asking for permission (if the logged-in user already has administrative rights) or for administrator credentials (if the logged-in user does not have administrative rights). Regardless of how often/when commands are used in the script (e.g., for long-running tasks), this only appears once at the beginning.
🚨 Important notes:
- It is not currently possible to execute scripts using administrative rights if TeamViewer (Classic) is used in Run only (one-time use) mode or via QuickSupport, as the UAC prompts cannot be displayed via the session. TeamViewer (Classic) must be installed on the device itself.
- Scripts in administrative mode are not yet supported for Linux.
Script types
Once the above is entered, the next step is to upload the script using the Upload Script button. The following script types are currently supported:
Windows
- Batch (.bat/.cmd)
- Powershell (.ps1)
macOS
- Shell (.sh)
Linux
- Bash (.sh)
How to update scripts
Hover the mouse over the desired script to modify and delete existing scripts. To the right of the script, a pencil icon and a trashcan icon will appear. These will allow you to Edit or Delete the script.
The new data is saved when a script is modified (either a new version of the script is uploaded or the information is changed). Old script data is deleted.
How to execute scripts
Prerequisites
The following requirements must be met to automate your tasks with scripts. Please make sure that you fulfill all:
- A valid TeamViewer subscription.
- Both machines must run TeamViewer (Classic) 14 or higher.
- Logged into your TeamViewer (Classic) client with a licensed account (scripts will not appear in the menu otherwise).
- The scripts are marked as suitable for the remote machine operating system.
- For Windows: The remote TeamViewer (Classic) client must be installed and not operated in "Run only" mode. This is required to run scripts that require Administrative rights.
- HTTP connection from the remote system to the cloud storage must be possible.
Execute scripts
To execute scripts, establish a TeamViewer (Classic) connection to your remote device and follow the instructions below:
- Open the scripts menu
- Windows: Go to Actions ➜ Scripts in the remote control toolbar to open the menu.
- macOS: Click Scripts on the right-hand side of the remote control toolbar.
- The drop-down menu will show all compatible uploaded scripts for the remote machine's operating system.
- Select a script to run on the remote machine by clicking on the context menu.
- The remote user must accept the script execution request dialogue. Once accepted, the script is downloaded to the remote machine directly from the cloud, decrypted, and started.
- On the remote side, some notifications are shown for the current status.
- If the script needs administrative rights, a dialogue will ask for permission. This only appears once per session
Permission management for unattended devices
By default, scripts can only be executed if the user on the remote side accepts the execution request. In situations where a script must be executed on an unattended device or where the user cannot accept the request, the request can be disabled completely or set always to deny script execution via the new access control.
Permissions can be defined for both incoming and outgoing connections. This setting can only be changed if administrative rights are active, meaning this setting can be used to restrict script execution abilities from those in your company who do not require it.
The following defaults are set if access control is chosen:
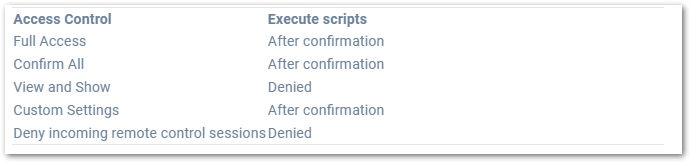
Custom settings can be defined using the following values:
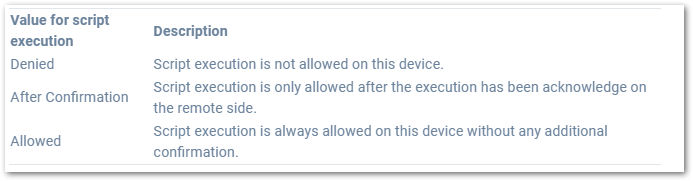
The access control allowed in a session depends on the setting of both the local and remote machines. In situations where access control differs, the most restrictive setting of the two will be used.
Manage Access Control on Windows
To verify or alter Access Control permissions on Windows:
- Access the TeamViewer (Classic) options in the upper right corner of the TeamViewer (Classic) app.
- Click on Advanced, navigate to Advanced settings for connections to this computer, or Advanced settings for other computers.
- In Access Control, select the desired setting and click OK.
Manage Access Control on macOS
To verify or alter Access Control permissions on macOS:
- Open TeamViewer (Classic).
- Click TeamViewer at the top left corner of your screen and select Preferences.
- Click on Advanced, navigate to Advanced settings for connections to this computer, or Advanced settings for other computers.
- In Access Control, select the desired setting and click OK.
Manage Access Control on Linux
To check or adapt the permissions on Linux:
- Open TeamViewer (Classic).
- Access the TeamViewer (Classic) Options.
- Click on Advanced, navigate to Advanced settings for connections to this computer, or Advanced settings for other computers.
- In Access Control, select the desired setting and click OK.
📌Note: Advanced settings for connections to this computer are the only current option available for Linux, as it is not yet possible to execute scripts from a Linux device.
Manage Access Control via TeamViewer policy
It is also possible to manage the Access Control settings from a TeamViewer policy. This allows you to affect the same settings on multiple devices at once.
You'll learn how to create a TeamViewer policy here: Create a settings policy. Once the policy is created, you can:
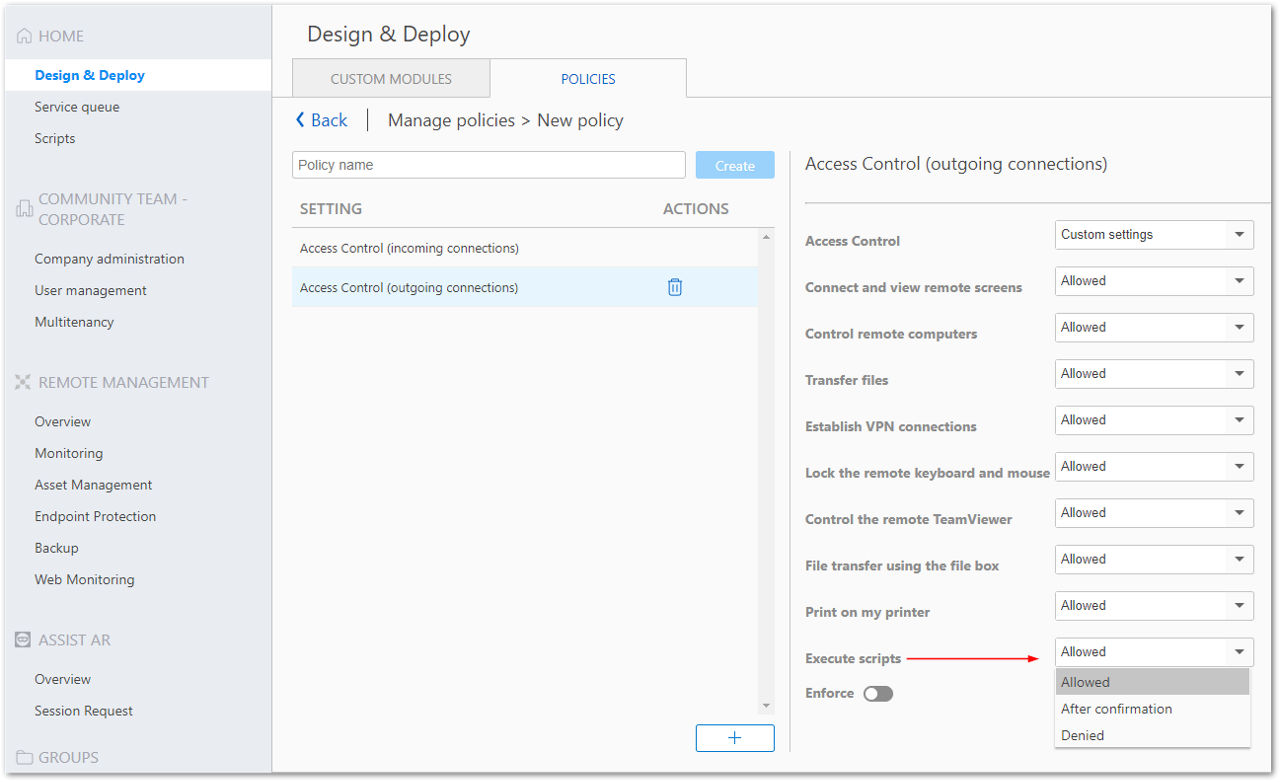
- Add Access Control (incoming connections) or Access Control (outgoing connections) to the policy.
- Manage the setting for Execute Scripts.
Once saved, the policy can be assigned using Assign TeamViewer policies.
More information on creating and deploying a TeamViewer policy can be found here:
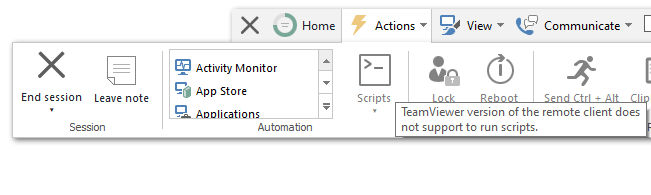
Scripts are not available within a session
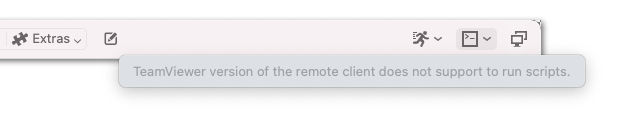
The script menu will appear greyed out when you cannot execute scripts during a session. To discover why scripts are unavailable, hover your mouse over the Scripts menu. Examples are shown below.
Windows
macOS
Best practices for writing your scripts
Using '~' for paths on macOS
macOS allows the character ‘~’ to address the user's home directory. If scripts are executed with administrative rights, the script is executed by the root user. Therefore, ‘~’ will be replaced by /var/root and not with the logged-in user's home directory.
Furthermore, the $HOME variable is not set in this case. For these reasons, you should not rely on ‘~’ and $HOME if you run your scripts as administrator.
If you need to create, copy or download folders or files, you can use the working directory of the executed script, which is located under ~/Library/Application Support/TeamViewer/Remote Scripting/<script-uuid>
This directory will be deleted immediately after the executed script has terminated.
The root user also creates these files and folders. If necessary, you can change the owner with the chown command and change the rights with chmod.
Using the right line endings
You must use the correct line endings in your script files that can be interpreted by the operating system on which you execute the scripts.
For example, a script file that contains “CR LF” like on Windows cannot be executed on Linux (expects only “LF”).
FAQ
Why is my PowerShell script not executed on the remote machine but works locally?
By default, Windows restricts the execution of Powershell scripts. The execution policy must first be changed.
- On 64-bit machines: Currently, the 32-bit process for the command line is used. For this, you have to set the permission on the 32-bit process:
SystemRoot%\SysWOW64\WindowsPowerShell\v1.0\powershell.exe "Set-ExecutionPolicy RemoteSigned".
(This issue will be fixed in a later version so that the 64-bit process is used.)
For further details, please have a look at the documentation for Get-ExecutionPolicy and Set-ExecutionPolicy