Navigation path: Automation > Flows
Summary
Purpose
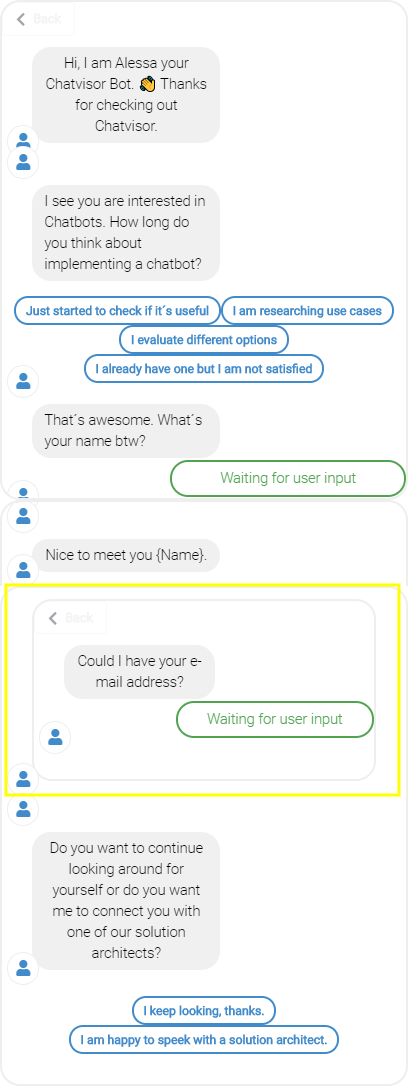
With Flows you can pre-model conversations, that can be used in different ways. Flows are Chatbots. For the purpose of automation, Flows can automate standard questions and requests, or be used by agents to easier handle repetitive tasks. From a marketing aspect, Flows can be used to approach website visitors that meet a pre-set criteria at scale.
Functionalities / need to know
Generally Flows:
- can be created for WebChat or Facebook Messenger
- can be triggered through button elements of WebChat UI
- can be triggered by Rules
- can be triggered in the Live Chat window
Feature descriptions
Your first Flow
- To create your first Flow, click
+ New Flows - Choose the platform the Flow shall be for
- (currently WebChat and Facebook Messenger/Facebook Inbox are supported)
- Name your Flow and click
Save & Edit
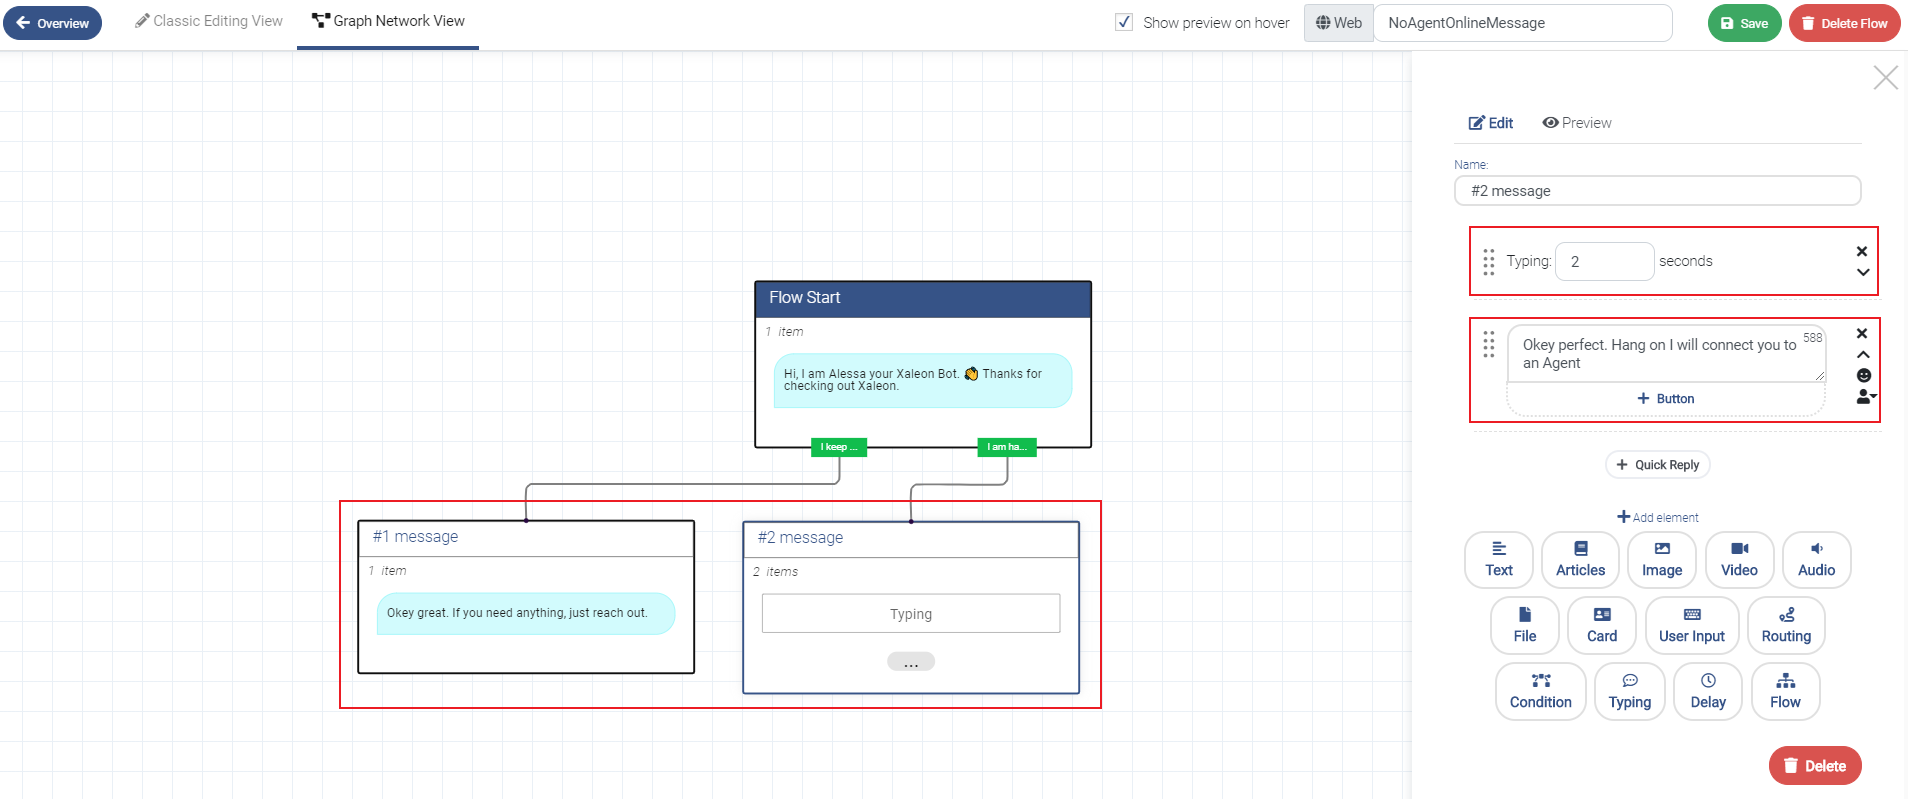
Within the flow builder
The flow builder has two views:
- Graph Network View (default)
- Classic Editing View
Due to the benefit of visualization, we recommend using the Graph Network View for bigger Flows. Overall, the Classic Editing View does only remove the visualization of the Flow - other than that, there are no differences.
Architecture of a Flow
One Flow consists of "one to many" Message Element(s).
One Message Element consists of "one to many" Message Item(s).
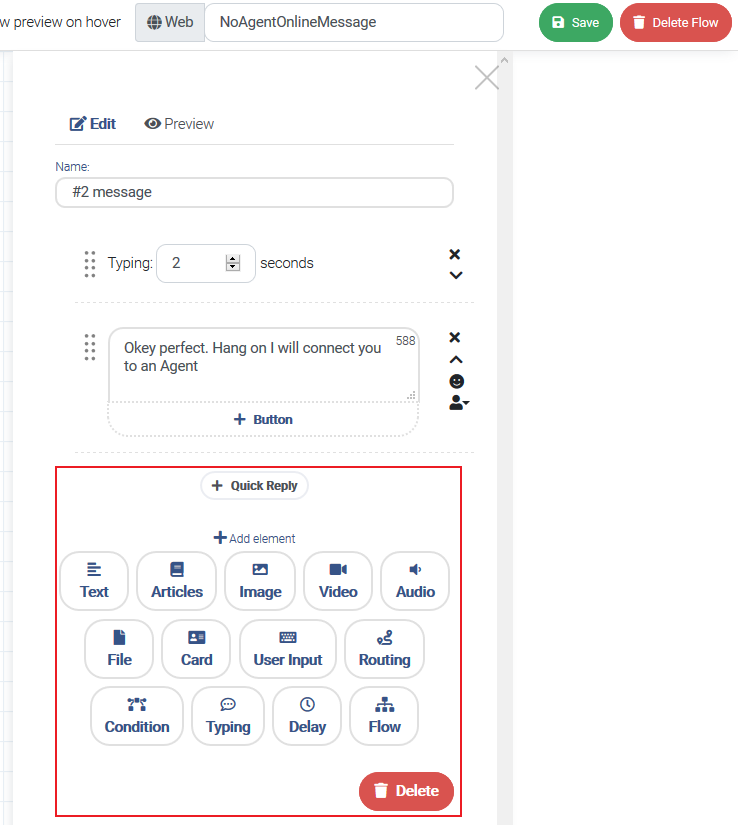
Message Items
We designed the flow builder after a modular principle including following Message Items:
💡Hint: Click the Flow Start Message Element to see the Message Items.
- Button
- Quick Reply
- Text
- Articles
- Image
- Video
- Audio
- File
- Card
- User Input
- Routing
- Condition
- Typing
- Delay
- Flow
- Additional Action
Text
This item allows you to insert a text message (including Emojis). The text item can contain 640 characters at max (like messages in Facebook Messenger).
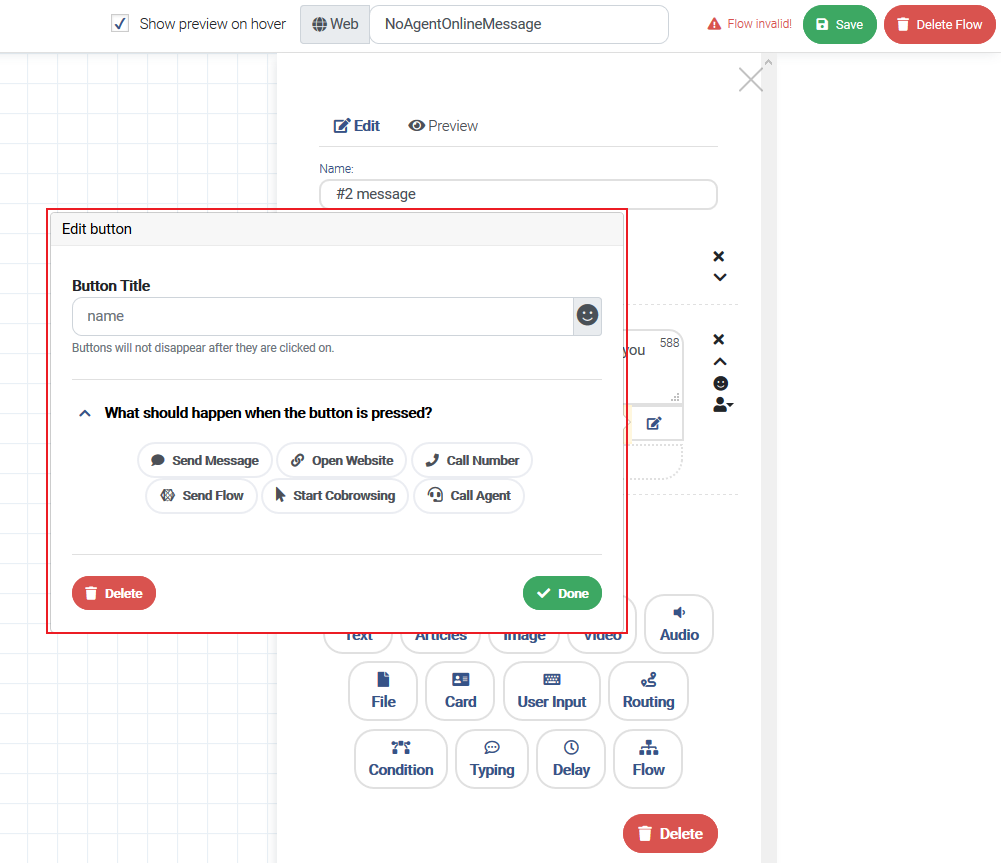
Button
The items Text and Card can be extended with up to three buttons, which trigger further actions. The actions are:
- Send Message
- Triggers another Message Element.
- You can create a new Message Element by clicking
+ Add new Message Element. - Add Additional Actions by clicking
+ Additional Action
- Open Website - redirects to URL (will be tracked to measure performance)
- Call Number - opens dial field on phone
- Send Flow - triggers other Flow
- Start Co-Browsing - triggers a Co-Browsing request and an Agent will be notified
- Call Agent - calls an Agent
To "Send message" you can add Additional Actions.
A button label can be max 20 characters.
Articles
Articles as pre-made widgets can be added as a slideshow. Articles consist of picture, title, short description, and URL.
Image
Upload an image (JPG, PNG, GIF).
Video
Upload a video (MP4).
Audio
Upload an audio file (MP3).
File
Upload a file (PDF, etc).
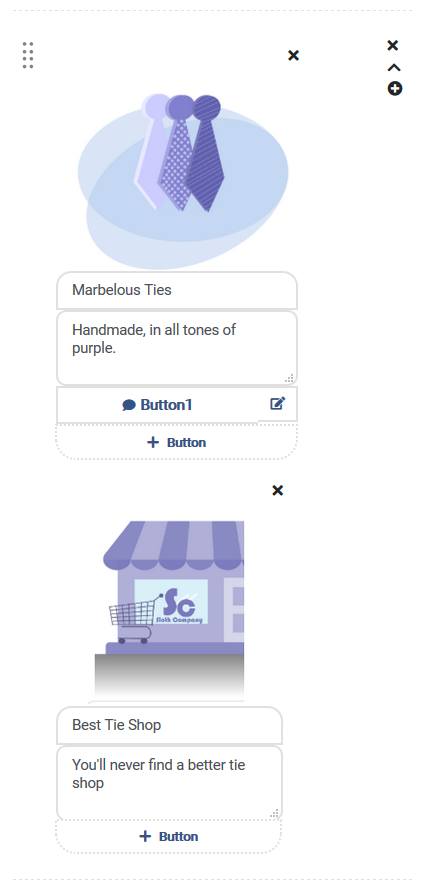
Card
With Cards you can build individual widgets. A card can consist of image, title, description and up to three Buttons. There can be 10 cards sent as one swipeable slideshow.
📌Note: A card always has to have image or description, or both.
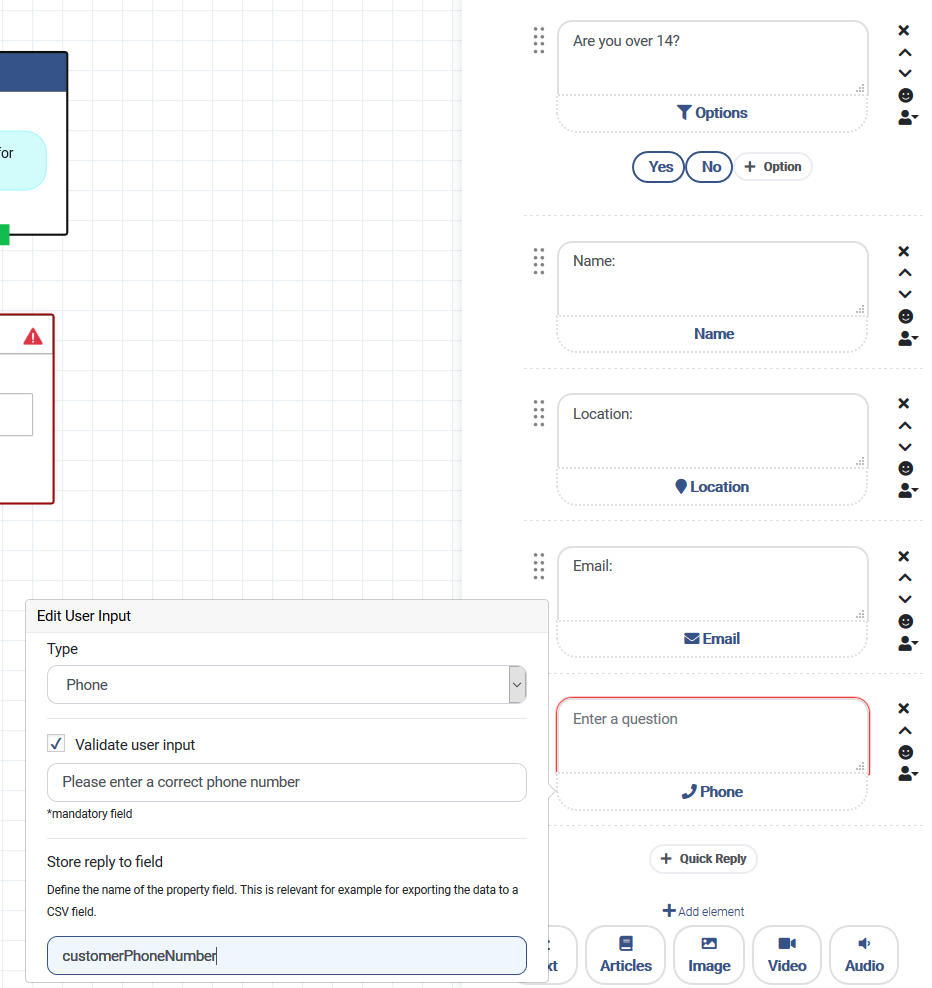
User Input
With User Inputs you send a message and save the user's response to a variable. The gathered User Inputs are displayed in the user details section of the Live Chat.
💡Hint: When using the Data Type "Name", User Inputs will update the customer name from "Visitor" to the given input.
Data Types
Standard data types are:
- Text
- Email
- Name
- Location
- Phone
- Options (single choice)
Validation of Data Types "Email" and "Phone":
The data types "Email" and "Phone" can be validated. By activating "Validate user input", TeamViewer Engage processes a simple validation. In case validation fails, a retry message will be sent where the user can confirm correctness.
📌Note: The retry message will only be sent once. If the user provides confirms the incorrect data, they will proceed in the Flow.
Referencing to User Input in Flow
After the user provided an input, the input can be used in the flow. Use {fieldname} to insert a user input into a message. Replace "fieldname" with the name you entered to "Store reply to field" when creating the user input.
Routing
Through using the Routing element you can shift the conversation from bot to human. You can auto-assign the conversation either by selecting responsible agents manually or by making use of Routing Rules (recommended).
Condition
Conditions are always used in combination with User Inputs. Most commonly, Conditions are used to check whether a User Input matches certain criteria or not. In case of success, another Message Element can then be triggered. One Condition item can include a number of conditions that trigger on success, and a fallback if there's no matching condition.
Typing
Typing shows a typing bubble within the chat for a set amount of time, and delays before the next message is sent/item is executed. The purpose of this item is solely to give an automated flow a more human touch.
Delay
"Delay" delays for a set amount of time before the next message is sent/item is executed.
Flow
Within a Flow, you can send another Flow.
💡Hint: Use this to remove "flow redundancy". Through this feature you are able to create partials for Flows that do a repetitive job and which you can re-use.
⚠Attention: Be aware that the Flow you reference to, shall have a clear end point. When that Flow leads somewhere through Buttons, Quick Replies, referenced Flows, the original Flow might never be completed.
Example:
- Flow 1 triggers Flow 2
- Flow 2 runs until its end
- Flow 1 resumes
Quick Reply
Quick replies are buttons containing a title displayed prominently above the composer. There can be up to 10 quick reply buttons in a row, when one quick reply is tapped, all buttons are dismissed - the title text of the tapped button will be posted as message in the conversation. Moreover quick replies can trigger a new Message Element or Flow.
📌Note: Text in quick reply can't be longer than 20 characters.
Additional Action
Additional Actions are a way to add information to a customer or notify an agent. Additional Actions are available when using Buttons or Quick Replies (or Auto Responders). The different Additional Actions are:
- Add Label
- Remove Label
- Add Custom Field - adds a new User Input field with a defined value.
- Notify Support - conversation is put into inbox as "Unresolved" and agents get a notification.
Continue reading here