After data collection, model training can be started.
Start a training
- Go to Project Overview.
- Select your project.
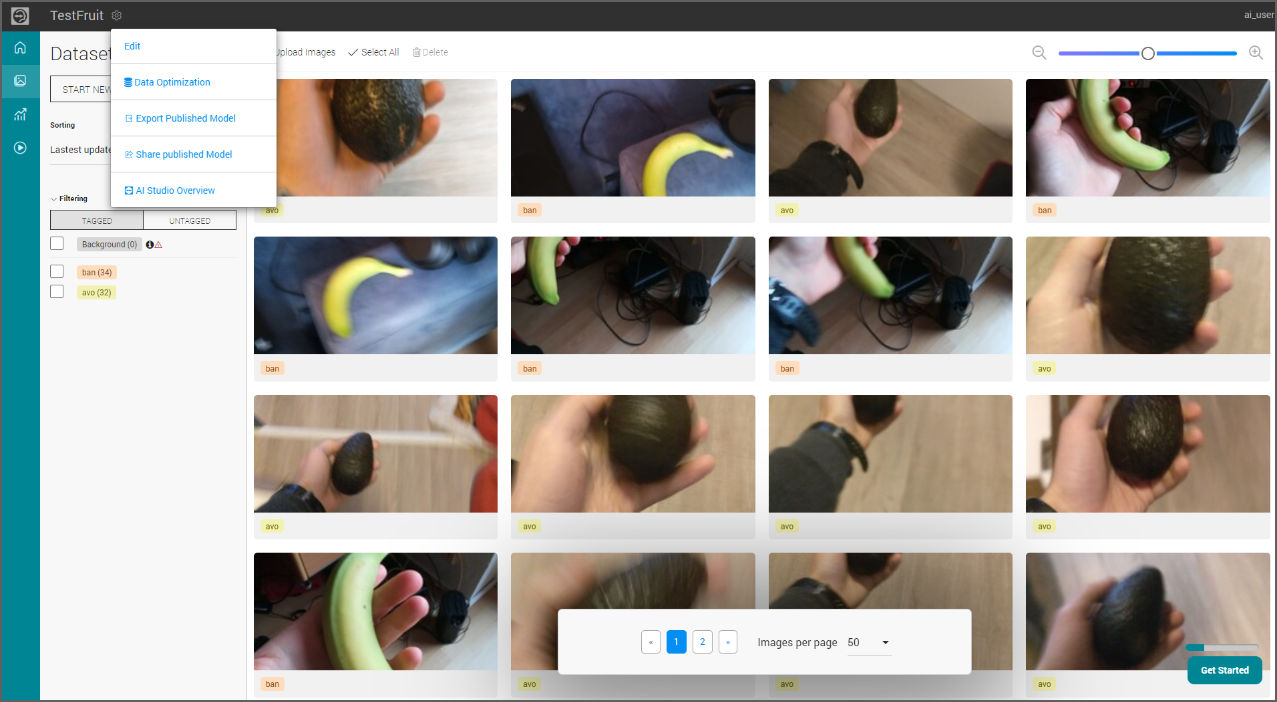
- Optional: On the top bar next to the project name select the gear icon.
- Optional: Select Data Optimization.
- Go through the suggested steps, this would enhance the dataset and make it more accurate.
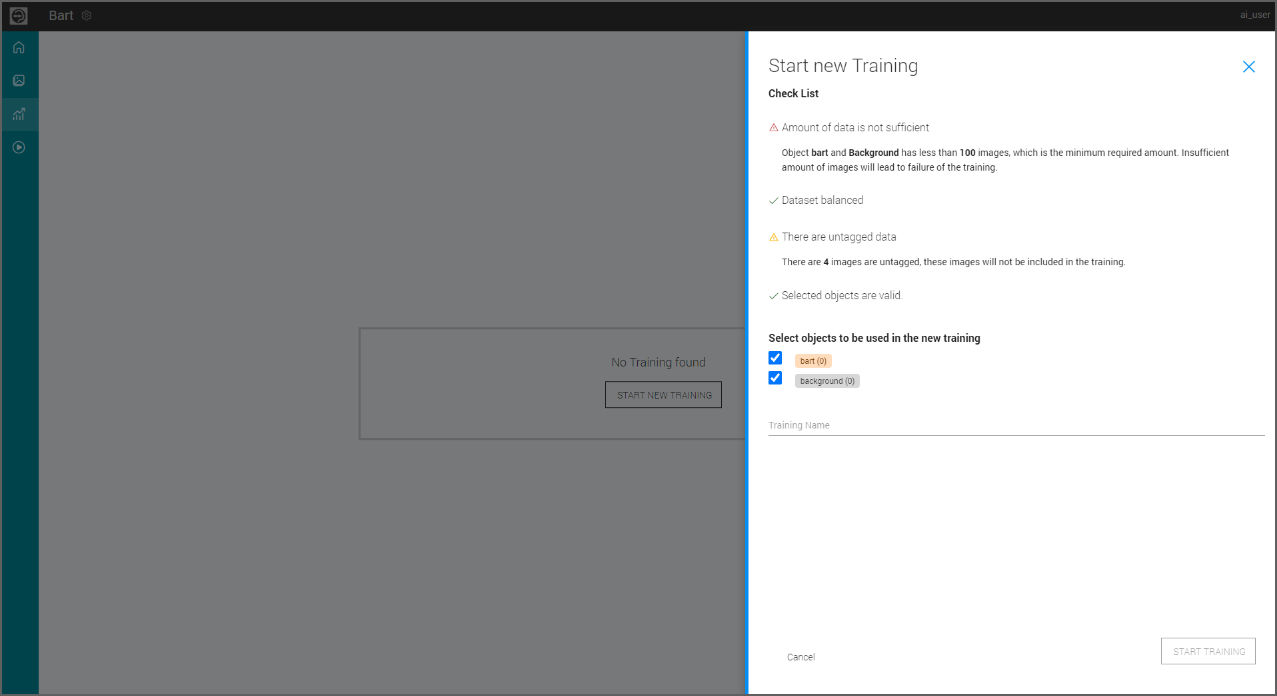
- Select Start New Training from the Dataset tab.
- Enter the training name and select objects to be used for the training.
- Select Start Training.
Note: Depending on the data and server availability, training will take some time to complete.
Training overview
Once the training has been completed, the user can access the various stats and overviews regarding the training on the Training page. This page is updated to include useful information which will help the user determine if the training was good or bad.
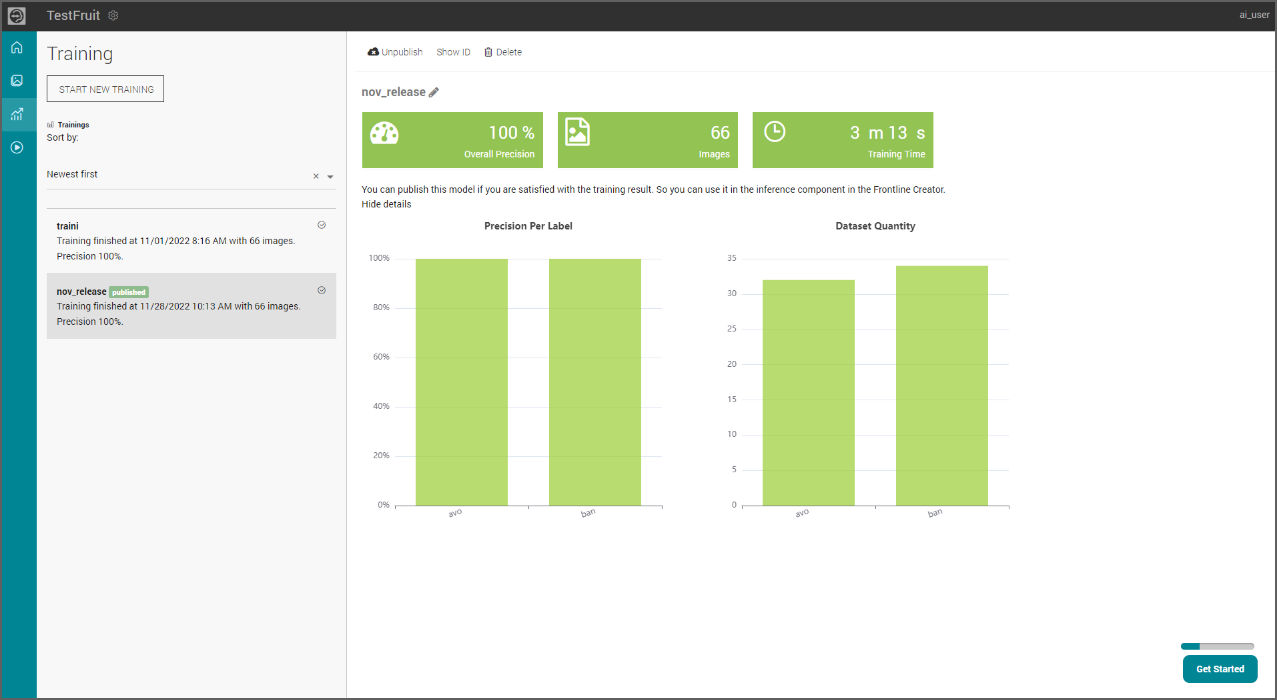
Here are the shown statistics to be analyzed:
- Overall Precision: Shows how accurately can the trained model predict the defined objects within the project on average.
- Images: Shows the number of images used in training.
- Training Time: Shows the overall time spent to train this model.
- Precision Per Label chart: Shows the accuracy that the trained model can achieve in predicting the defined objects of the project individually.
- Dataset Quantity: Shows the data that was used in the training per defined object within the project. There has to be an improvement of the quantity when orange and red are shown.
The training results can have different colors. They mean the following:
- Green: The result is good and you can proceed.
- Orange: The result is okay and you can proceed but there is more data needed. Try to improve the model by adding more images and by reviewing the correctness of the labels, etc.
- Red: The result is not good and you should train a new model after making adjustments like; adding more images, reviewing the correctness of the labels, etc.
Publishing a trained model
Depending on the stats of training, the user can decide which training to be published and the user can choose through the list of trainings presented on the left.
To publish a training:
- Select the training you want to publish.
- Click Publish on the top.
Note: Published training can also be unpublished by clicking the button on the top.
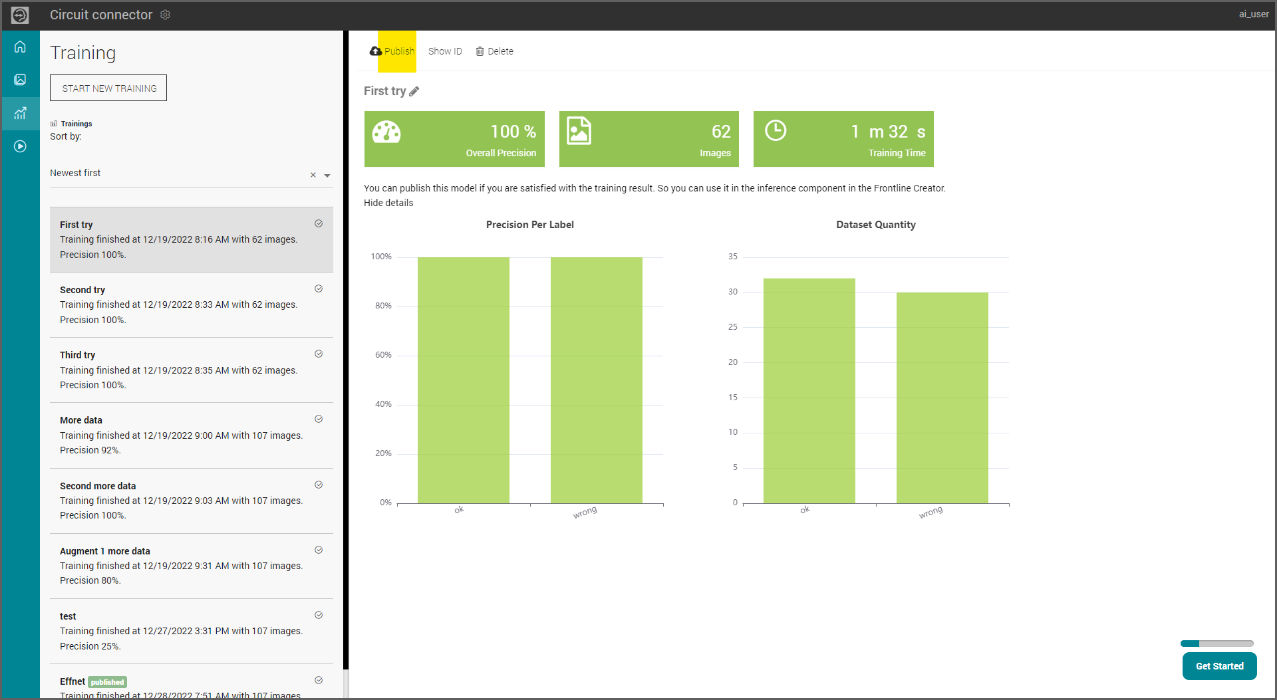
Usually, when new images are added to dataset, further training is required to improve the precision. But in case the subsequent training result in bad precision, older training can still be used.
Exporting a published model
To export a model:
- Click on the cog icon next to the project name at the top.
- Select Export published models.
Note: You can also share the model by generating a shareable link in the same menu.