This article describes how TeamViewer can be directly deployed on Azure Virtual Machines with Windows OS from the Microsoft Azure Portal → https://portal.azure.com/
Prerequisites
- TeamViewer subscription for Corporate or Tensor licenses with Microsoft Azure VMExtension available as 'Standard integrations addon'.
- Azure Subscription with a Virtual Machine using Windows as OS
- TeamViewer Licensed account (Corporate)
- Custom deployment for TeamViewer Host
How to set it up
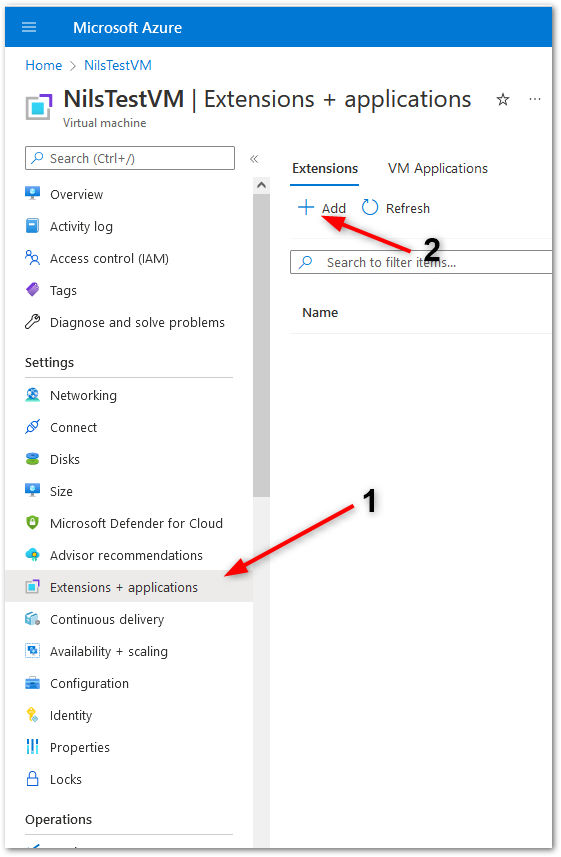
1. In the Azure Portal select the Virtual Machine you want and select Extensions and klick add
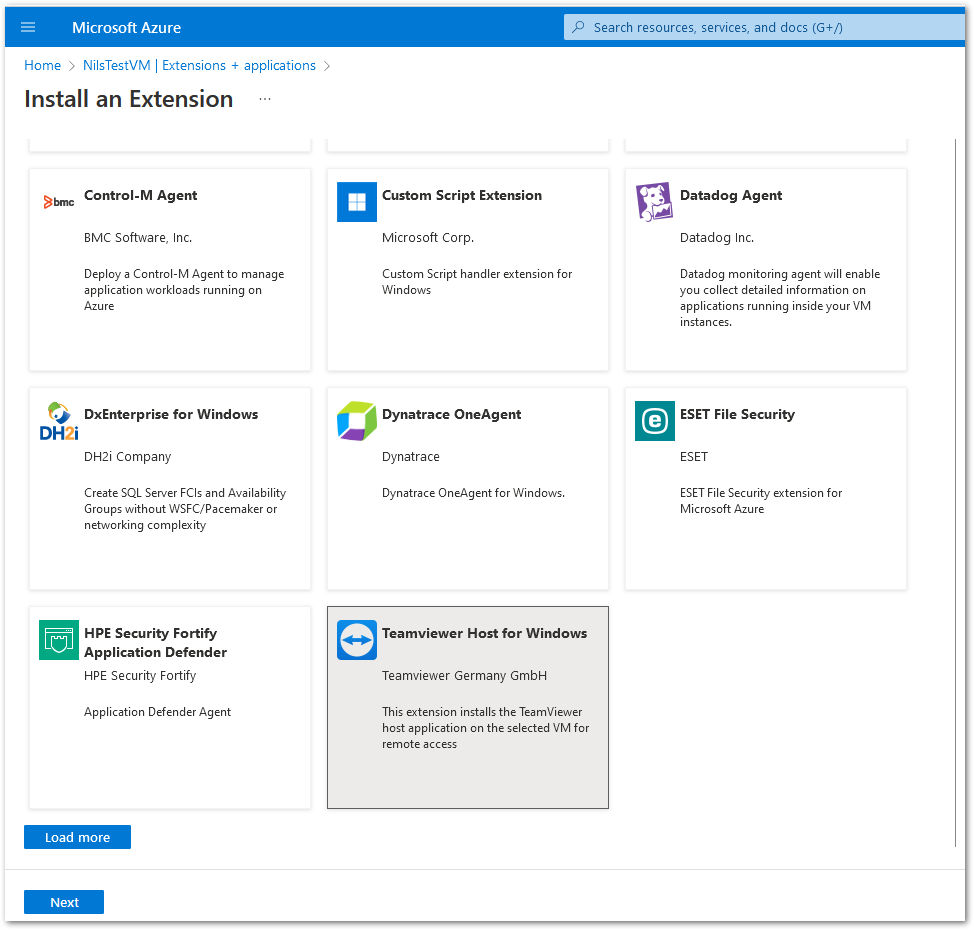
2. Search and select the TeamViewer application from the available applications:
3. In the wizard fill the fields with the values from your custom module configuration for TeamViewer host.
4. A custom TeamViewer Host module can be created under login.teamviewer.com.
💡Hint: For more information on how to create and available options on the host module, please check our article: 📄 Create your custom module - 2/6
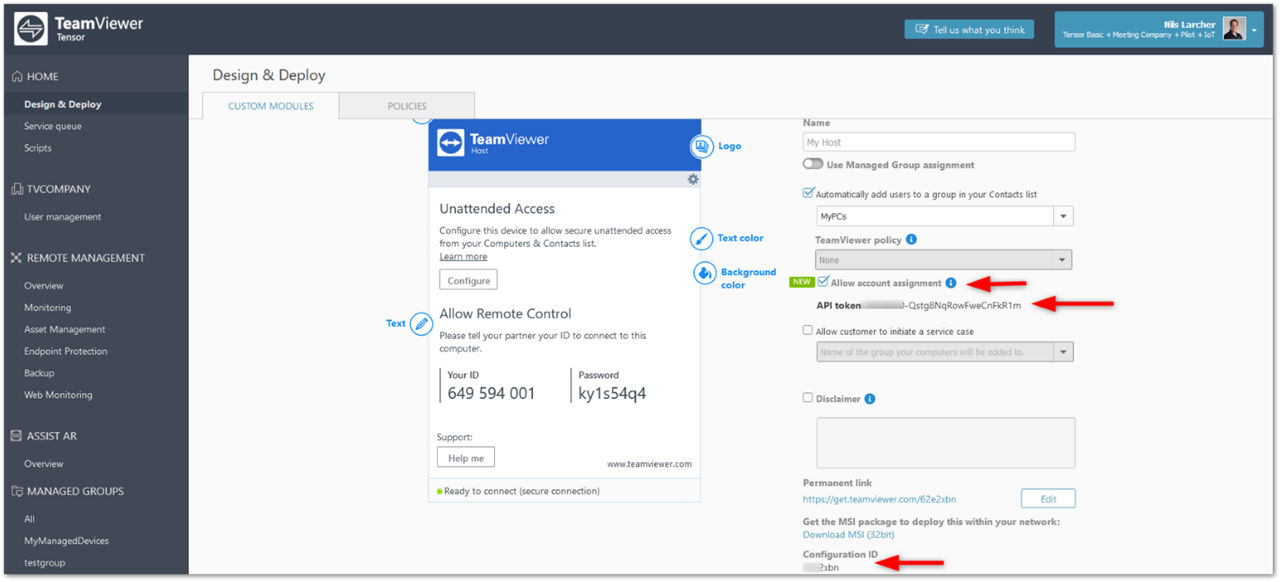
💡Hint 2:The options for assignment parameters can be found here: 📄 Assignment options - 5/6
5. After completing the steps wait some minutes until the rollout takes place.
Once the deployment is completed the VM will show up as a new device ready for remote connection in the TeamViewer Computer & Contacts List.