Spatial Workplace is an application that allows users to visualize pins and their information over real-life objects. Its installation is available on a Microsoft HoloLens 2, iOS devices (iPhones and iPads), and Android devices.
Playing workflows
To play a workflow, select it from the Tasks or the Templates menu by using one of the cursors and the workflow opens immediately. Alternatively, open a specific workflow using your device's camera:
- Open Frontline Command Center.
- Go to Templates or Tasks and find the workflow to open on the device.
- Click on Print QR Code and scan the QR code with your device. By opening the link, the application opens automatically and runs the selected workflow.
Scan the QR code by pointing your sight to it when using a HoloLens or by opening the camera and pointing it to the QR code when using a mobile device.
Note: If the user is not assigned to the selected workflow, the application will open on the main menu.
Positioning workflow content
To place the content of the workflow in real life, the user needs to perform specific actions depending on the spatial reference used in the workflow.
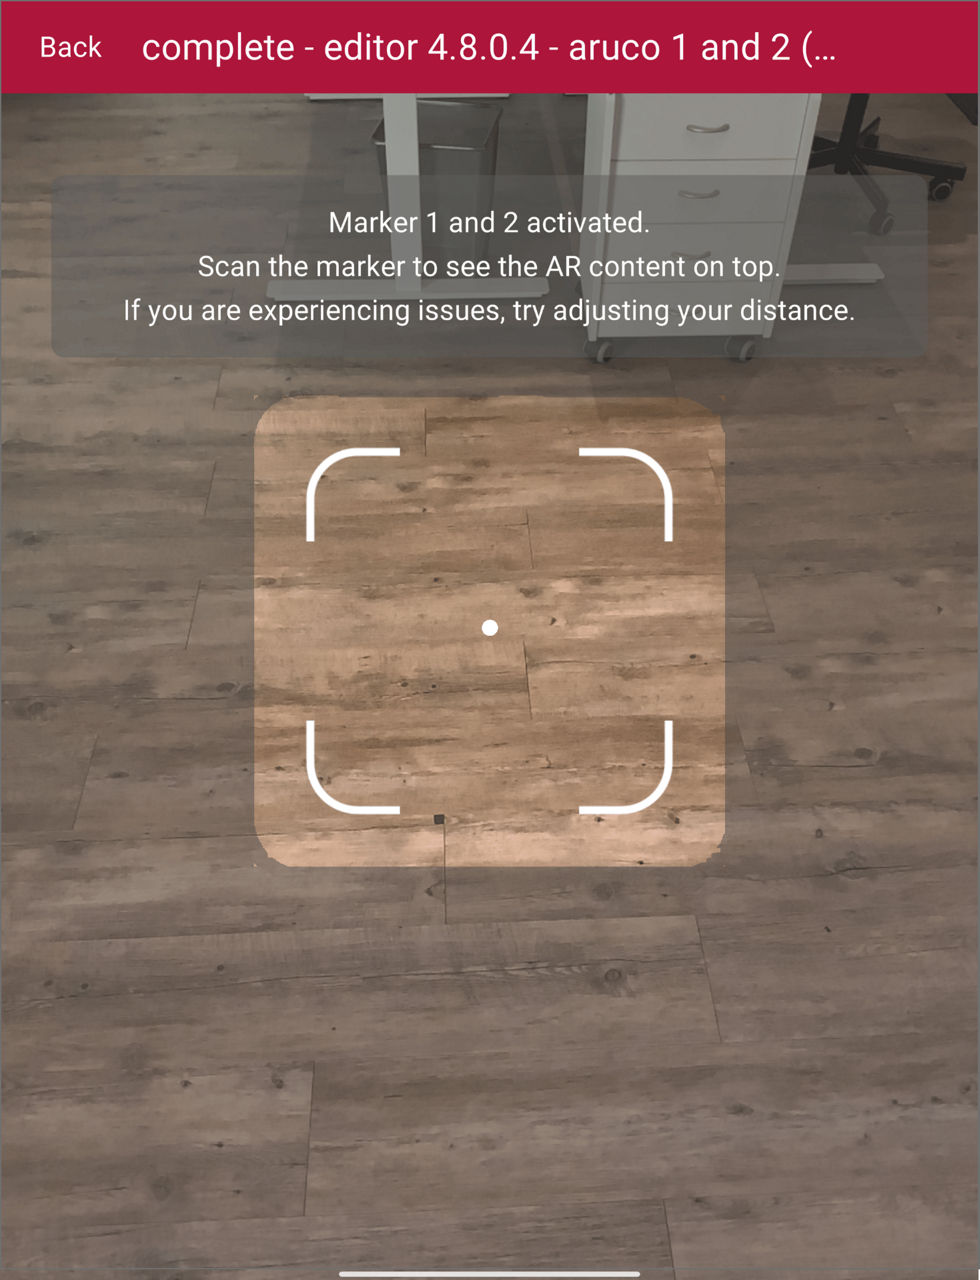
Workflows with markers
After opening the workflow, the marker scanner appears. On the top, the marker IDs are activated to start the workflow. The device's camera will open in the background and the user can focus on the chosen marker to display the first pin.
Workflows with object tracker
After opening the Workflow, the hologram of the initial pose of the object appears. The device camera opens in the background and the user can position the object inside the outline until loading is completed.

Changing the initial pose: To change the initial pose of the object, change the position of the object tracker in relation to the model inside your Spatial Editor project.
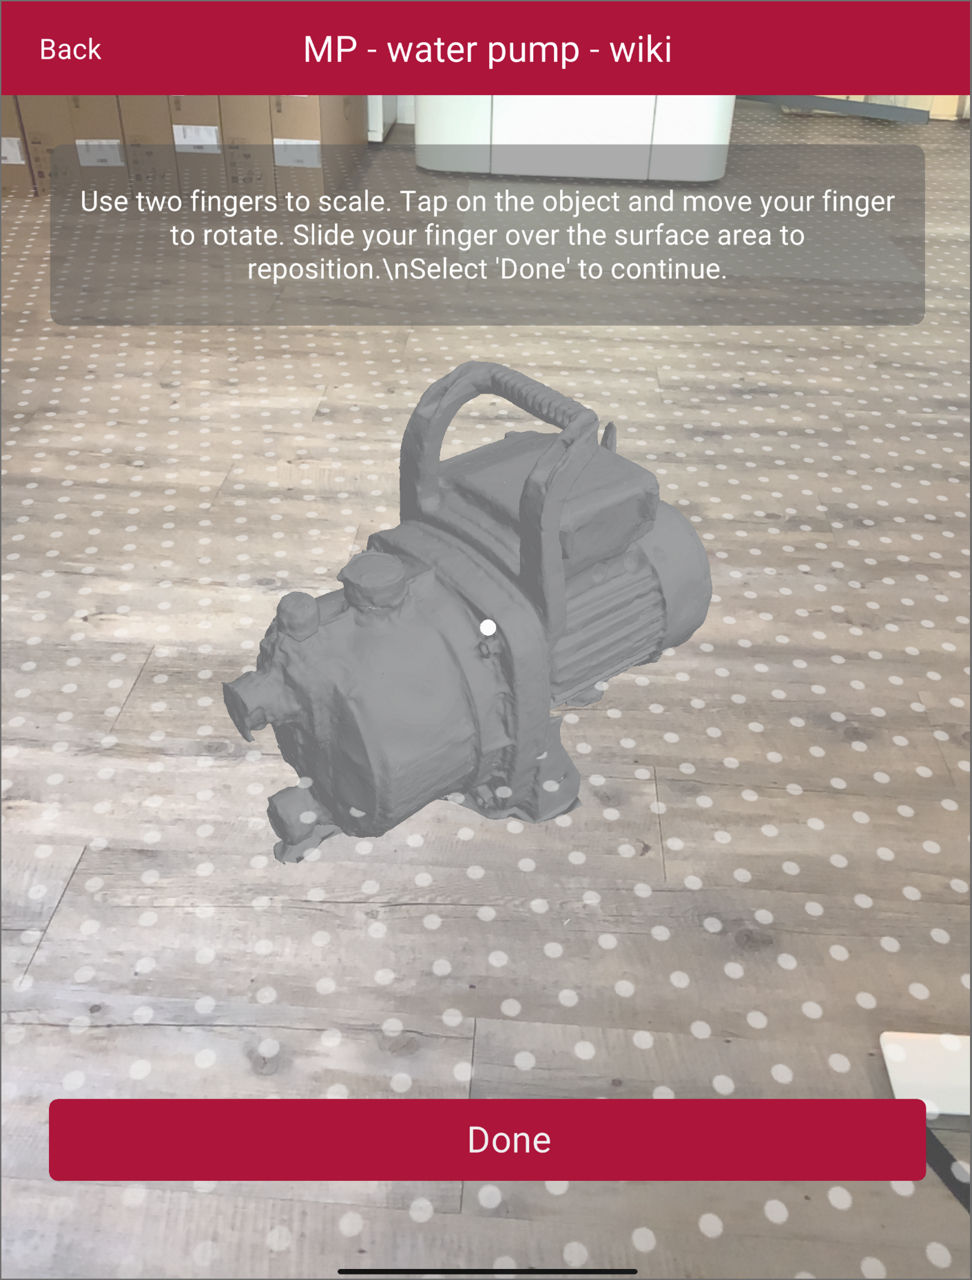
Workflow with model placement
On a mobile device
After opening the workflow, the camera of the device opens in the background and users can move their device around to find a flat surface (e.g., a floor or a table). Recognized surfaces will be marked with white dots.
To adjust the position and rotation of the model:
- Tap on the screen to position the model on this surface.
- Pinch your fingers on the model to zoom in and out.
- Tap over the model and move your finger around to rotate it.
- Tap outside the model, on a free surface, to reposition it.
It is also possible to reposition and rotate the model during the execution of the workflow. Users can rotate the model, rescale it with pinching in/out, and move it up and down with a three-finger hold. The degree values and percentage of scale are visible while making adjustments.
Note: Readjustments are possible only if the model has been made visible with a scene state node in the workflow with proper adjustments. Please see this page about how to make models visible using scene states.
On HoloLens
After starting the workflow, a UI element asks the user to tap-to-place. To place the model, users can use the HoloLens air-tap gesture.
Position of the model: The model will be placed in relation to the head position, at the same distance that the model is from the model placement element in the Spatial Editor project.
Workflow navigation
Navigate through the pins by using the control icons around them:
- Done: Moves on to the next pin or pins.
- Back: Goes back to the previous pin or pins. If there are pins with auto connections, then Back takes the workflow to the last pin that does not have an auto type of connection coming out of it.
- Comment: While executing a workflow, it is possible to drop comments on pins by simply tapping on the Comment button at the bottom of the pin content. You can also go back and edit your comments.
- Workflow menu: The menu contains actions to reposition the marker, to open the main menu, and to choose between the content displays (only for mobile devices, read more under Different Views in mobile devices below).
Note: The Done button may be substituted by another word or phrase if the workflow creator defines a custom label for the relevant connection.
Workflow menu: On the HoloLens, the workflow menu stays above the position of the spatial reference. For example, after scanning a marker, the menu will be placed above it. Alternatively, to display the menu next to your hand, simply raise your hand in the HoloLens field of view. On mobile devices, the workflow menu always stays in the top left corner of the screen.
Restart tracking
If the content drifts from its correct placement during the workflow, the user can reposition the workflow and reset its spatial reference. On the workflow menu, select the Reposition Workflow option. The user is prompted to reset the spatial reference of the workflow (e.g., rescan the marker) and then the workflow continues with the previous step. For more information, please see the section tracking recommendations on this page.
Different views on mobile devices
On mobile devices, there is the option to see the pins and content of a workflow through different views. The user can switch between the views and content displays using the workflow menu on the top left.
Note: On a HoloLens 2, only the AR overlay view is available.
AR overlay view
The AR overlay view is the default way of presenting pins in augmented reality over the real component. The pin shape will always be presented in the exact position in relation to the spatial reference. The content can be displayed as flat or anchored. Flat content displays the information of the pins in a menu on the right side of the screen in a static way. Anchored content displays the information in a banner next to the actual position of the pin and moves vertically, following the user's movement.
Flat content:

Anchored content:

3D Model view
The 3D model view, on the other hand, gives the user the possibility to see and handle the workflow in a virtual environment that is independent of the physical world. There is no necessity for a Scene State node or a hologram to be visible at a certain step for the user to be able to go to the 3D view.
To open and close the model view, select Show in 3D on the Workflow Menu. This option is available for all pins that contain at least one hologram or have scene states visible.
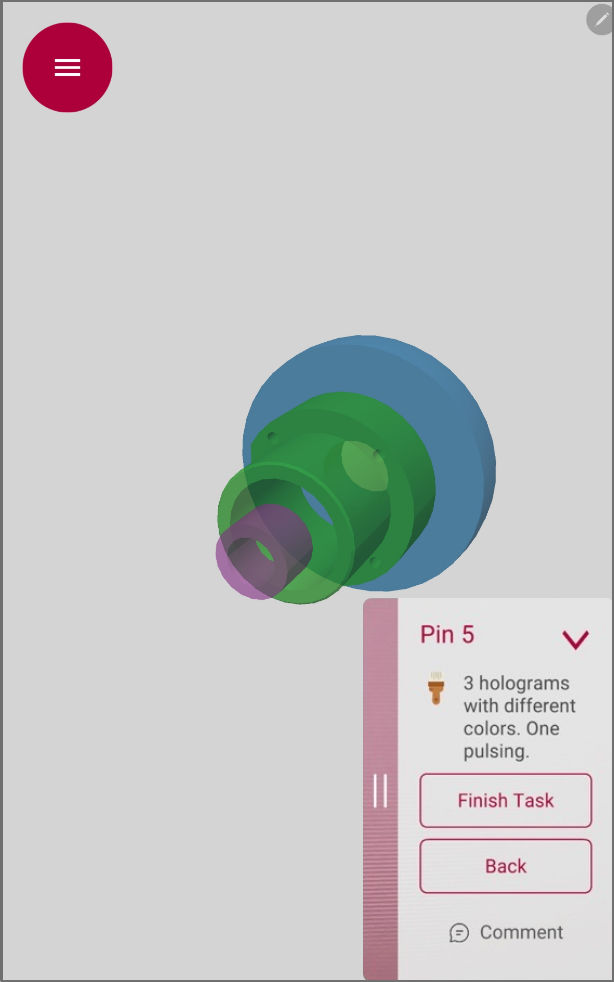
Inside this view, users can perform the following actions:
- Use one finger to turn the hologram.
- Pinch with two fingers to zoom in or out.
- Use three fingers to drag the hologram sideways.
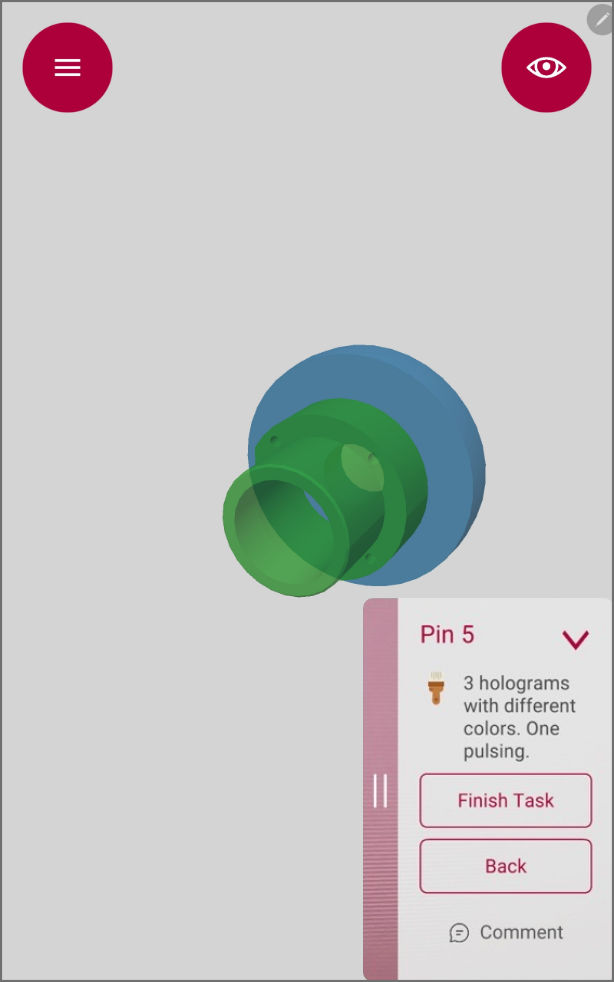
- Tap on a particular part to hide it.

After a part of the hologram has been hidden, the eye toggle appears on the top right of the screen. Tap on it to unhide the part.
Note: The 3D model view can be used to explore the details of the hologram's model without the need to point the device to its real-life position. In this view, the remaining content of the pin (text, videos, pictures, audio, pdf) is always presented on a flat display.
Recommended video links for this guide
Frontline Spatial | Navigating through Spatial Workplace on HoloLens 2
Frontline Spatial | Navigating through Spatial Workplace on Mobile