Frontline supports a variety of external Bluetooth scanners as peripheral devices. As with any other Bluetooth-enabled device, a scanner needs to be paired with a smart glasses in order to be used.
Getting started to pair scanners
To pair a scanner as an SPP master (non-discoverable and supporting auto reconnect):
- Sign in to the Frontline Workplace application on the smart glasses.
- Sign in to the Frontline Command Center with a user that has an Administrator role.
- To ensure that the correct Bluetooth MAC Address of the smart glasses is displayed on the Device Management.
- Go to Navigation Pane on the top left of your Dashboard, and select Configuration under Administration.
- Select Device Management to view connected devices.
- Double-click on the logged-in device from the device list to view device information.
- Verify the Bluetooth MAC Address of the smart glasses.
- Select Settings and scroll down to About Device.
- Select About Device and scroll down to view the Bluetooth MAC Address.
- If the Bluetooth MAC Address is displayed correctly as seen in step 3. c, then go to step 6.
- Optional: Enter the Bluetooth MAC Address into the device information from step 3. c and select Save. (You may also edit the Device Name to make it easier to find in the future).
- Select Scanner to choose the scanner type that you want to connect to your smart glasses.
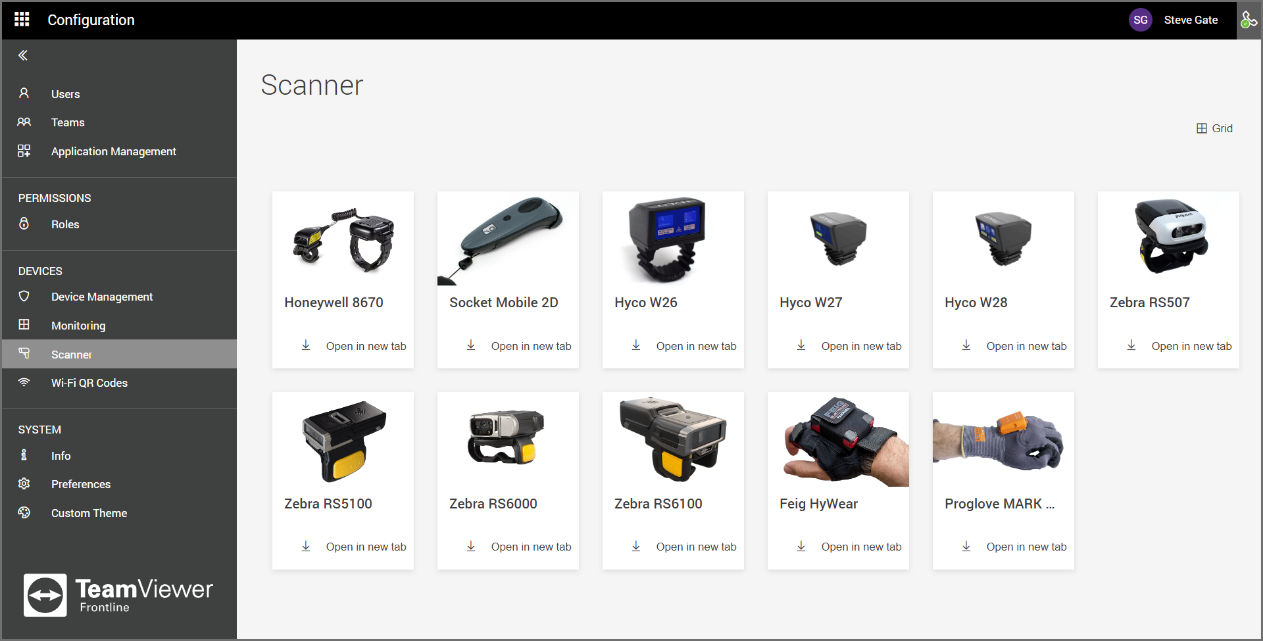
⇒ A PDF with information on how to connect this scanner opens up.
Note: For each scanner model, there is a dedicated PDF document available that contains various maintenance codes and device codes. Each maintenance code comes with a description of what they are used for depending on the capabilities of the scanner model. The device codes contain barcodes for all registered smart device brands on the Workplace application.
Pairing a Zebra/Hyco/Honeywell Scanner
To pair the scanner with smart glasses follow the steps below:
1. Sign in to the Frontline Workplace application on the smart glasses.
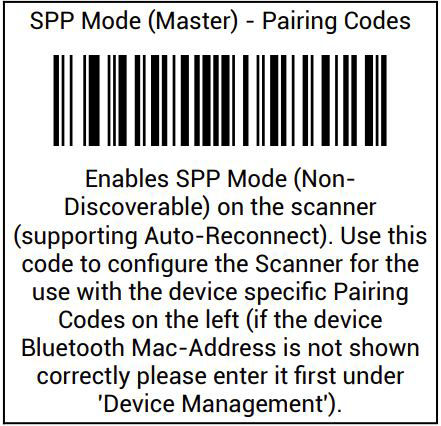
2. From the PDF, scan the code displayed under the SPP Mode (Master) – Pairing Codes.
Note: Hyco26 works only for printed barcodes, while Hyco27 works for both printed and on-screen barcodes, and Hyco28 works for printed/on-screen barcodes and 2D code reading.
3. From the PDF, scan the code displayed next to the device you want to pair the scanner.

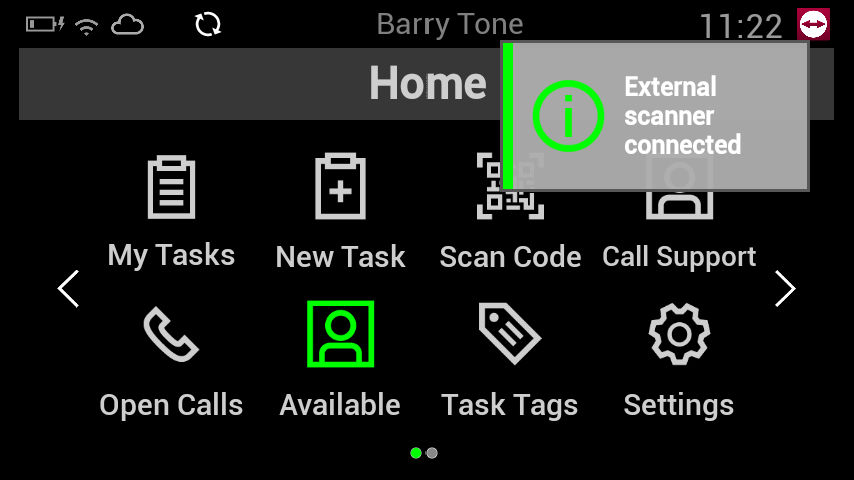
4. On your smart glasses select Pair from the Android notification.

⇒ The scanner will be connected to the smart glasses and a notification will pop up on the Frontline Workplace application.
Pairing a Proglove Mark Series
For general information on the hardware, please visit this page by ProGlove and choose User Manual (EN).
Preparation
- On smart glasses, install the ProGlove Insight Mobile App (downloaded from ProGlove Insight Portal).
- On Creator, open the picking workflow and make sure to use the Bluetooth Setup component.
- Save and publish the workflow.
- Open the workflow on smart glasses.
5. Select ProGlove Setup.
There are 3 pairing options
1. Proximity Pairing
⇒ This solution is provided in collaboration with ProGlove. TeamViewer is testing the solution with selected customers, and early adopters will be approached first when the solution becomes globally available later in 2024.
Requirements:
- Frontline v4.24 or higher
- Insight Mobile App and the scanner firmware that supports proximity pairing (currently only non-public test versions)
Process:
- Select an unpaired scanner and turn it on.
- Double-click the trigger to enter advertisement mode (both LEDs flash in blue
- Hold the scanner near your device.
⇒Device is paired.
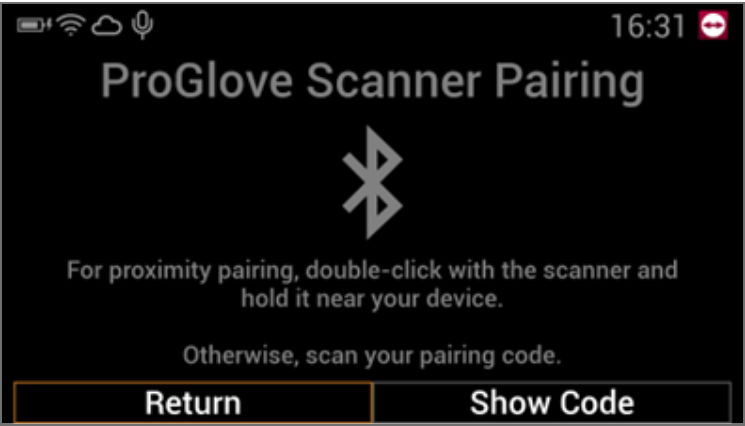
2. Scan2Pair (Show Code) Pairing
Selecting the Show Code option brings the ProGlove Insight Mobile App to the foreground and displays the Scan2Pair code:
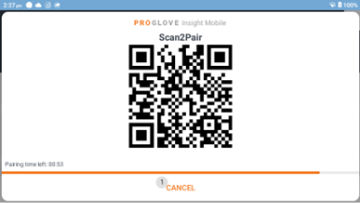
This is suited for mobile devices with a screen that you can scan with your scanner.
⇒ After scanning the QR Code, the device is paired.
3. Pairing with Frontline Command Center generated code
- On Frontline Command Center, go to xPick > Scanner > ProGlove Mark Series.
- Select Show Code on the ProGlove Setup Screen.
- Scan the QR Code specific to your smart glasses from the list under Device Codes.
- Optionally, you can print these codes and use them offline for pairing.
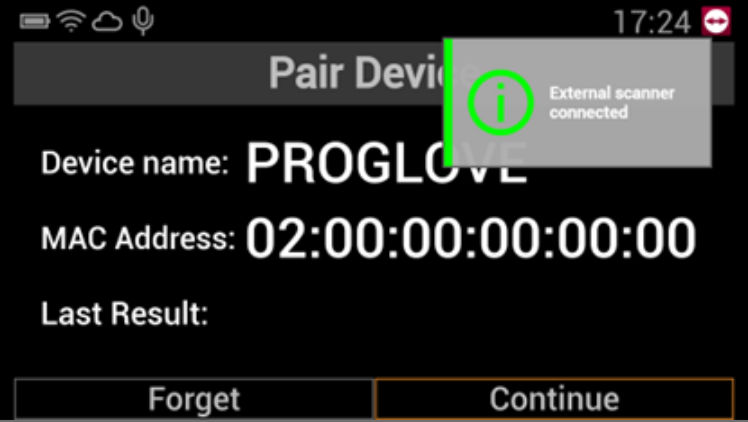
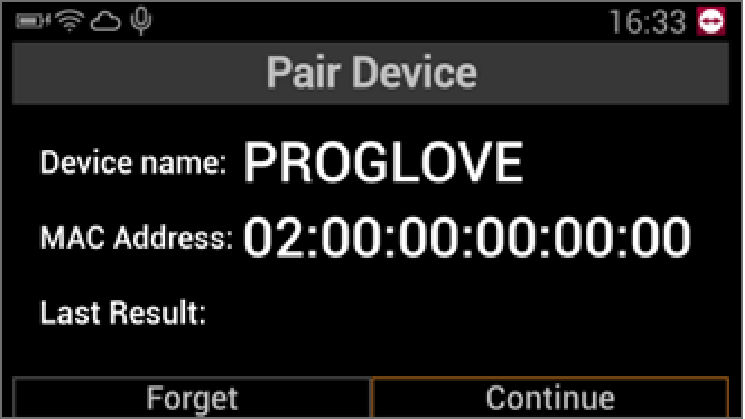
⇒ When successfully connected, you will see the following screen:
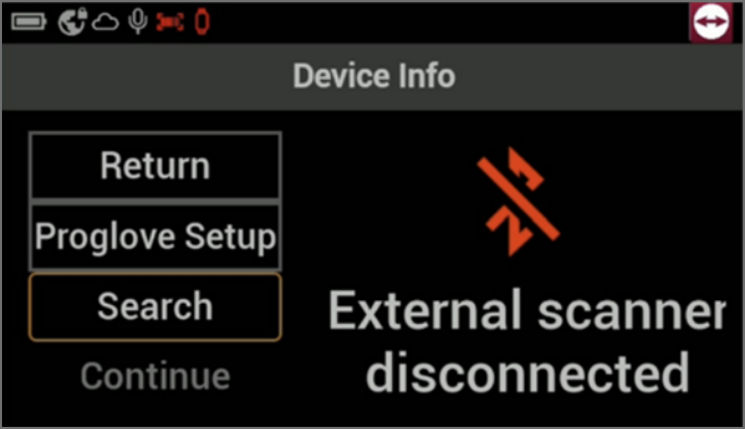
Disconnecting ProGlove Scanner
There are multiple options to disconnect a scanner from its current device:
- Use the scanner to scan the pairing code of a different device.
- Place the scanner in the charging station.
- Select Forget in the ProGlove Setup component in Frontline Workplace.
⇒ Scanner is disconnected.
Using Scanners As A Selection Button
Scanners can serve as selection buttons to confirm highlighted options in the user interface with a double-click. They are beneficial in navigating workflows and performing step-by-step processes.
Zebra Scanners
To enable the double-click function for Zebra scanners:
1. Pair the scanner as explained above
2. Scan the following barcode
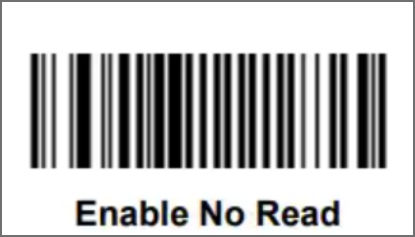
⇒ The scanner will be enabled to be used as a selection button.
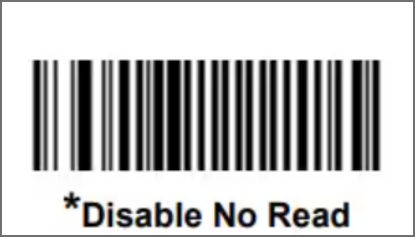
If you want to disable the function afterward, scan the following barcode:
Note: For more information please visit the official Zebra configuration page here.
ProGlove Scanners
This feature is enabled by default on ProGlove scanners. Ensure the firmware is updated.