Preferences display a list of properties with their distinct values.
Users who have the Administrator role can configure the domain preferences. With that, Administrators can control the server and implement changes instantly.

There are different categories in system preferences:
1. Clients as a category defines and filters the severity level of the log information the users receive.
Available values according to the hierarchical level are:
DEBUGchecks the issue via troubleshooting and diagnoses it.INFOshows if the information authorization works properly.WARNclears if there is an unexpected disturbance even though the app is not crashed and it is still working.ERRORprevents the app from functioning properly because of critical issues.
2. Frontline Connector as a category allows configuration of Frontline Connector interface for xPick.
Available values are:
TRUEenables the property.FALSEdisables the property.
3. Frontline Command Center as a category allows configuration of the domain with various properties such as; error reporting, log-in mechanism, screenshot consent, license expiration notification, selectable languages, etc.
Available values are:
TRUEenables the property.FALSEdisables the property.CANCELLEDDefines multiple statuses of tasks that are removed automatically after a defined time.DONEDefines multiple statuses of tasks that are removed automatically after a defined time.ERRORDefines multiple statuses of tasks that are removed automatically after a defined time.PARTIAL_DONEDefines multiple statuses of tasks that are removed automatically after a defined time.PAUSEDDefines multiple statuses of tasks that are removed automatically after a defined time.PROGRESSDefines multiple statuses of tasks that are removed automatically after a defined time.UNASSIGNEDDefines multiple statuses of tasks that are removed automatically after a defined time.DeviceFlowDefines the preferred login method by using two-factor authentication for smart glasses users, and Single Sign-On for other users.LegacyDefines the preferred login method (scanning the QR Code or entering the username and password) to be used with smart glasses.OfflineTokenDefines the preferred login method (scanning the QR Code or entering the username and password) to be used with smart glasses, and the activation of Azure Active Directory (ADD) is possible. It can be reworked within 1 year.
4. xAssist as a category allows the configuration of xAssist functionalities such as call quality, recording requests, auto-share live feed, mandatory call title, the format of the call title, etc.
Available values are:
TRUEenables the property.FALSEdisables the property.OPTIMIZEDdefines the default quality setting of calls.PERFORMANCEdefines the default quality setting of calls.QUALITYdefines the default quality setting of calls.
5. xMake/xInspect as a category allows configuration of xMake and xInspect functionalities (e.g., selectable in the task list).
Available values are:
TRUEDefines if a template is selectable in the task list by default.FALSEDefines if a template is not selectable in the task list by default.
6. xPick as a category allows configuration of xPick functionality (e.g., setting WMS credentials).
Available values are:
TRUEenables the user creation form to allow to set WMS credentials.FALSEdisables the user creation form to allow to set WMS credentials.
Configuring System Preferences
These properties can be updated by simply double-clicking on an item on this list. This opens the Update Property modal, where the respective values can be modified and the changes can be confirmed by clicking on Save.
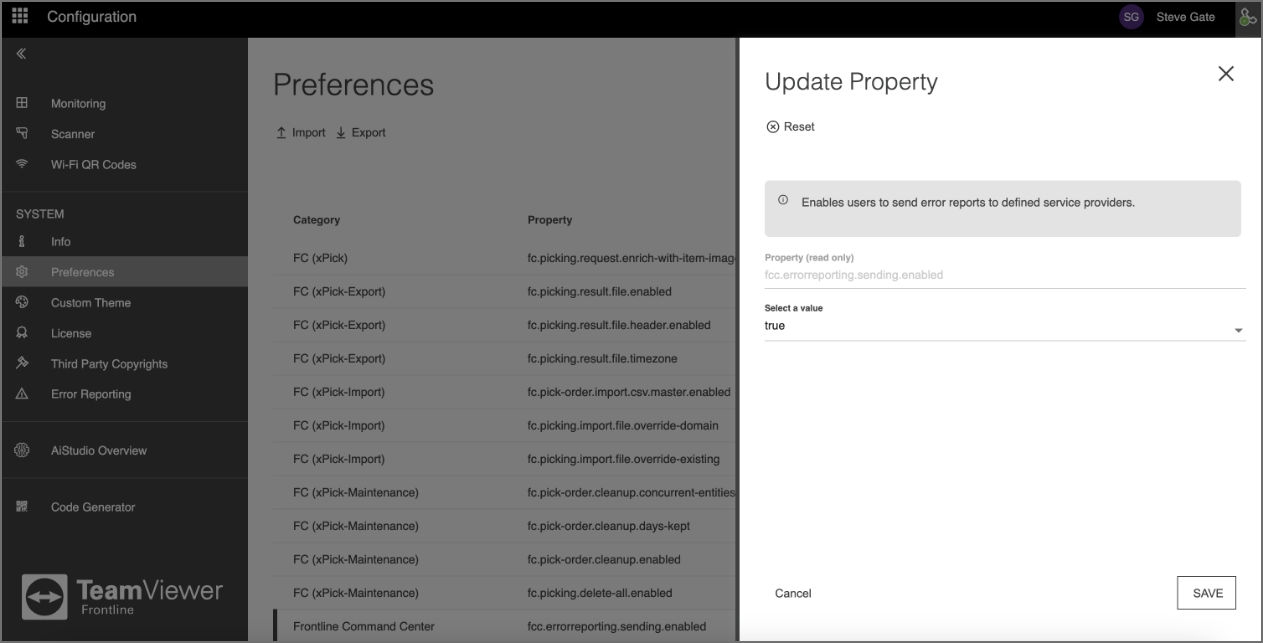
Note: In the case of a multi-domain server, administrators are able to maintain preferences for each domain separately. The set of properties can be quickly enabled for various domains by exporting them from one domain and importing them to another.
Configuring Device Flow for Frontline Workplace
This configuration has the highest security level due to two-factor authentication and does not require scanning any QR code. Instead, the user needs to enter the login code for the respective device after clicking on the ENTER DEVICE LOGIN CODE button displayed on the Frontline Command Center dashboard.
Activating Device Flow:
- Go to Configuration > Preferences.
- Search for "keycloak".
- Double-click on the
fcc.keycloak.preferred-client-loginproperty. - In the Update Property modal, select Device Flow from the drop-down list.
- Click on Save, to confirm the changes.
To switch back to sign-in via login QR code, select Legacy in step 4.