TeamViewer Single Sign-On (SSO) aims to reduce user management efforts for large companies by connecting TeamViewer with identity providers and user directories.
This article applies to TeamViewer customers with an Enterprise/Tensor license.
Requirements
To use TeamViewer Single Sign-On, you need
- a TeamViewer version 13.2.1080 or newer
- a SAML 2.0 compatible identity provider (IdP)*
- a TeamViewer account to access the Management Console and add domains
- access to the DNS management of your domain to verify the domain ownership
- a TeamViewer Tensor license.
TeamViewer configuration
Single Sign-On (SSO) is activated on a domain level for all TeamViewer accounts using an email address with this domain. Once activated, all users who sign into a corresponding TeamViewer account are redirected to the identity provider that has been configured for the domain.
For security reasons and to prevent abuse, it is required to verify the domain ownership before the feature is activated.
Add a new domain
To activate SSO, log in to Management Console select Company administration and then the Single Sign-On menu entry. Click on Add domain and enter the domain you want to activate SSO for.
You also need to provide your identity provider’s metadata. There are three options available to do so:
- via URL: enter your IdP metadata URL into the corresponding field
- via XML: select and upload your metadata XML
- Manual configuration: manually enter all necessary information. Please note that the public key must be a Base64 encoded string.

Once it's done, click Continue.
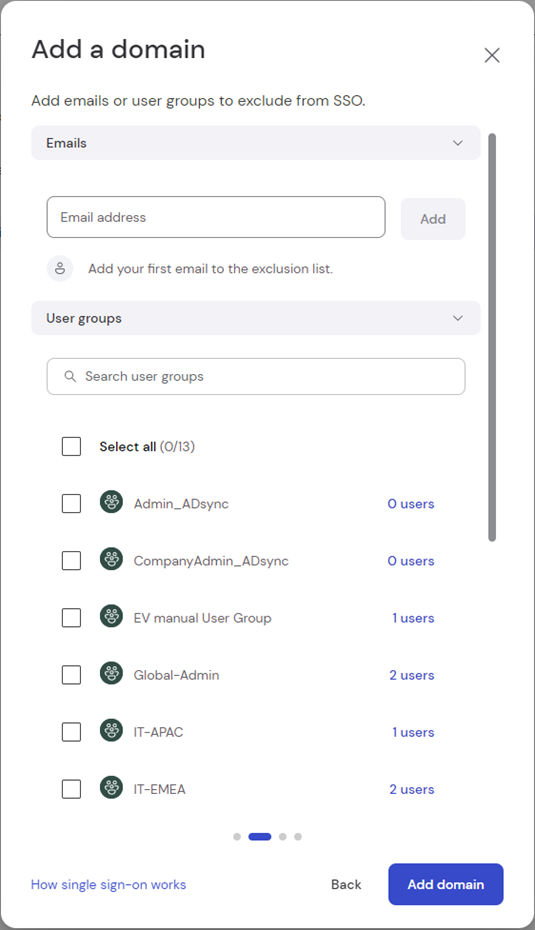
Now, select the e-mail addresses or user groups you want to exclude from SSO and click Add domain.
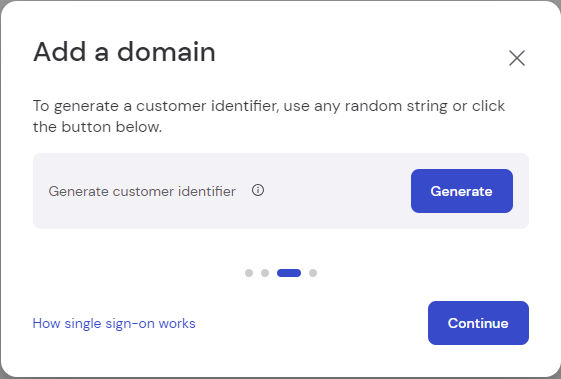
Create custom identifier
After the domain has been added, the custom identifier can be generated. This custom identifier is not stored by TeamViewer but is used for the initial configuration of SSO. It must not be changed at any point in time since this will break Single Sign-On, and a new setup will be necessary. Any random string can be used as a customer identifier. This string is later required for the configuration of the IDP. To generate the custom identifier, click Generate.
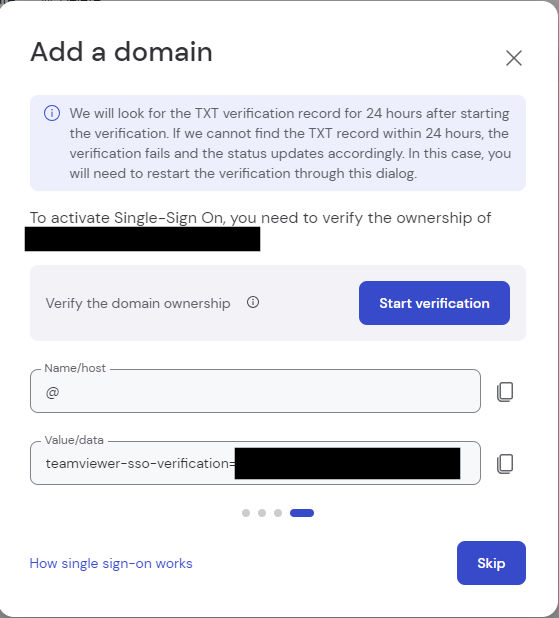
Verify domain ownership
After a domain has been added successfully, you need to verify the domain ownership.
Single Sign-On will not be activated before the domain verification is completed.
To verify the domain, please create a new TXT record for your domain with the values shown on the verification page.
📌Note: The verification process can take several hours because of the DNS system.
📌Note: Depending on your domain management system, the description of the input fields may vary.
After creating the new TXT record, start the verification process by clicking on the Start verification button.
📌Please note that the verification process can take several hours because of the DNS system.
💡Hint: TeamViewer will look for the TXT verification record for 24 hours after starting the verification. If we cannot find the TXT record within 24 hours, the verification fails, and the status is updated accordingly. You need to restart the verification through this dialog in this case.
Identity Provider Setup with Okta
This section describes how to set-up Okta to be used as IdP for the TeamViewer SSO service.
💡Hint: You need to assign users to the application in Okta, depending on your settings.
Find the Okta documentation here.
Automatic configuration using the TeamViewer Okta app
1) Login to your Okta Administrator Dashboard
2) Add the TeamViewer application
3) Select SAML 2.0
- Copy and save your metadata URL
4) Assign users to the application
5) Activate SAML using your metadata in the Domain Management in MCO
Manual Configuration using the Okta Web User Interface
Go to the administration interface and add a new SAML application. Specify the following values on the SAML Settings page:
Add the following attribute statements (Name Format - Unspecified):
- http://schemas.xmlsoap.org/ws/2005/05/identity/claims/emailaddressValue: user.email
- http://sso.teamviewer.com/saml/claims/customeridentifierThis attribute has to be specified by each customer when initially setting up TeamViewer SSO.
📌Please note: The "Customer Identifier" that has been set initially must not change otherwise SSO will break. TeamViewer is not storing this value.
-More complex mapping-
📌Please note: The value of the emailaddress attribute statement may include more complex mapping rules. Okta therefore provides you with an expression language You can see the official documentation about it here: https://developer.okta.com/reference/okta_expression_language/index
Company A has reserved two email address domains for its users - @a1.test and @a2.test. The Okta users have the @a1.test domain associated to their account.
TeamViewer SSO should be enabled for the @a2.test email addresses only.
The value for the emailaddress statement could look like the following:
String.append(String.substringBefore(user.email, "@"), "@a2.test")
This causes the SAML response to include the correct email address.
TeamViewer Client Configuration
TeamViewer is compatible with Single Sign-On starting from version 13.2.1080.
Previous versions do not support Single Sign-On and can not redirect users to your identity provider during the login. The client configuration is optional but allows changing the used browser for the SSO login of the IdP.
The TeamViewer client will use an embedded browser for the identity provider authentication by default. If you prefer to use the default browser of the operating system, you can change this behavior:
Windows:
HKEY_CURRENT_USER\Software\TeamViewer\SsoUseEmbeddedBrowser = 0 (DWORD)
macOS:
defaults write com.teamviewer.teamviewer.preferences SsoUseEmbeddedBrowser -int 0
📌Note: You need to restart the TeamViewer client after creating or changing the registry.