For running TeamViewer (Classic), you don't need any administrative rights. To control the Windows UAC (User account control) using TeamViewer (Classic), you can log on to the remote PC as an administrator.
For this, you can use Windows authentication.
This article applies to all TeamViewer licenses and all free users of TeamViewer (Classic).
Connect via Windows Authentication
Instead of the TeamViewer authentication using TeamViewer ID and password, you can also authenticate with username and password of your Windows account.
How to connect using Windows Authentication:
- Start TeamViewer (Classic) on your computer.
- Ask your partner to start TeamViewer or TeamViewer QuickSupport on their computer.
- Ask your partner for their TeamViewer ID shown in the TeamViewer application.
- Select the option Remote support and enter your partner's TeamViewer ID in the field Partner ID (Windows authentication can be used for all other connection modes as well).
- Click on Connect to Partner.
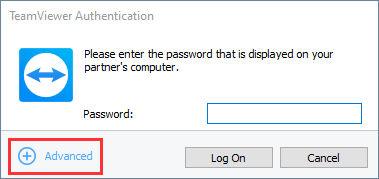
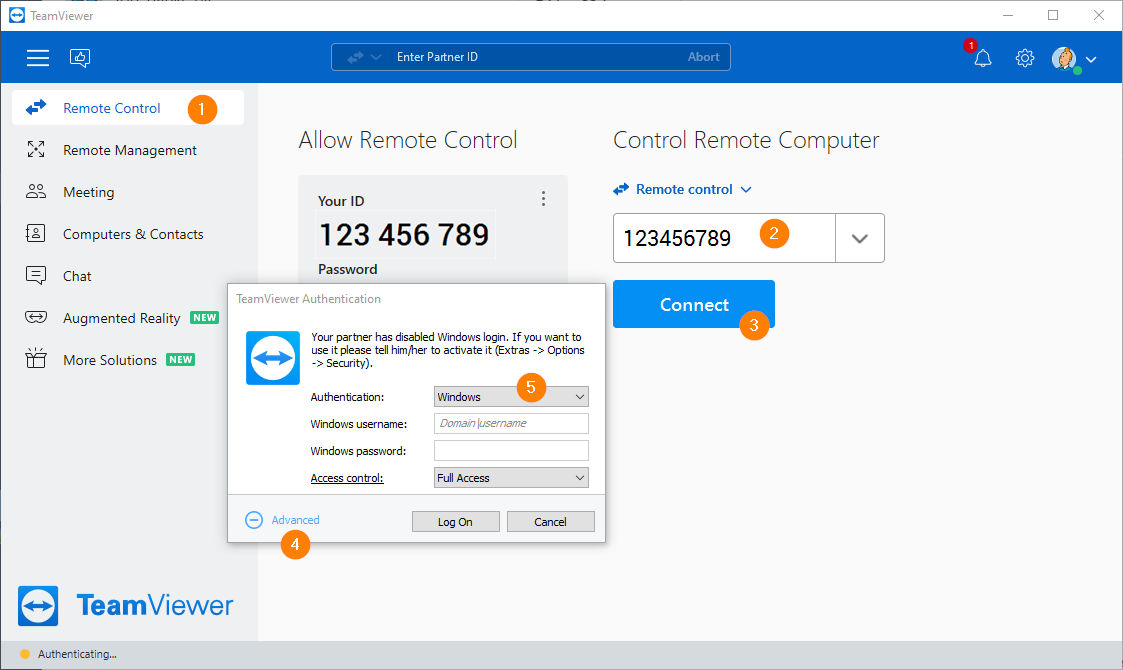
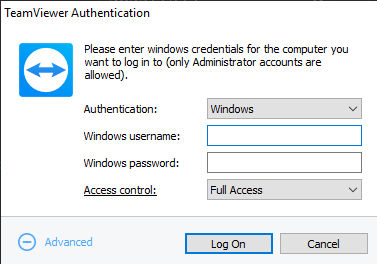
The TeamViewer authentication dialogue will open:
1. Click on Advanced. The dialogue displays advanced settings.
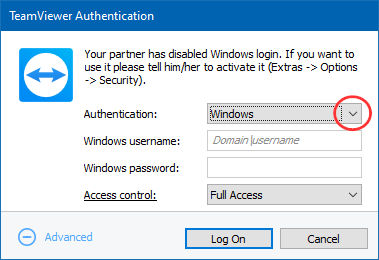
2. In the drop-down field, set the authentication method to Windows.
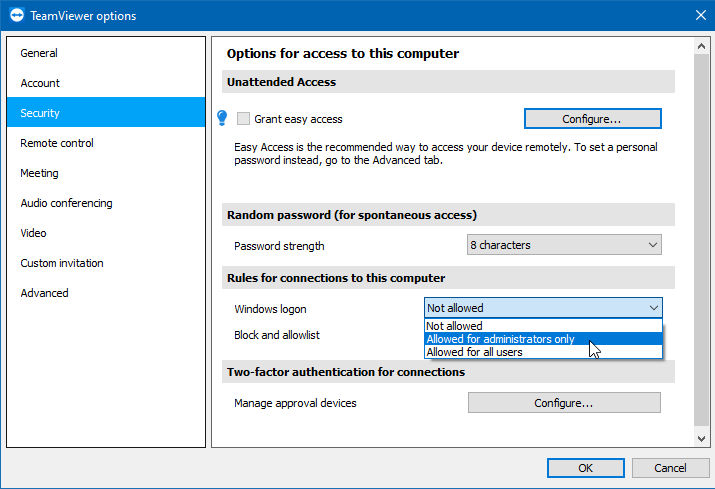
🚨IMPORTANT: If a full version is running on the remote computer:
- the Windows logon rule must be enabled. You can enable this parameter in the TeamViewer Options (⚙) in the Security tab:
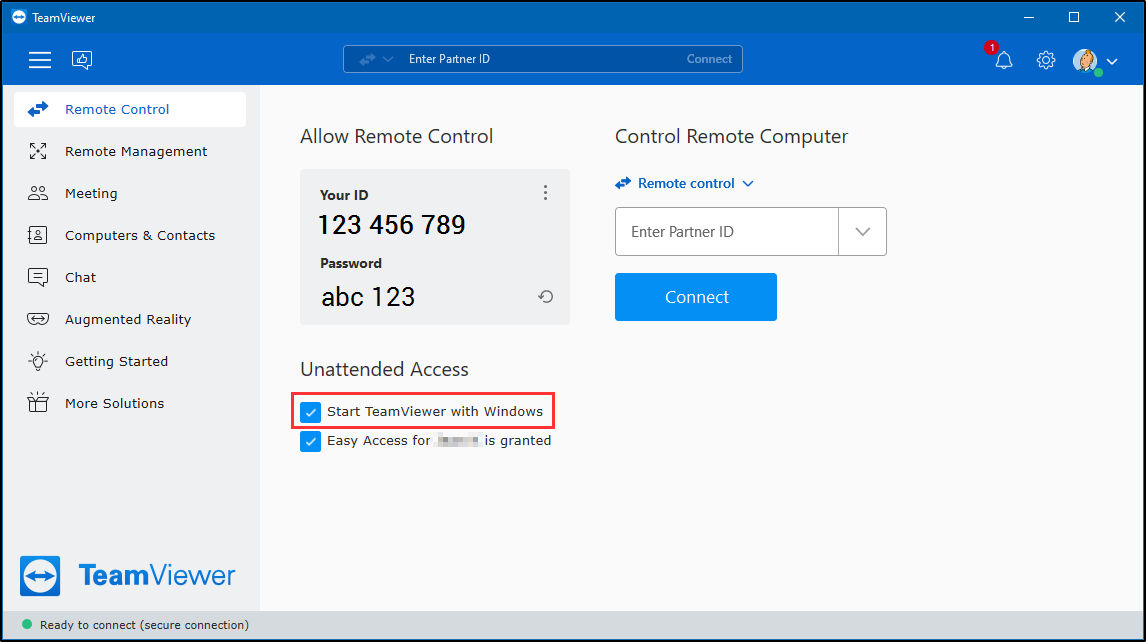
- Start TeamViewer with Windows must be enabled.
📌Note: This step is not required when connecting to a QuickSupport module.
3. Enter your Windows (Admin) login, the domain (if used) and the Windows password.
4. Click on Log On.
You are now connected to your partner’s computer and can control the UAC as you wish.
Compatibility
TeamViewer (Classic) is compatible with UAC and works automatically on operating systems with User Account Control (UAC).
With Windows Vista, Microsoft introduced the UAC, which leads to a confirmation prompt, whenever administrative activities are being performed. This is an additional security feature of Microsoft Windows.
When connecting to a remote device, this could lead to issues in regards to being to able to perform administrative activities on the remote device in the following case:
- The user connects to a target computer (TeamViewer Full Version, TeamViewer Host, TeamViewer Portable or TeamViewer QuickSupport) on which a Windows user is currently logged in. This user has to confirm the UAC prompt (see Windows: User Account Control settings).
Please follow the steps below on troubleshooting UAC for connections to a TeamViewer Host or full version or to the TeamViewer Service Case or to the TeamViewer QuickSupport.
Troubleshooting
UAC for connections to the TeamViewer Host or full version
To avoid UAC issues during connections via a TeamViewer ID when connecting to the TeamViewer Host or full version (when the remote computer is logged in with a non-admin account) please do one of the following:
- If not already done beforehand: Install the TeamViewer full version or Host on the remote computer.
- Run the TeamViewer (Classic) software on the remote device with administrative rights (for TeamViewer run-only full version, Portable, or QuickSupport module).

- Run TeamViewer (Classic) as administrator on the local computer.
- Connect to the remote device using TeamViewer ID and Windows Authentication instead of the password. This requires the Windows account credentials of an Windows admin account on the remote device.
- Connect to a Windows device with the Windows login credentials.
UAC for connections to a TeamViewer Service Case
To avoid UAC issues during connections to a Service Case (session code), please connect to the service case using Windows Authentication instead of the password.
This requires the Windows account credentials of an admin account on the device that created the service case.
Connect to a service case using Windows login credentials.
UAC for connections to the QuickSupport module
If you are connecting to a customer running a QuickSupport module, there are a few additional steps needed in order to interact with remote UAC prompts.
Please see below for the steps required in order to interact with the UAC prompt on a remote machine when connected to a TeamViewer QuickSupport:
- Start TeamViewer (Classic) on your computer
- Ask your partner to start TeamViewer QuickSupport on their device
- Ask your partner for their TeamViewer ID shown in TeamViewer QuickSupport
- Select the option Remote support and enter your partner's TeamViewer ID in the field Partner ID
- Click on Connect to Partner
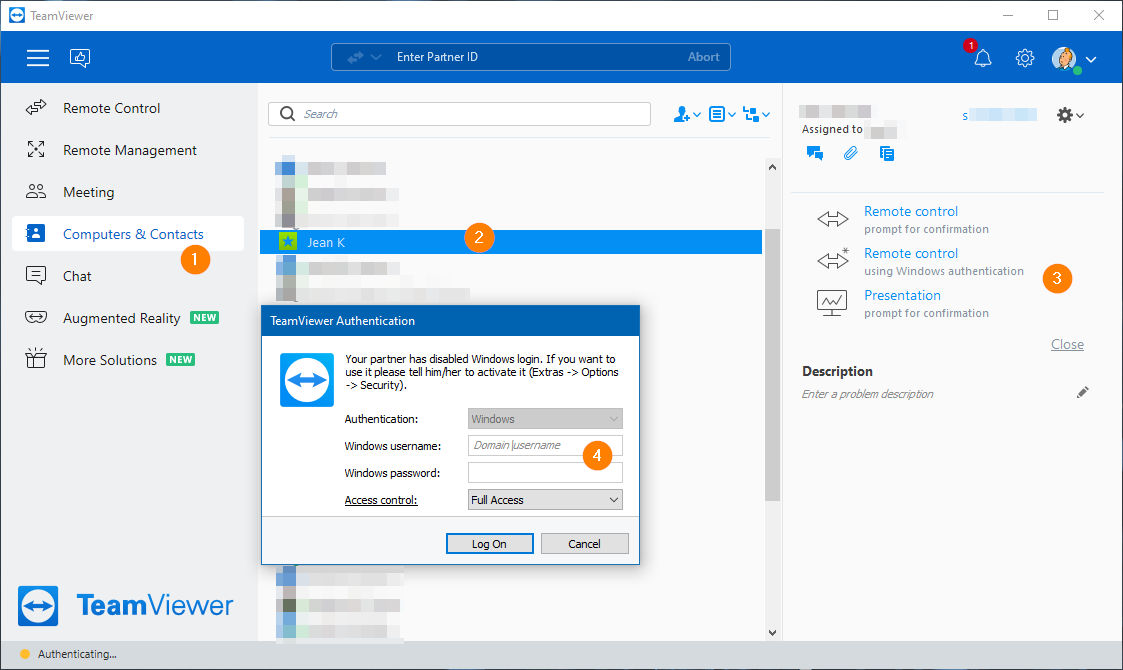
💡Hint: If you are using QuickSupport with Session codes (Service Cases), after your partner starts TeamViewer QuickSupport on their device, select Remote Control using Windows authentication to the right of the service case in your Computers & Contacts window. See chapter above.
The TeamViewer dialogue will open, but as you are connecting to a QuickSupport module, a new message also appears.
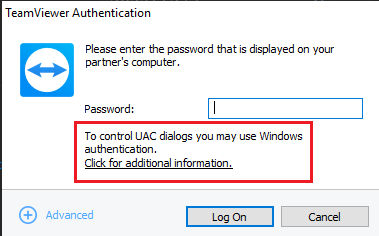
Select Click here for more information to proceed. A new dialog box appears:
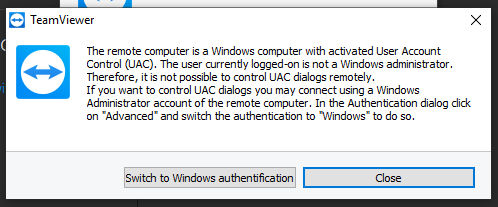
Select Switch to Windows authentification and enter the remote computer's local admin credentials and Click Log On.
💡Hint: When you click Log On please be advised you will not be automatically connected. You will see a new message appear at the bottom of the TeamViewer (Classic) application window:
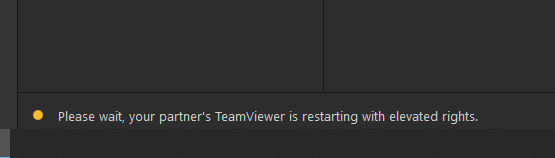
The remote computer will be prompted with a UAC prompt from TeamViewer. Instruct the remote user to select YES to allow TeamViewer to make the requested changes.
Once the user accepts the UAC prompt, their TeamViewer QuickSupport will restart. Reconnect to the ID, and you will be prompted with the Windows credentials login screen again. Re-enter the local admin credentials, and you will be connected to the device.
You are now connected to your partner’s computer and can control the UAC as you wish.