This article explains how to activate your Remote Access license. We will talk about local and remote computers. In a typical home office situation, the local computer is the computer at home, and the remote computer is the computer at the office, at the workplace.
To be able to use your Remote Access license, it is required to install the latest version of TeamViewer on both sides of the connection. If you have an older version of TeamViewer (Classic) on your computers, please update TeamViewer on your computers.
Step 1: Prepare your remote computer
In order to be able to activate the license on a computer to which you connect, you must first know the TeamViewer ID of this computer and set up secure unattended access.
Please follow the instructions below:
1. Retrieve the ID of your remote computer
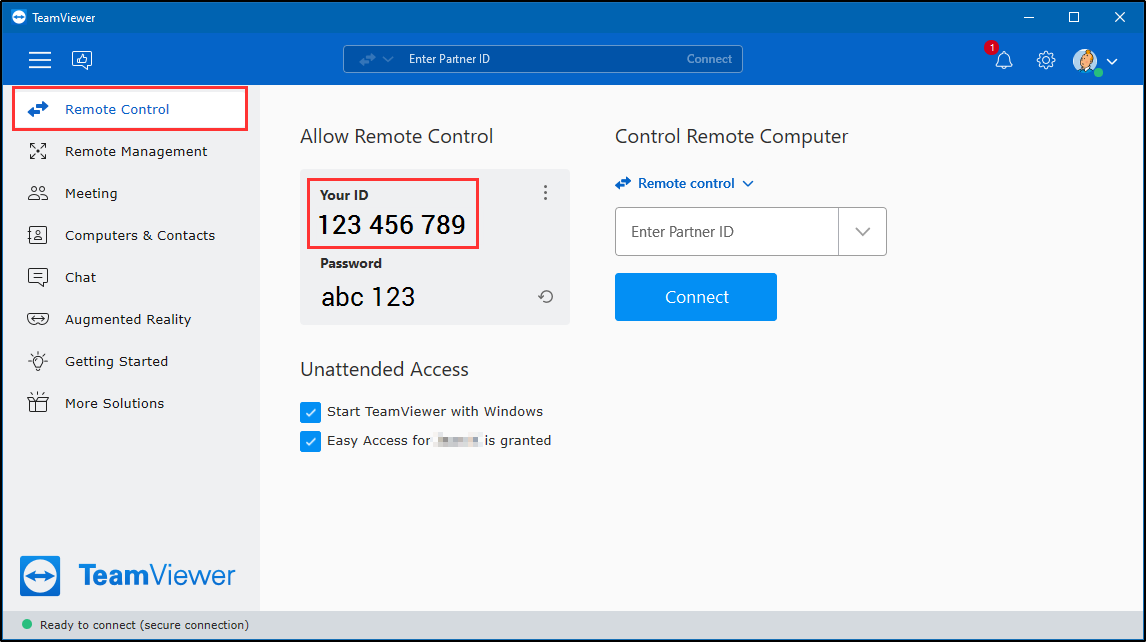
To find out the TeamViewer ID of your remote computer, open TeamViewer (Classic) and click the Remote Control tab. There you will find the TeamViewer ID of the remote computer:
2. Set up Easy Access on the remote computer
In order to be able to connect to the computer without any problem, you must set up Easy Access on the remote computers.
1. Click on Grant Easy Access
2. Enter your TeamViewer account credentials and click Assign
3. Done! Your computer Easy Access is now successfully activated on your remote computer
👉We highly recommend using Easy Access and coupled with an AllowList.
📌Note: With the Remote Access license, you can connect up to three remote computers. Please apply this procedure for all the remote computers to which you want to connect.
Step 2: Create your TeamViewer account & activate the license
1. Check the email account that you used to purchase your license for your account activation email from TeamViewer.
📌Important note: Please make sure to open the email for the license activation (There will also be an email for activating the TeamViewer customer portal).
2. Click on Activate in the e-mail to activate your license on your TeamViewer account. You are redirected to the Management Console.
3. You will be re-directed to the Account Sign In page. Please sign in with your existing TeamViewer account or click Sign Up to create a new one. Click Activate.
4. You will be redirected to the Management Console where you will see a pop-up that confirms your license was successfully activated.
You are now signed in to your TeamViewer account and have successfully activated your license.
Step 3: Log into your TeamViewer account within the TeamViewer (Classic) program on the local computer
To log in to your TeamViewer account within the TeamViewer (Classic) program on the local computer, please:
1. Open TeamViewer (Classic)
2. Click on Sign In to TeamViewer (Classic) (in the top right corner of the application)
3. Enter your TeamViewer account credentials
4. Click Sign In
Or follow this animation:
Step 4: Add your remote computer(s) to your TeamViewer account
1. Click on the Remote Access menu
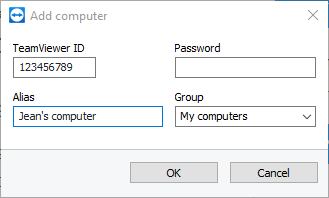
2. Add your endpoint device by clicking the Add computer button
3. Enter the TeamViewer ID of the remote computer (which you prepared in Step 1). You can also give it an alias (display name), then validate with OK. (cf image below)
📌Note: No need to enter a password!
4. You're done! You have now successfully added your remote computer. You can connect to it now either by double-clicking on the computer or by clicking once on the computer and then on Connect.
Additional information for Remote Access
How to check how many endpoints have been activated
1. Visit the TeamViewer (Classic) Management Console
2. Click on the user name in the upper right.
3. Click Edit profile
4. In the General tab, under License, you can see the number of end-points in use.
How to deactivate end-point devices
1. On TeamViewer (Classic) software, click on Remote Access
2. Select the device you would like to deactivate
3. Click the three white dots.
4. Click on Remove from licensed computers