You can define which functionalities your custom Android QuickSupport should include.
Please find general information about the QuickSupport module here.
This article applies to all TeamViewer Tensor customers.
How to create a custom Android QuickSupport
To create a custom Android QuickSupport, please follow the instructions below:
- Log in to the Management Console.
- Click on Design & Deploy.
- In the Custom Modules tab, click on the + sign.
- Select Android QuickSupport.
- Enter a name and select the functionalities you need.
- Click Save.
How to share the custom Android QuickSupport
You can use the custom Android QuickSupport in two different ways.
Via the permanent link
- Access the custom Android QuickSupport via the Design & Deploy menu.
- Hover the mouse over the module and click on the download button.
- Select Copy download link.
- Please share the link with the users you want to support and ask them to open the link in the browser on their smartphone.
- The user will be prompted to install and launch QuickSupport. Once QuickSupport is open, you will be able to connect to it.
💡Hint: You can customize the permanent link's wording to your needs. To customize the permanent link, please follow the instructions below:
- Go to the Design & Deploy menu.
- Hover the mouse over the module and click the Edit button (pencil icon).
- On the bottom right corner, under Permanent link, click the Edit button.
- Give the URL a name and click Apply.
Via Mobile Device Management
You can also use the QuickSupport by using the ConfigID via appConfig in your Mobile Device Management system.
💡Hint: To find the ConfigID, please follow the instructions below:
- Go to the Design & Deploy menu.
- Hover the mouse over the module and click the Edit button (pencil icon).
- Your ConfigID will be displayed under Configuration ID, in the bottom right corner.
Please find more information about the topic here: Configure Android Apps with MDM
Restrict permission to connect to the custom Android QuickSupport via allowlist
You can restrict the permission to connect to your custom Android QuickSupport module to specific company members and contacts using the allowlist. Both options explained below can be used independently.
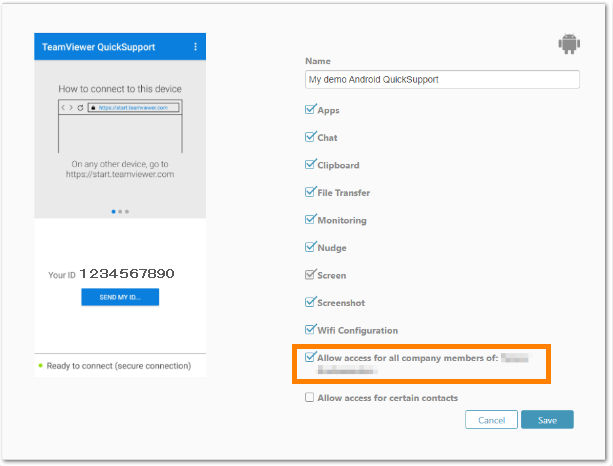
Allow access for all company members
To restrict access to your company members only, select Allow access for all company members of [your company].
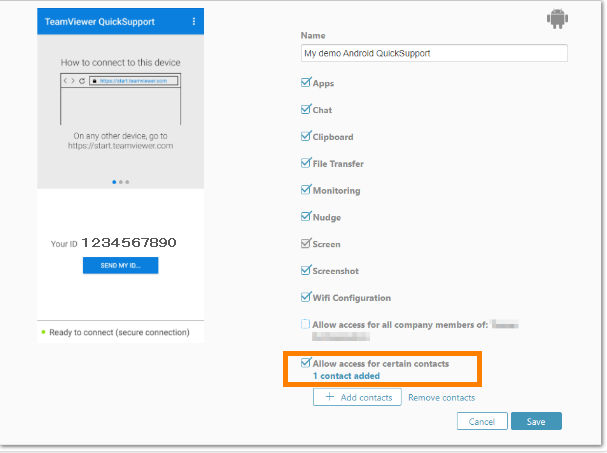
Allow access for specific contacts from your Computers & Contacts list
To restrict access to selected contacts from your Computers & Contacts list:
- Select Allow access for certain contacts.
- Select Add contacts. A window will open with contacts.
- Select the respective contacts and select Add.
- To save the selected configuration of company members or contacts, click Save.
📌Notes: To remove the selected contacts, click Remove contacts, select the contacts to be removed in the window, and click Save.
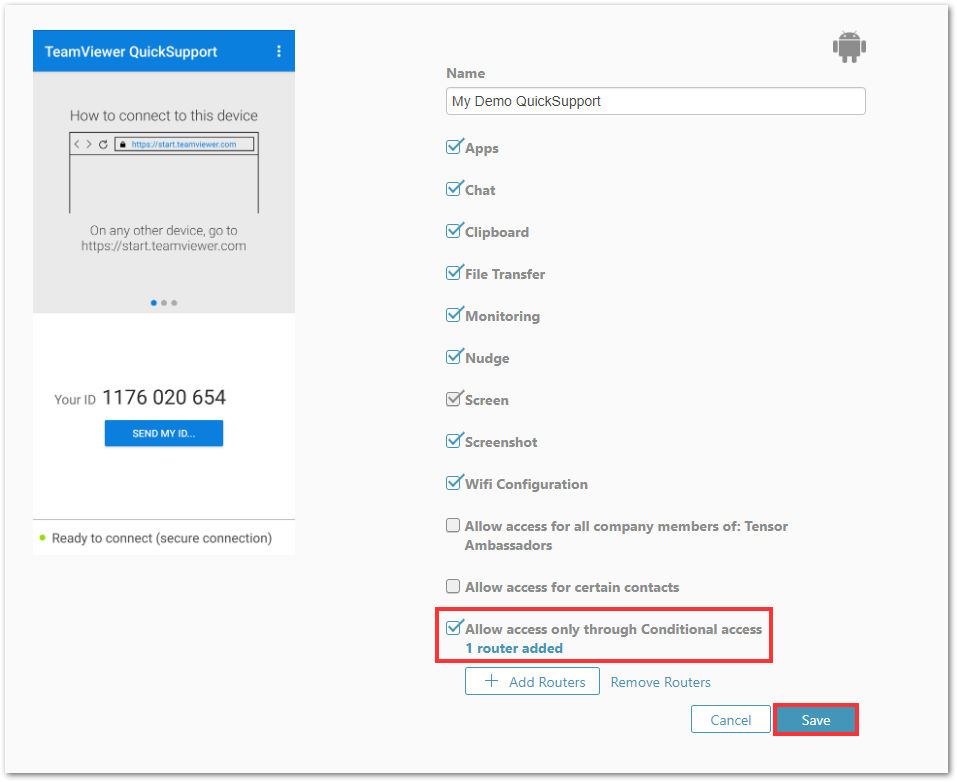
Restrict permission to connect to the custom Android QuickSupport via your Conditional Access router(s)
Restricting access via your Conditional Access routers allows you to prevent unauthorized entry to the custom QuickSupport Android Module. By embedding these Conditional Access keepalive routers within the module, the connection rules set up in the Conditional Access configuration will be enforced, ensuring that any unauthorized connections are blocked.
To do so, please follow the instructions below:
- Select Allow access only through Conditional access.
- Select your required Conditional Access router(s).
- The default setting is to select all, and this is the recommended configuration.
- Click Save.
📌Notes: To remove the selected routers, click Remove Routers, select the routers to be removed in the window, and click Save.