With TeamViewer Software Development Kit (SDK) you can utilize full Assist AR functionality and provide the best AR remote support experience to your customers by embedding AR remote assistance capabilities within your own mobile apps.
The SDK enables you to have secure and GDPR compliant connections to your customer's devices.
This article applies to all TeamViewer Assist AR users.
Prerequisites
- iOS 14.1 and higher
- An existing TeamViewer Account
If you don't have a TeamViewer account, follow the steps below to create one:
- Go to https://login.teamviewer.com/ and click Sign Up.
- Complete the steps to create an account and validate your email address.
Generate an API key
1) Go to https://login.teamviewer.com/ and sign in using your TeamViewer account.
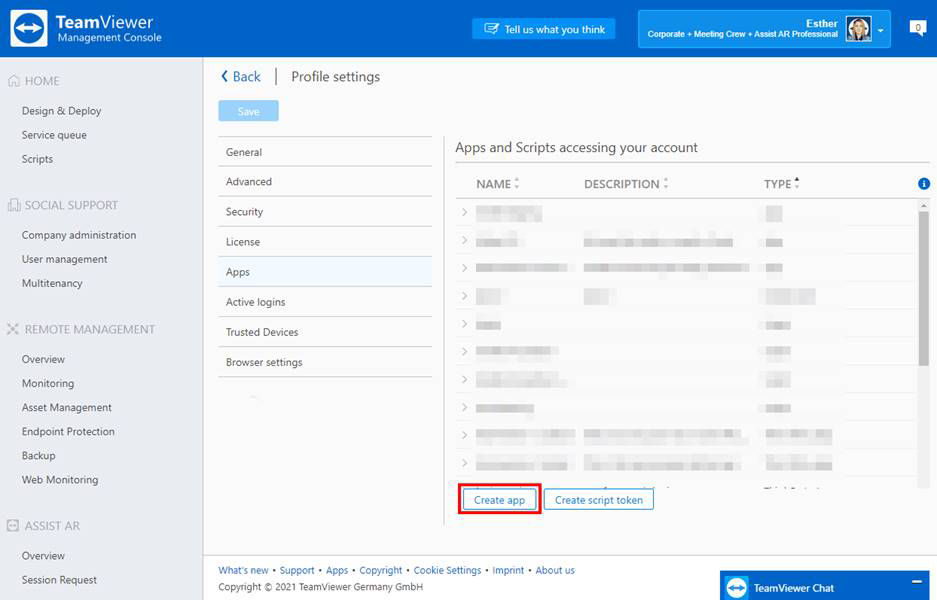
2) On the bottom of the page, click Apps.

3) Click the Create App button.
4) Activate Mobile SDK Token, enter a name, and (optional) add a short description.
5) Activate iOS.
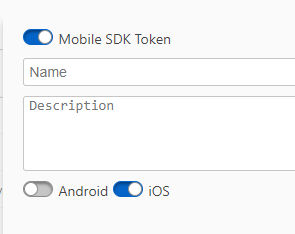
6) Click Create.
Your token is displayed when opening the created app:
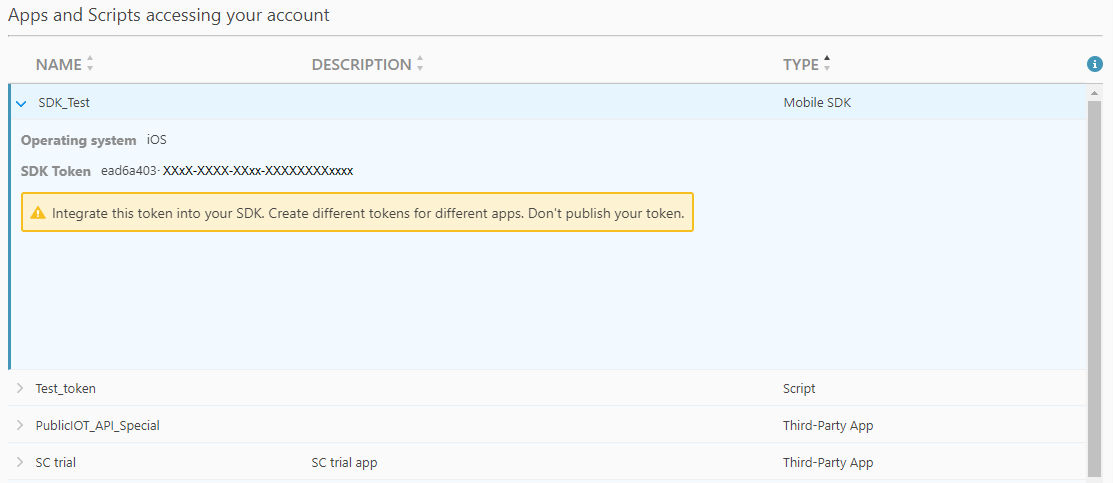
Copy this token into your clipboard and paste it to a secure place.
🚨IMPORTANT: Do not share this token with anyone!
Get the TeamViewer Mobile SDK
There are two possibilities to install the TeamViewer Mobile SDK:
A. Install the TeamViewer Mobile SDK via CocoaPods
The easiest way to get the TeamViewer SDK is via CocoaPods. To add the SDK to your project, add this to your Pod file:
platform :ios, '12.0'
target YOUR_TARGET do
  use_frameworks!
  pod 'TeamViewerSDK'
end
B. Install manually
1) The SDK is available for customers with an Assist AR Professional license and is distributed by the TeamViewer Support team.
2) Download the .zip file, decompress and copy all the included xcframework folders inside of your project folder.
📌Note: The SDK is distributed as universal XCFramework containing both architectures, iOS arm64 and Simulator x86. We currently do not support Apple Silicon or Mac Catalyst architectures.
3) Link the TVLocalizations and TeamViewerSDK frameworks to your project.
4) Make sure that the option Embed & Sign is selected.
5) You might also need to link against ARKit and CallKit, depending on your implementation.
6) Only if you plan to support CallKit: Link against CallKit.

Setting up your Xcode Project
The TeamViewer SDK uses the camera and microphone during a remote support session.
1) Add the following keys to the Info.Plist file:
- NSMicrophoneUsageDescription
- NSCameraUsageDescription

If you do not add those keys, iOS will terminate the application the moment the SDK tries to access the microphone or camera.
Using the TeamViewer SDK
🚨IMPORTANT: The SDK is a single instance class. You cannot directly create one. You should access the shared instance.
1) Initialize the SDK instance with your API Key obtained in the section Prerequisites.
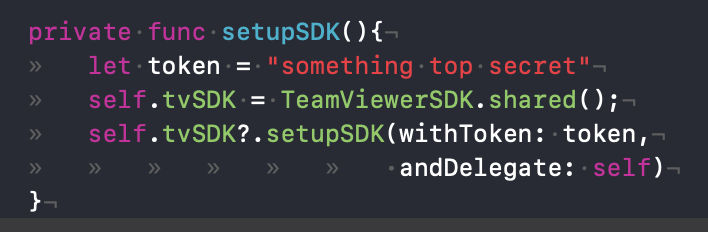
2) Set a delegate conforming to the protocol TeamViewerSDKDelegate.
This ensures you are able to react to events happening during the lifetime of your TeamViewer connection.
3) Connect to a session code
The shared SDK provides a method for establishing a connection to a session code. This session code can be of two types:
- Remote Support or
- Assist AR
4) Create session codes in your TeamViewer client or via the TeamViewer REST API.

The method connectToSessionCode returns a TeamViewer session.
🚨IMPORTANT: You are responsible for keeping this variable alive, and also responsible for freeing up this variable. Failing to do so might result in the session UI being kept alive even after the remote session has ended.
🚨IMPORTANT: Once the SDK connects to a session code, it enters a waiting state, you get notified about the state change via the delegate method handleSessionCodeOnline.
At this point, you should not allow the user to connect to a different session code. It is only allowed to allow the user to leave the current connection.
On the supporter side, the session code will appear as being online, allowing the client to establish a connection to that session code.
Reacting to incoming connections
The SDK provides delegate methods for reacting to incoming connection events.
Once the connection is initiated on the TeamViewer side, the SDK gets notified about this connection attempt via the delegate method handleConnectionRequestWithAuthenticationData.
On the authentication data parameter there is the name of the supporter, the type of incoming connection (ScreenShare or Assist AR) and a callback function to allow or reject the incoming connection.
If the incoming connection is accepted, the corresponding TeamViewer connection is established.
- For the ScreenShare connection, a prompt for microphone and screen sharing is shown to the user.
The UI of your application is grabbed using the replay kit and there is bi-directional VoIP communication between the user and the supporter.
- For the Assist AR connection, the system permissions for camera and microphone access are shown. If the user allows this, the AR session is started. There is bi-directional VoIP communication between the user and the supporter.
- The delegate method handleConnectionRequestAbort should be implemented in order to be notified when the remote user cancels the connection request. You are responsible to clear any prompts that are shown to the user, or to cancel any CallKit incoming call notifications.
Reacting to optional SDK events
- handleSupporterConnected: This method gets called when the supporter has ended the session, it also gets called when the user has locally ended the session.
- handleSupporterDisconnected: This method gets called when the supporter has ended the session, it also gets called when the user has locally ended the session.
💡Hint: You should clean the references to the session as the session is considered no longer valid at this point.
- handleError: This method gets called if the session code or the API token used for establishing a connection are not valid.
💡Hint: You should clean the resources used for the current session as the session itself is considered invalid.
Reacting to optional session events
- handleSessionError: This gets called when an error has occurred during the session. For example, a feature was requested but the compatibility between client and server was not met.
💡Hint: This error is only informative. You can write it to a log file.
Note about CallKit support
If your application supports CallKit:
- Provide the TeamViewer SDK with information about the unique identifier of your call.
- TeamViewer asks the system if there is a running call and does not try to set up a VoIP connection if this is the case.
- Tell TeamViewer that the current call is yours so we can take over the audio pipeline and start the VoIP transmission:
- Call the setupCallUUID method.
- Tell the SDK that your call has ended by calling the clearCallUUID method.
Enabling background modes
Ensure that you have at least one of these background modes enabled in your Info.plist file:
- Audio,
- AirPlay or
- Voice over IP background mode.
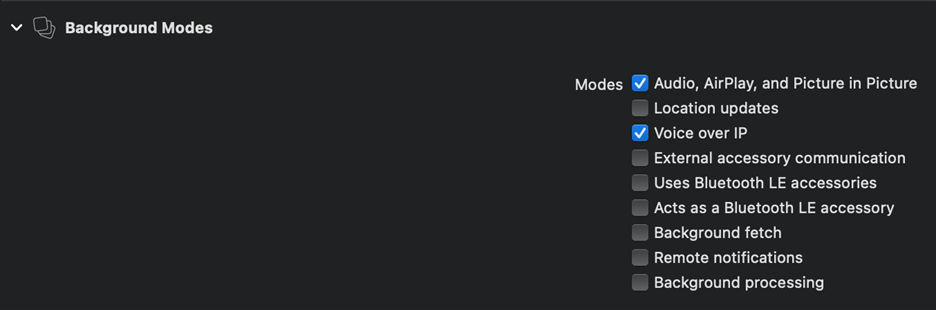
🚨IMPORTANT: Failing to do so will cause the app to get suspended only a few seconds after being put in the background during an active TeamViewer session.
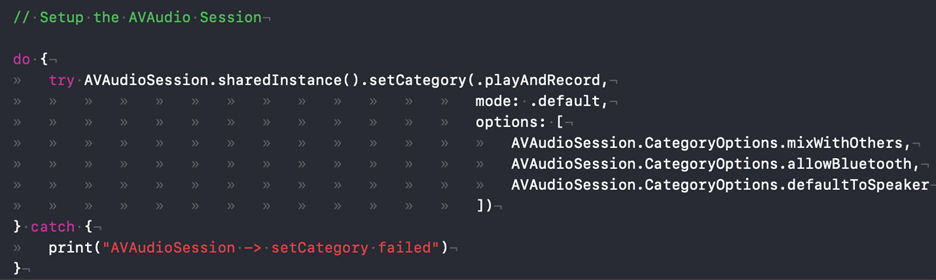
Audio setup
The mobile SDK works with the default AVAudioSession configuration values.
- If you want to override these values to support Bluetooth, Airplay mix, use loudspeakers, etc., make sure to change this before a session is established. In case your application mutes other apps, the recommended point in time to configure the audio session is right before accepting the connection.
- If your application audio mixes with other apps, you can configure the audio options at the application launch.
Disable VoIP
In case you want to use another means for establishing voice communication, you can disable the VoIP feature entirely by setting the options on the shared SDK instance prior to establishing a connection.
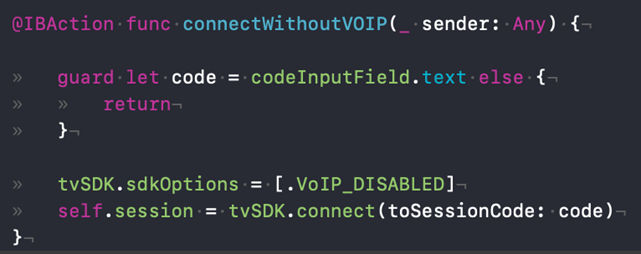
For more information refer to the TVSDKOptions documentation.
Class documentation
All public headers are documented. For detailed information about each class, please refer to the QuickHelp content generated by Xcode ('⌥ '+ click on constant or variable name).