Connectivity issues can be caused by multiple factors, including instability with the ISPs. When starting a remote connection, TeamViewer (Classic) may display the following error message:
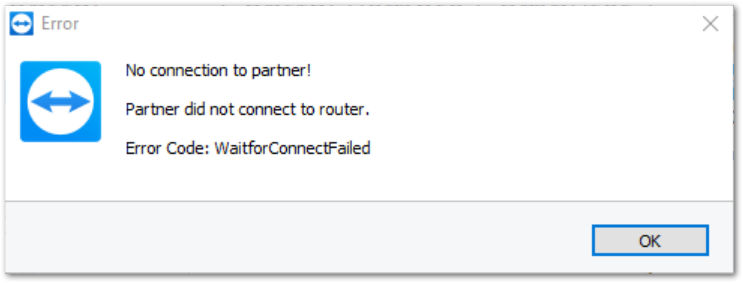
as well as:

This article applies to all TeamViewer (Classic) users and customers.
🚨 Important disclaimer: Please note this article is a general recommendation, and we cannot guarantee that the steps below will be enough to troubleshoot the connectivity problems you encountered. The steps below should be taken at your own risk and responsibility.
Steps for troubleshooting
The easiest and most efficient workaround we've found to help our customers and users overcome this problem is by disabling IPv6 on the devices used for the remote connection (your and your partner's devices).
📌Note: If you have IPv6 disabled already on both ends of the remote connection, and the issue persists, please consider contacting our customer support directly by phone or support forum is also open to the public for assistance.
Below is a step-by-step guide to disabling IPv6 according to your OS:
Disable IPv6
Windows
1) Type in the Windows search bar ncpa.cpl, and the Network Connection window will open

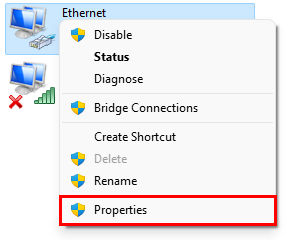
2) Right-click the available network (Usually Ethernet or Wi-Fi) ➜ Properties
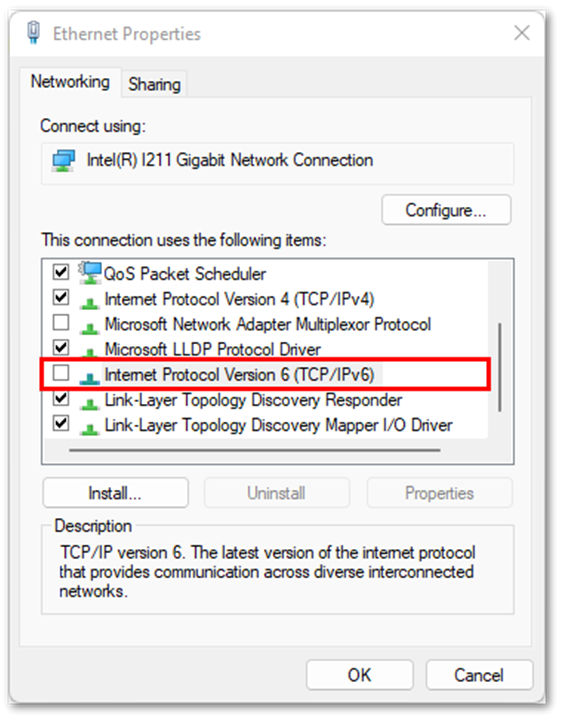
3) Uncheck the option Internet Protocol Version 6 (TCP/IPv6) ➜ click Ok to save
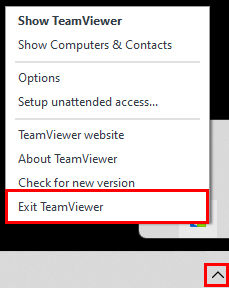
4) After doing the steps above, please restart TeamViewer services and try connecting again.
📌Note: You can easily close TeamViewer services by right-clicking the TeamViewer icon at the Show hidden icons menu:
MacOS
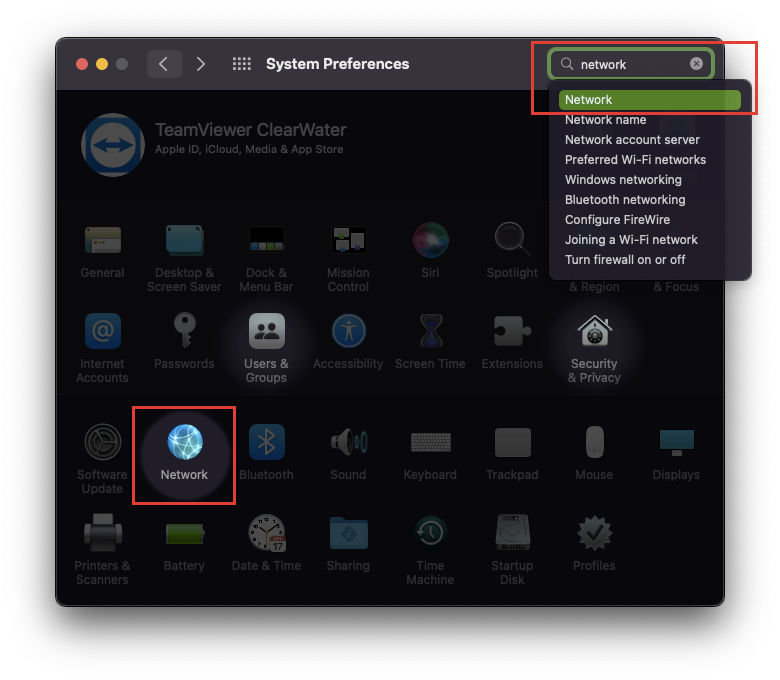
1) Open System Preferences ➜ Network
2) On the left panel, select the network adapter in use (Wi-Fi or Ethernet) → Click on the Advanced button

3) Navigate to the TCP/IP tab, and on Configure IPv6, set it to Link-local only → Click Ok to save
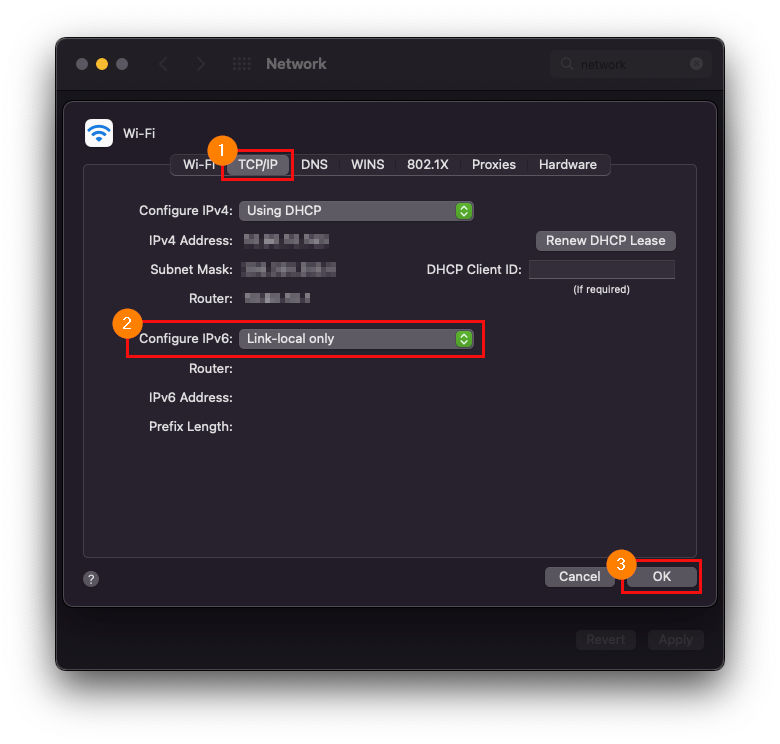
🔀 Alternatively, you can set the Configure IPv6 to Off
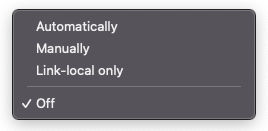
If the Off option is not visible, you can open the terminal and enter the command line according to your active network:
- Wi-Fi:
networksetup -setv6off Wi-Fi - Ethernet:
networksetup -setv6off Ethernet - Wi-Fi and Ethernet at the same time:
networksetup -setv6off Ethernet && networksetup -setv6off Wi-Fi
You can re-enable IPv6 by replacing setv6off with setv6automatic
Example: networksetup -setv6automatic Wi-Fi && networksetup -setv6automatic Ethernet
4) After doing the steps above, please restart your device and try connecting with TeamViewer (Classic) again.
Linux
📌Note: The steps below are just an example and may vary depending on your Linux environment.
💡Hint: You can first verify the status of your IPv6 by following the steps:
1) Log in with root privileges
2) Execute the following command:
$ ip a | grep inet6
- In case you find the following as the result, then IPv6 is enabled:
 inet6 ::1/128 scope host
inet6 fe80::e922:bcdf:e150:labb/64 scope link
- If IPv6 is disabled, you should see no output if you run this command.
To disable IPv6 on a Linux device, you can perform the following steps:
1) Log in with root privileges
2) Open the /etc/sysctl.conf file with the following command:
$ sudo vim /etc/sysctl.conf
3) Add the following lines to it:
net.ipv6.conf.all.disable_ipv6 = 1
net.ipv6.conf.default.disable_ipv6 = 1
4) Save the file and reboot your device with the following command:
$ sudo reboot
5) Verify that IPv6 is disabled by running the following command:
$ ip a | grep inet6