TeamViewer Tensor (Classic) with Single Sign-On gives IT more control over provisioning enterprise user accounts for TeamViewer Tensor (Classic) remote access and support. By limiting access to users with corporate emails only, TeamViewer Tensor (Classic) with SSO allows you to prevent unauthorized users from ever using your enterprise remote access platform.
- Centralize password control through your SSO identity service provider, so IT doesn’t have to manage passwords, reducing password reset requests.
- Automatically apply corporate password policies and identity authentication rules to every authorized TeamViewer Tensor (Classic) user.
- Efficiently offboard employees, without worrying about unauthorized backdoor access through TeamViewer.
- Improve the end-user experience by allowing employees to log in to TeamViewer Tensor (Classic) with the same SSO login credentials they’re already using for your corporate applications — no separate TeamViewer Tensor (Classic) login with another password to remember.
This article applies to TeamViewer customers with an Enterprise/Tensor license.
Requirements
To use TeamViewer Single Sign-On, you need
- a TeamViewer version 13.2.1080 or newer
- a SAML 2.0 compatible identity provider (IdP)*
- a TeamViewer account to access the Management Console and add domains
- access to the DNS management of your domain to verify the domain ownership
- a TeamViewer Tensor license.
* Currently, we only support Centrify, Okta, Azure, OneLogin, ADFS, and G Suite, but we are working on supporting more IdPs in the future. The above IdPs have been tested, and detailed steps to set up one of these IdP can be found in these documents and other linked pages about SSO and the respective IdPs.
Note: If you use a different IdP, please use the technical information to set up your IdP manually.
Hint: When adding a domain for Single Sign-On, it is recommended to add the owning account to the exclusion list. The reason for this is a fallback scenario that you keep access to the domain configuration even if the IdP is not working.
Example: The TeamViewer Account "admin@example.com" adds domain „example.com“ for Single Sign-On. After adding the domain, the email address "admin@example.com" should be added to the exclusion list. This is required to make changes to the SSO configuration, even when Single Sign-On doesn't work due to misconfiguration.
Hint2: When adding a single Sign-On domain, adding additional owners to the SSO domain is recommended since the SSO ownership is not inherited within your company.
Example: After the TeamViewer Account "admin@example.com" adds domain „example.com“ for Single Sign-On, they add multiple company administrators (e.g. "admin2@example.com") as domain owners so that they can also manage the domain and its SSO settings.
Single Sign-On (SSO) is activated on a domain level for all TeamViewer accounts using an email address with this domain. Once activated, all users that sign into a corresponding TeamViewer account are redirected to the identity provider that has been configured for the domain. This step is required independent of which IdP is used.
For security reasons and to prevent abuse, it is required to verify the domain ownership before the feature is activated.
Add a new domain
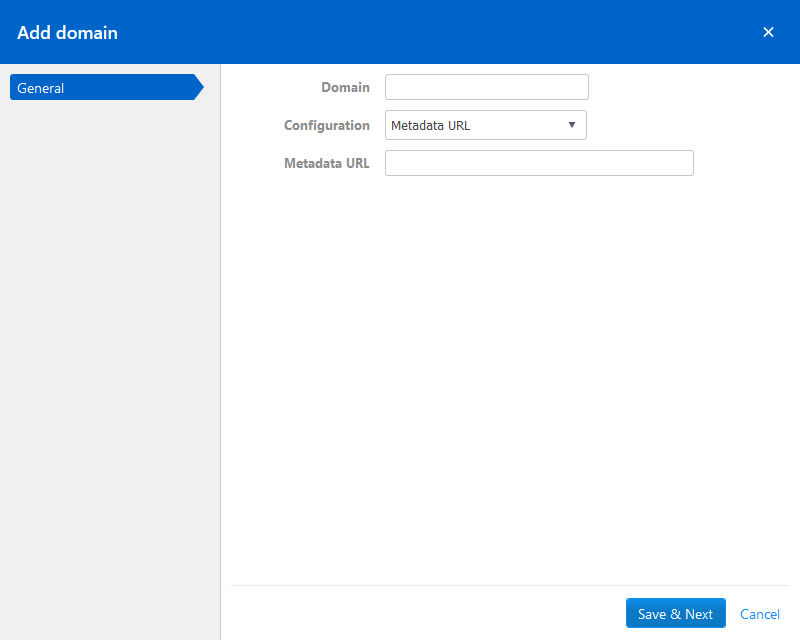
To activate SSO, log in to Management Console select Company administration and then the Single Sign-On menu entry. Click on Add domain and enter the domain you want to activate SSO for.
You also need to provide your identity provider’s metadata. There are three options available to do so:
- via URL: enter your IdP metadata URL into the corresponding field
- via XML: select and upload your metadata XML
- Manual configuration: manually enter all necessary information. Please note that the public key must be a Base64 encoded string.
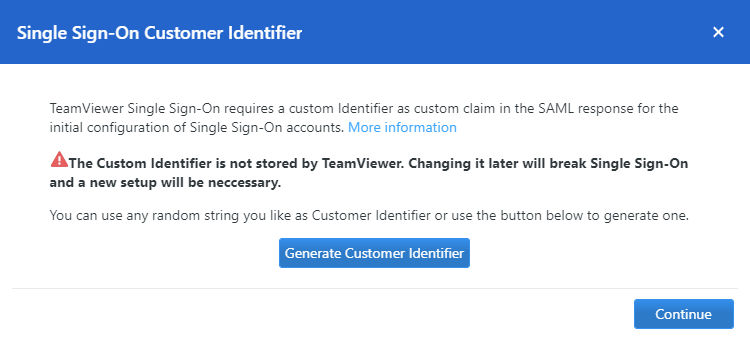
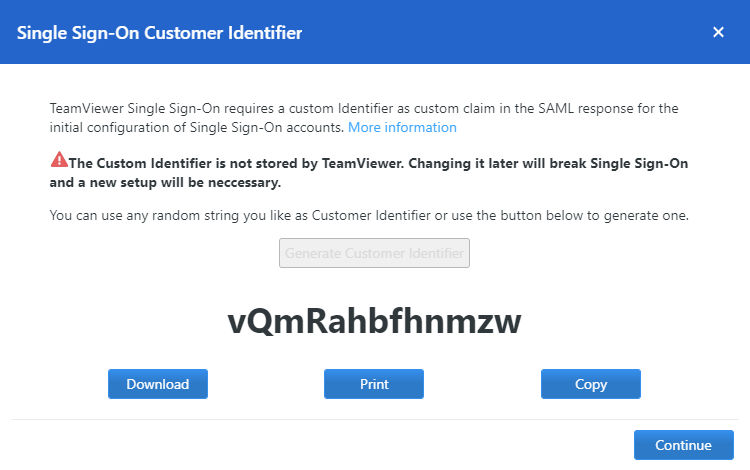
Create custom identifier
After the domain has been added, the custom identifier can be generated. This custom identifier is not stored by TeamViewer, but is used for the initial configuration of SSO. It must not be changed at any point in time, since this will break Single Sign-On and a new setup will be necessary. Any random string can be used as customer identifier. This string is later required for the configuration of the IdP.
Verify domain ownership
After a domain has been added successfully, you need to verify the domain ownership.
Single Sign-On will not be activated before the domain verification is completed.
To verify the domain, please create a new TXT record for your domain with the values shown on the verification page.
Note: The verification process can take several hours because of the DNS system.
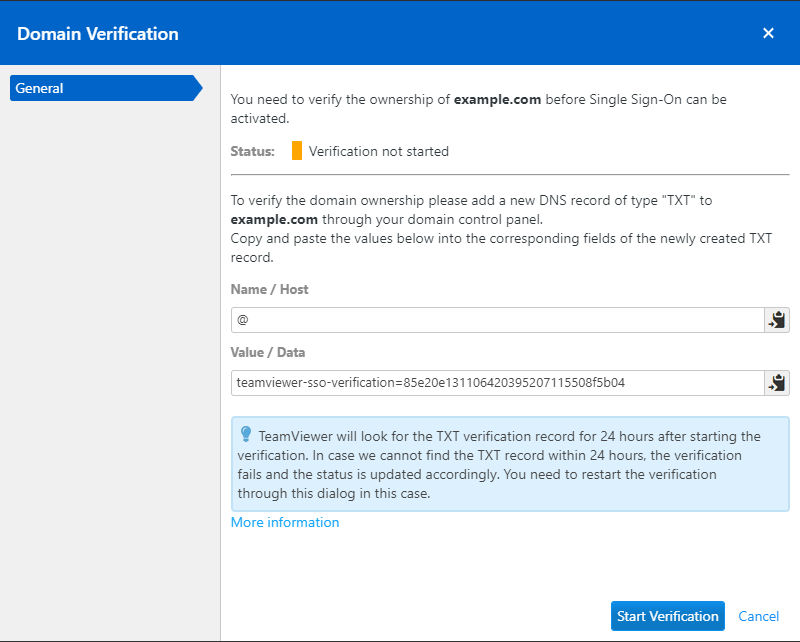
The dialog to add a TXT record might look similar to:
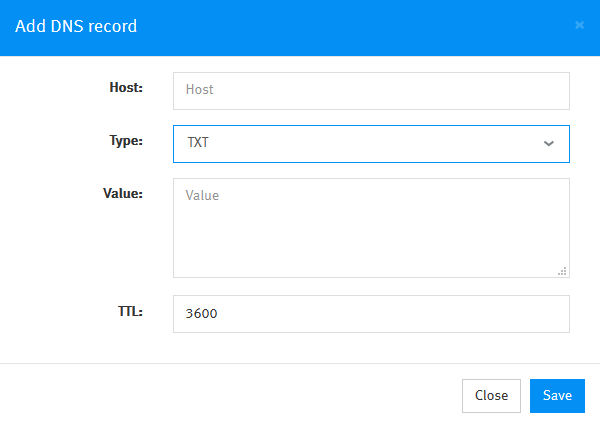
Note: Depending on your domain management system, the description of the input fields may vary.
After creating the new TXT record, start the verification process by clicking on the “Start Verification” button.
Please note that the verification process can take several hours because of the DNS system.
Hint: TeamViewer will look for the TXT verification record for 24 hours after starting the verification. If we cannot find the TXT record within 24 hours, the verification fails, and the status is updated accordingly. You need to restart the verification through this dialog in this case.
Identity provider setup
Each identity provider requires its own configuration, which is covered in dedicated knowledge base articles:
TeamViewer client configuration
TeamViewer is compatible with Single Sign-On starting from version 13.2.1080. Previous versions do not support Single Sign-On and can not redirect users to your identity provider during the login.
Disabling the embedded browser for SSO
The client configuration is optional but allows changing the used browser for the SSO login of the IdP.
The TeamViewer client will default use an embedded browser for identity provider authentication. If you prefer to use the default browser of the operating system, you can change this behavior:
Windows:
HKEY_CURRENT_USER\Software\TeamViewer\SsoUseEmbeddedBrowser = 0 (DWORD)
macOS:
defaults write com.teamviewer.teamviewer.preferences SsoUseEmbeddedBrowser -int 0
Linux:
sudo systemctl stop teamviewerd && echo '[bool ] SsoUseEmbeddedBrowser = 0' >> ~/.config/teamviewer/client.conf && sudo systemctl start teamviewerd
Note: After creating or changing the registry, you need to restart the TeamViewer client.
Technical information
This section lists the technical details of the TeamViewer SAML Service Provider (SP). This data might be relevant for adding other IdPs than the ones described above.
SAML Service Provider Metadata:
Required SAML Response Claims:
This should be mapped to a unique user identifier within the scope of the IdP (and, therefore, within the scope of the corresponding company).
For example, this can be the Active Directory Object GUID for ADFS or the email address for Okta
This attribute should be mapped to the email address of the user that wants to sign in. The email address needs to be the same as configured for the TeamViewer account. The mapping/comparison is done in a case-insensitive way.
This attribute should return a customer-specific identifier. The attribute must be named “customeridentifier.”
TeamViewer requires a customer identifier as a custom claim in the SAML response for the initial configuration of Single Sign-On accounts.
TeamViewer does not store the customer identifier. Changing it later will break Single Sign-On, and a new setup will be necessary.
Any random string can be used as a customer identifier.
Signature & Encryption Certificate (Public Key)
The public key of the certificate that is used to sign SAML requests and for the encryption of SAML responses can be obtained by executing the following PowerShell command:
"-----BEGIN PUBLIC KEY-----`n" + `
((Select-Xml `
-Content ((Invoke-WebRequest `
https://sso.teamviewer.com/saml/metadata.xml).Content) `
-xpath "//*[local-name()='X509Certificate']").Node[0].'#text') + `
"`n-----END PUBLIC KEY-----" `
| Out-File -FilePath "sso.teamviewer.com - saml.cer" -Encoding ascii
The command downloads the metadata extracts the public key, and writes it to a file.