TeamViewer Single Sign-On (SSO) aims to reduce the user management efforts for large companies by connecting TeamViewer with identity providers and user directories.
This article applies to TeamViewer customers with an Enterprise/Tensor license.
Requirements
To use TeamViewer Single Sign-On, you need
- a TeamViewer version 13.2.1080 or newer
- a SAML 2.0 compatible identity provider (IdP)*
- a TeamViewer account to access the Management Console and add domains
- access to the DNS management of your domain to verify the domain ownership
- a TeamViewer Tensor license.
TeamViewer Management Console (MCO) Configuration
Single Sign-On (SSO) is activated on a domain level for all TeamViewer accounts using an email address with this domain. Once activated, all users that sign into a corresponding TeamViewer account are redirected to the identity provider that has been configured for the domain.
For security reasons and to prevent abuse, it is required to verify the domain ownership before the feature is activated.
Add a new domain
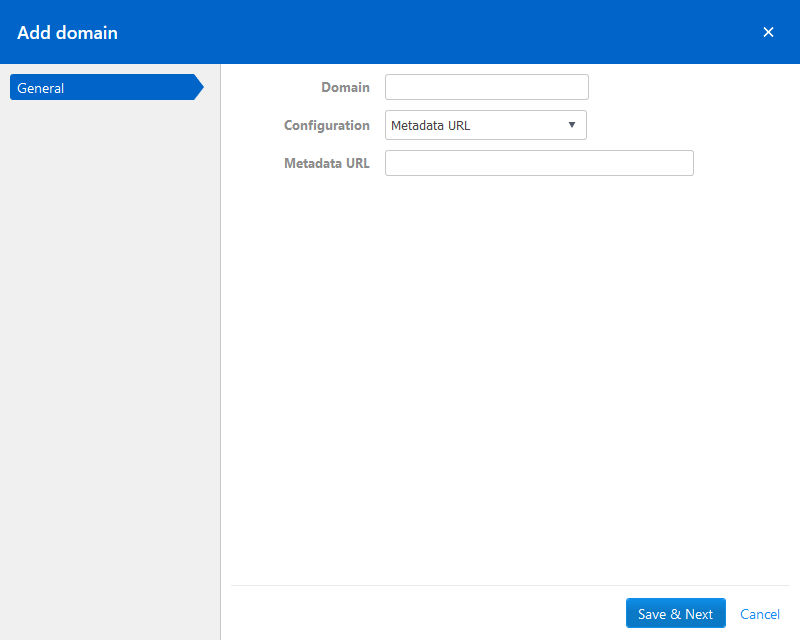
To activate SSO, log in to Management Console and select the Single Sign-On menu entry. Click on Add domain and enter the domain you want to activate SSO for.
You also need to provide you identity provider’s metadata. There are three options available to do so:
- via URL: enter your IdP metadata URL into the corresponding field
- via XML: select and upload your metadata XML
- Manual configuration: manually enter all necessary information. Please note that the public key must be a Base64 encoded string.
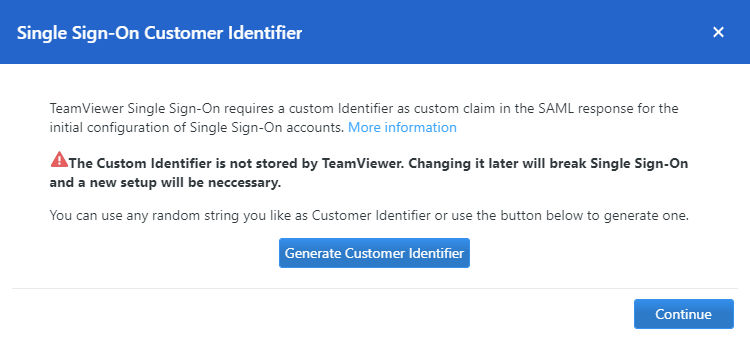
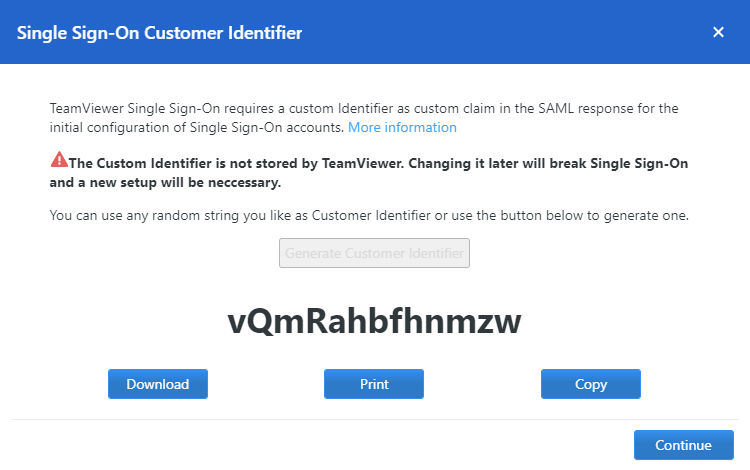
Create custom identifier
After the domain has been added, the custom identifier can be generated. This custom identifier is not stored by TeamViewer, but is used for the initial configuration of SSO. It must not be changed at any point in time, since this will break Single Sign-On and a new setup will be necessary. Any random string can be used as customer identifier. This string is later required for the configuration of the IdP.
Verify domain ownership
After a domain has been added successfully, you need to verify the domain ownership. Single Sign-On will not be activated before the domain verification is completed.
To verify the domain, please create a new TXT record for your domain with the values shown on the verification page.
📌Note: The verification process can take several hours because of the DNS system.

The dialog to add a TXT record might look similar to:
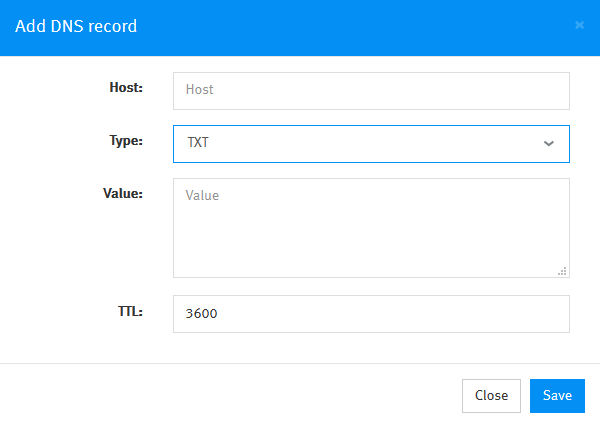
📌Note: Depending on your domain management system, the description of the input fields may vary.
After creating the new TXT record, start the verification process by clicking on the “Start Verification” button.
📌Please note that the verification process can take several hours because of the DNS system.
💡Hint: TeamViewer will look for the TXT verification record for 24 hours after starting the verification. In case we cannot find the TXT record within 24 hours, the verification fails and the status is updated accordingly. You need to restart the verification through this dialog in this case.
💡Hint2: When adding a domain for Single Sign-On, it is recommended to add the owning account to the exclusion list. The reason for this is a fallback scenario that you keep the access to the domain configuration even if the IdP is not working.
Example: The TeamViewer Account "[email protected]" adds domain „example.com“ for Single Sign-On. After adding the domain, the email address "[email protected]" should be added to the exclusion list. This is required in order to make changes to the SSO configuration, even when Single Sign-On doesn't work due to misconfiguration.
💡Hint3: When adding a domain for Single Sign-On, it is recommended to add additional owners to the SSO domain, since the SSO ownership is not inherited within your company.
Example: After the TeamViewer Account "[email protected]" adds domain „example.com“ for Single Sign-On, they add multiple company administrators (e.g. "[email protected]") as domain owners, so that they can also manage the domain and its SSO settings.
Identity Provider Setup for Active Directory Federation Services (ADFS)
The following steps describe the setup procedure for Active Directory Federation Services (ADFS). Directions and commands have been taken from a machine running Windows Server 2016 Standard (Version 1607).
The configuration basically consists of the following two steps:
1) Add an ADFS Relying Party Trust for the TeamViewer Single Sign-On service. This step requires metadata of the TeamViewer SSO service to be entered. This can be done in one of the following ways:
- Automatic: This only requires entering a URL to the metadata XML file. The file gets downloaded by ADFS and all required fields of the relying party trust are filled-out automatically. It requires the ADFS server to have access to the internet.
- Semi-Automatic: Like the automatic method but instead of providing a URL to the metadata, the file itself is downloaded beforehand and given to ADFS as XML file. This can be useful if the ADFS server does not have internet access.
- Manual: If none of the above methods are applicable, the metadata can be entered manually to ADFS.
2) Add a transformation rule to the claim issuance policy of the new relying party trust.
The following sections describe the configuration for all three scenarios using the PowerShell command prompt and the ADFS Management graphical user interface:
Automatic Configuration using PowerShell
Open a new PowerShell command window and enter the following commands to add a new relying party trust with a default claim issuance policy to ADFS:
$customerId = 'Your Generated Customer Identifier'
$claimRules = @'
 @RuleTemplate = "LdapClaims"
 @RuleName = "TeamViewer Login"
 c:[Type ==
 "http://schemas.microsoft.com/ws/2008/06/identity/claims/windowsaccountname",
 Issuer == "AD AUTHORITY"]
 => issue(store = "Active Directory", types =
 ("http://schemas.xmlsoap.org/ws/2005/05/identity/claims/nameidentifier",
 "http://schemas.xmlsoap.org/ws/2005/05/identity/claims/emailaddress"), query =
 ";objectGUID,mail;{0}", param = c.Value);
 @RuleName = "TeamViewer Customer ID"
 => issue(Type = "http://sso.teamviewer.com/saml/claims/customeridentifier",
 Value = "
'@ + $customerId + '");'
Add-AdfsRelyingPartyTrust `
 -Name TeamViewer `
 -MetadataUrl https://sso.teamviewer.com/saml/metadata.xml `
 -IssuanceTransformRules $claimRules `
 -AccessControlPolicyName "Permit everyone" `
 -AutoUpdateEnabled $true `
 -MonitoringEnabled $true `
 -Enabled $true
Adapt the "-Name" parameter value (line 13) to your needs. This is the name displayed in the ADFS graphical user interface. Also, the name of the access control policy (line16) may differ on your system.
All the settings can be changed later via PowerShell or the ADFS graphical user interface.
Semi-Automatic Configuration using PowerShell
This is very similar to the "automatic" method described above. It requires to download the metadata XML file beforehand and to copy it to the ADFS server.
The metadata file can be downloaded from the following URL:
https://sso.teamviewer.com/saml/metadata.xml
The following commands assume that the metadata XML file is available in the current directory of the PowerShell command prompt as "metadata.xml".
$customerId = 'Your Generated Customer Identifier'
$claimRules = @'
 @RuleTemplate = "LdapClaims"
 @RuleName = "TeamViewer Login"
 c:[Type ==
 "http://schemas.microsoft.com/ws/2008/06/identity/claims/windowsaccountname",
 Issuer == "AD AUTHORITY"]
 => issue(store = "Active Directory", types =
 ("http://schemas.xmlsoap.org/ws/2005/05/identity/claims/nameidentifier",
 "http://schemas.xmlsoap.org/ws/2005/05/identity/claims/emailaddress"), query =
 ";objectGUID,mail;{0}", param = c.Value);
 @RuleName = "TeamViewer Customer ID"
 => issue(Type = "http://sso.teamviewer.com/saml/claims/customeridentifier",
 Value = "
'@ + $customerId + '");'
Add-AdfsRelyingPartyTrust `
 -Name TeamViewer `
 -MetadataFile metadata.xml `
 -IssuanceTransformRules $claimRules `
 -AccessControlPolicyName "Permit everyone" `
 -Enabled $true
The main difference to the "automatic" method is the use of the "-MetadataFile" parameter (instead of "-MetadataUrl" - line 14). The "-AutoUpdateEnabled" and "-MonitoringEnabled" parameters have been omitted as both require a valid metadata URL to be given.
Manual Configuration using Powershell
The manual configuration requires to download and extract the public key of the signature/encryption certificate of the TeamViewer SAML Service Provider.
Execute the following commands in a PowerShell command prompt to manually add a relying party trust:
$customerId = 'Your Generated Customer Identifier'
$cert = New-Object System.Security.Cryptography.X509Certificates.X509Certificate2(".\sso.teamviewer.com - saml.cer", "")
$claimRules = @'
 @RuleTemplate = "LdapClaims"
 @RuleName = "TeamViewer Login"
 c:[Type ==
 "http://schemas.microsoft.com/ws/2008/06/identity/claims/windowsaccountname",
 Issuer == "AD AUTHORITY"]
 => issue(store = "Active Directory", types =
 ("http://schemas.xmlsoap.org/ws/2005/05/identity/claims/nameidentifier",
 "http://schemas.xmlsoap.org/ws/2005/05/identity/claims/emailaddress"), query =
 ";objectGUID,mail;{0}", param = c.Value);
 @RuleName = "TeamViewer Customer ID"
 => issue(Type = "http://sso.teamviewer.com/saml/claims/customeridentifier",
 Value = "
'@ + $customerId + '");'
$samlEndpoints = @(
 (New-AdfsSamlEndpoint -Binding POST -Protocol SAMLAssertionConsumer -Uri https://sso.teamviewer.com/saml/acs -Index 0),
 (New-AdfsSamlEndpoint -Binding Redirect -Protocol SAMLAssertionConsumer -Uri https://sso.teamviewer.com/saml/acs -Index 1)
)
Add-AdfsRelyingPartyTrust `
 -Name "TeamViewer" `
 -Identifier "https://sso.teamviewer.com/saml/metadata" `
 -RequestSigningCertificate $cert `
 -EncryptionCertificate $cert `
 -SamlEndpoint $samlEndpoints `
 -IssuanceTransformRules $claimRules `
 -AccessControlPolicyName "Permit everyone" `
 -Enabled $true
Please also have a look at the official documentation of the "Add-AdfsRelyingPartyTrust" PowerShell commandlet: https://technet.microsoft.com/en-us/library/ee892322.aspx
Semi-Automatic Configuration using ADFS Management Tools (graphical)
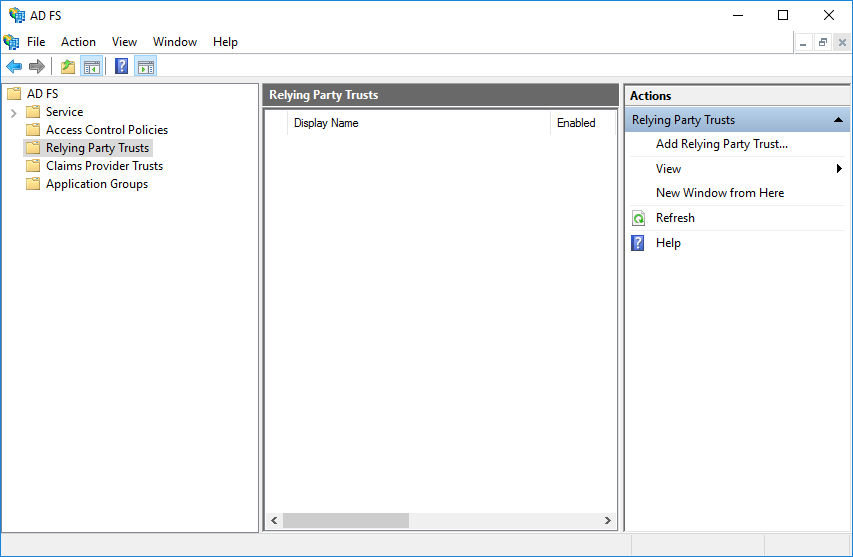
1) Start the ADFS Management tools from the Server Manager.
2) Navigate to ADFS --> Relying Party Trusts and click on Add Relying Party Trust... in the navigation pane on the right

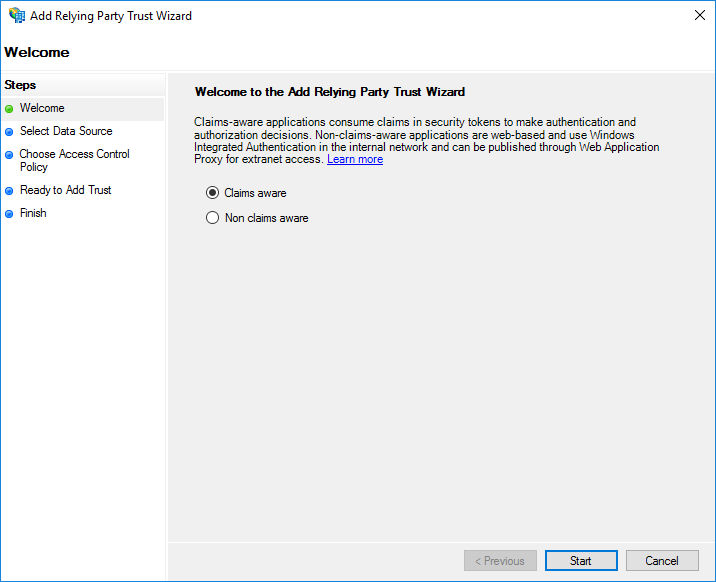
3) Select Claims aware and start the wizard by clicking the Start button

4)Depending on whether you want to have the or variant, select to
- import the metadata via URL
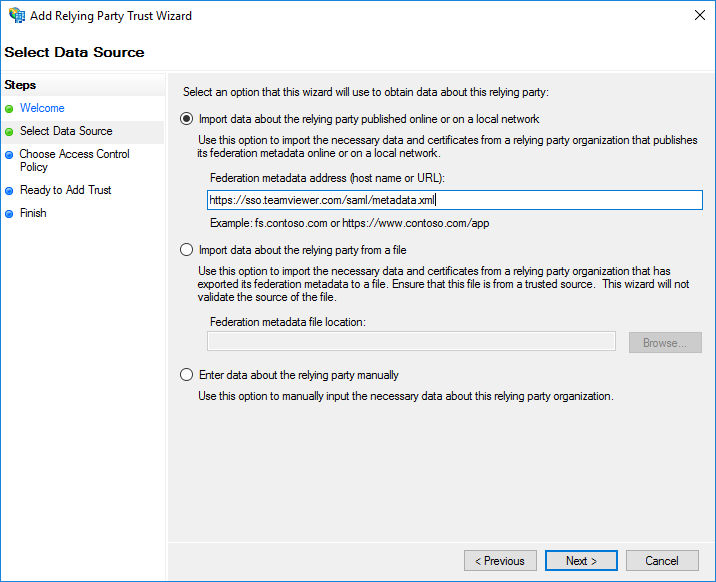
- Enter the metadata URL: https://sso.teamviewer.com/saml/metadata.xml import the metadata via file. Browse to the downloaded metadata XML file. The file can be downloaded from the above URL.

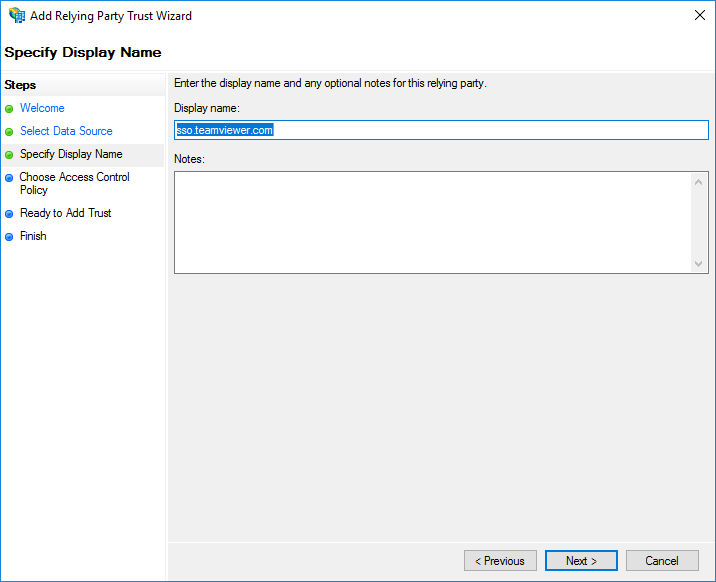
5) Choose a name for the relying party trust, like TeamViewer or sso.teamviewer.com or choose the pre-filled name if applicable.

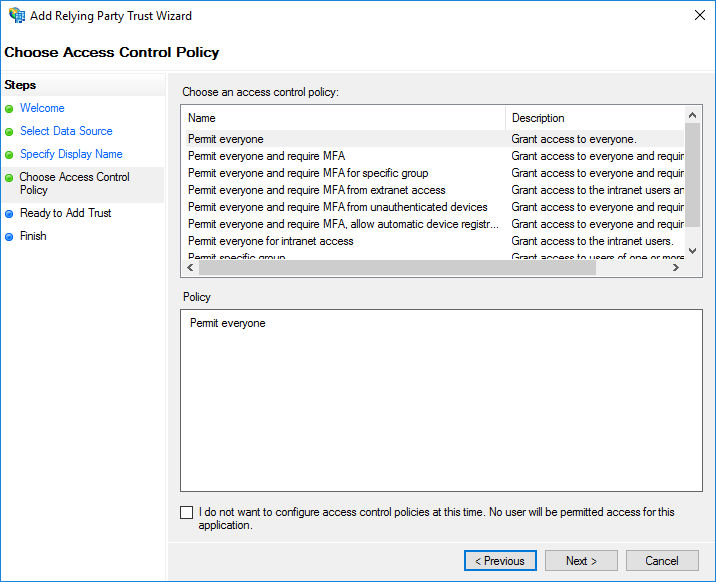
6) Select the access control policy for the relying party trust. E.g. choose permit everyone
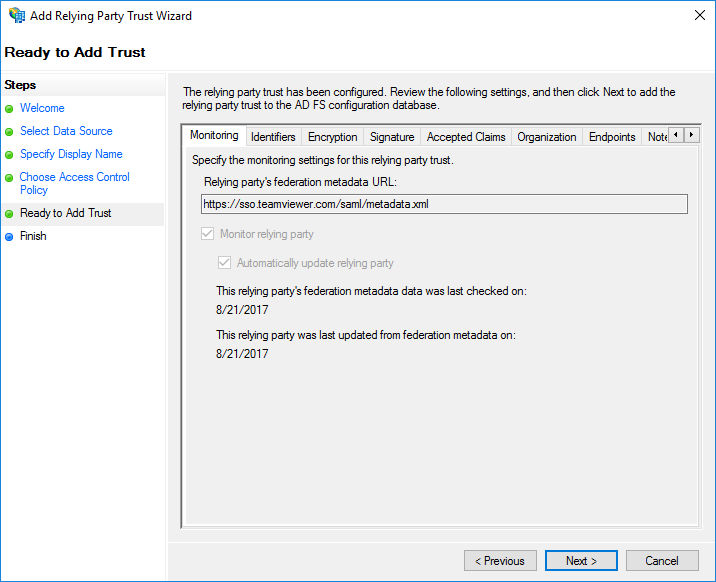
7) Click Next on the summary screen to add the relying party trust
Next, the claim issuance policy needs to be configured for the new relying party trust.
- Select the relying party trust and click "Edit Claim Issuance Policy..." in the navigation pane on the right.
- Click Add Rule and choose Send LDAP Attributes as Claims
- Enter a name for the transformation rule, e.g. TeamViewer Login
- Select Active Directory as Attribute store.
- Add the following two mappings:
6) Click Finish.
7) Add a second claim rule by adding Add Rule again and select Send Claims Using a Custom Rule.
8) Enter a name for the custom claim rule, e.g. TeamViewer Customer ID
9) Enter the following custom rule and set the Value to your generated customer identifier:
=> issue(Type = "http://sso.teamviewer.com/saml/claims/customeridentifier", Value = "Your Generated Customer Identifier");
Please ensure to add to the value field your own generated customer identifier.
10) Click Finish
Manual Configuration using ADFS Management Tools (graphical)
The manual configuration requires to download and extract the public key of the signature/encryption certificate of the TeamViewer SAML Service Provider.
Please see the Technical Information section below on how to get the certificate.
1) Start the ADFS Management tools from the Server Manager
2) Navigate to ADFS - Relying Party Trusts and click on Add Relying Party Trust... in the navigation pane on the right
3) Select Claims aware and start the wizard by clicking the Start button
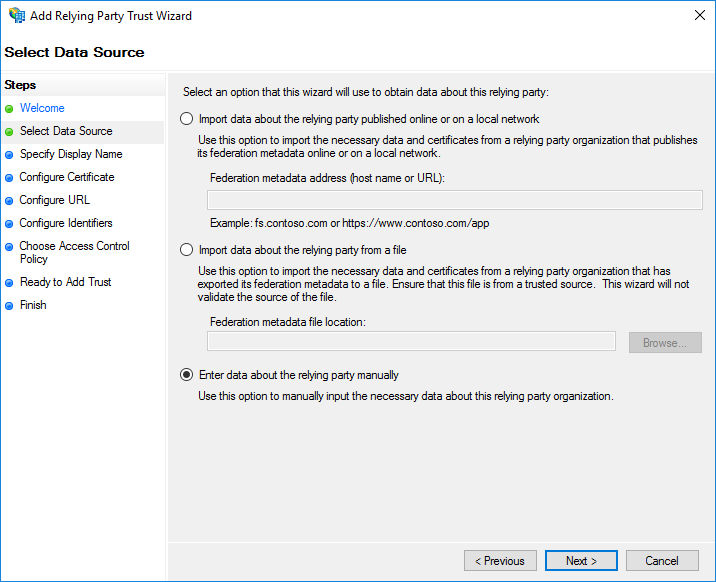
4) Select to enter the data manually (third bullet point)
5) Choose a name for the relying party trust, like TeamViewer or sso.teamviewer.com or choose the pre-filled name if applicable
6) Browse to the certificate file (see comment above)

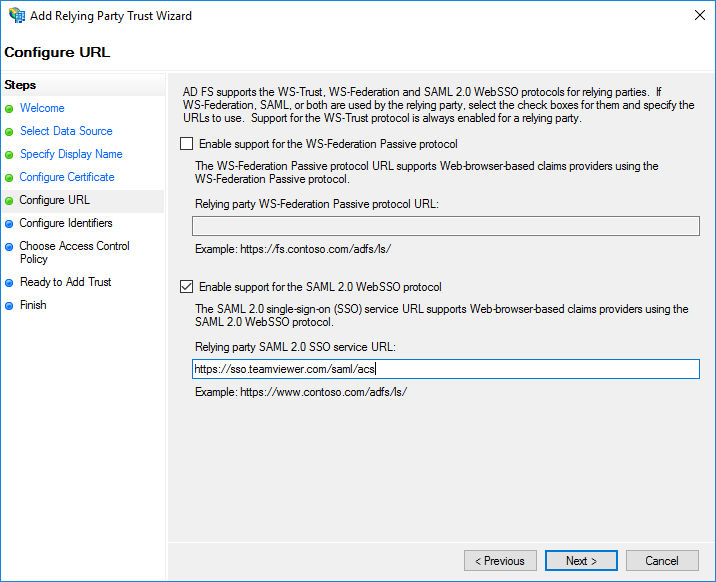
7) Check the box for Enable support for the SAML 2.0 WebSSO protocol and enter the following service URL: https://sso.teamviewer.com/saml/acs
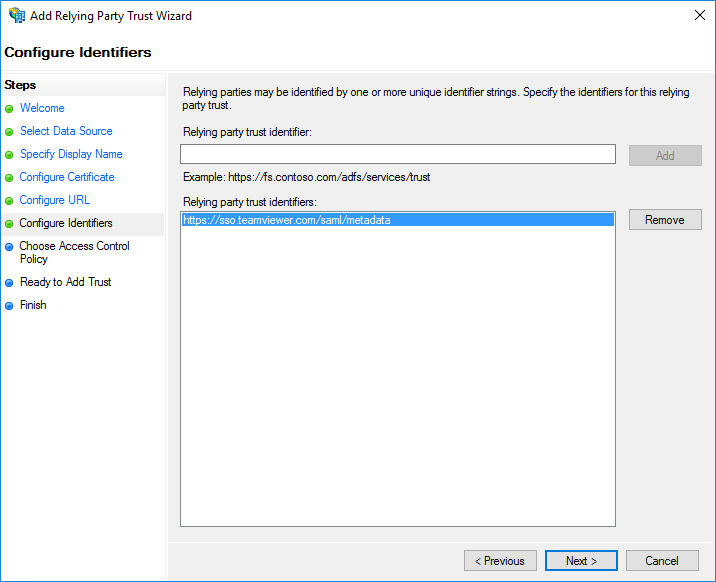
8) On the Configure Identifiers page, add https://sso.teamviewer.com/saml/metadata as identifier
9) Confirm adding the relying party trust.
10) Configure the claim issuance policy as described for the Automatic procedure above.
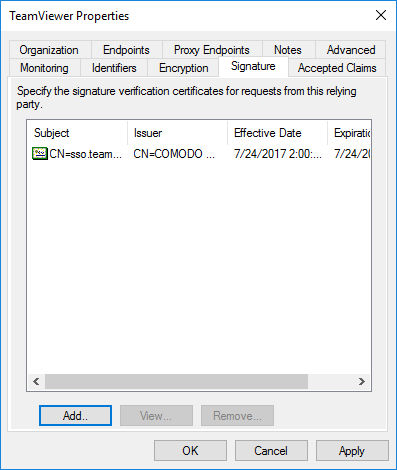
11) Next, configure the signature certificate of the relying party trust. Therefore open the properties (double-click) and navigate to the Signature tab. Browse to the same certificate file as mentioned above
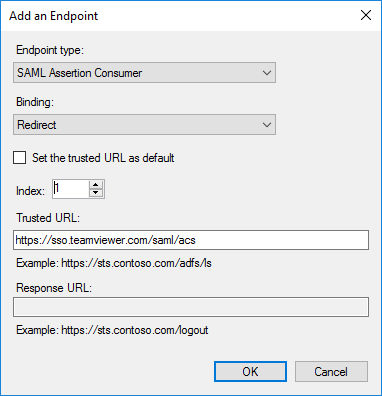
12) Optionally, add a second SAML endpoint to the relying party trust. Navigate to the Endpoints tab and click Add SAML endpoint
- Select SAML Assertion Consumer as endpoint type
- Select Redirect as binding
- Set the Index to 1
- Set the Trusted URL to https://sso.teamviewer.com/saml/acs
TeamViewer Client Configuration
TeamViewer is compatible with Single Sign-On starting from version 13.2.1080.
Previous versions do not support Single Sign-On and can not redirect users to your identity provider during the login. The client configuration is optional but allows changing the used browser for the SSO login of the IdP.
The TeamViewer client will use an embedded browser for the identity provider authentication by default. If you prefer to use the default browser of the operating system, you can change this behavior:
Windows:
HKEY_CURRENT_USER\Software\TeamViewer\SsoUseEmbeddedBrowser = 0 (DWORD)
macOS:
defaults write com.teamviewer.teamviewer.preferences SsoUseEmbeddedBrowser -int 0
📌Note: You need to restart the TeamViewer client after creating or changing the registry.