Hi all,
I am pretty sure it's not only me that has been part of countless online meetings, video calls, and webinars in the last one and a half years - at least.
If you asked me what I learned during the last months, I´d tell you this: It is critically important to have easy-to-use meeting software.
I mean it.
👉 Downloading, starting, navigation, invitation, etc., must be straightforward with no open questions left for anyone.
Let's face it:
- We do not have time to do a degree to be able to start a meeting solution
- We do not have time to wait for participants to find out where to unmute themselves
- We do not have time to search for the camera to be switched on or off
- We just want to join the meeting. Period.
I think, wasting five minutes on getting everyone on track is five valuable minutes we will never get back. Five minutes we could have spent way more productive, don't you agree?

That being said:
The UX teams and designers behind such programs need to understand the importance of a hassle-free meeting and make it as easy as possible for everyone to work.
Therefore, I am so excited about the last updates of the TeamViewer Meeting, because our UX teams do understand what's relevant for users like me 🤩
The Change Log calls it plainly:
- A meeting preview screen is now available for users joining or starting meetings, enabling users to control various options in advance. ( ➡ [Windows] Meeting v15.18.2)
- Usability improvement for joining password-protected meetings: users can now enter the password in the meeting preview page. (➡ [Windows] Meeting v15.19.3)
But I am way more excited than that!
I want to talk more about what these enhancements and improvements actually mean for all of us joining one meeting after the next:
Let´s start!
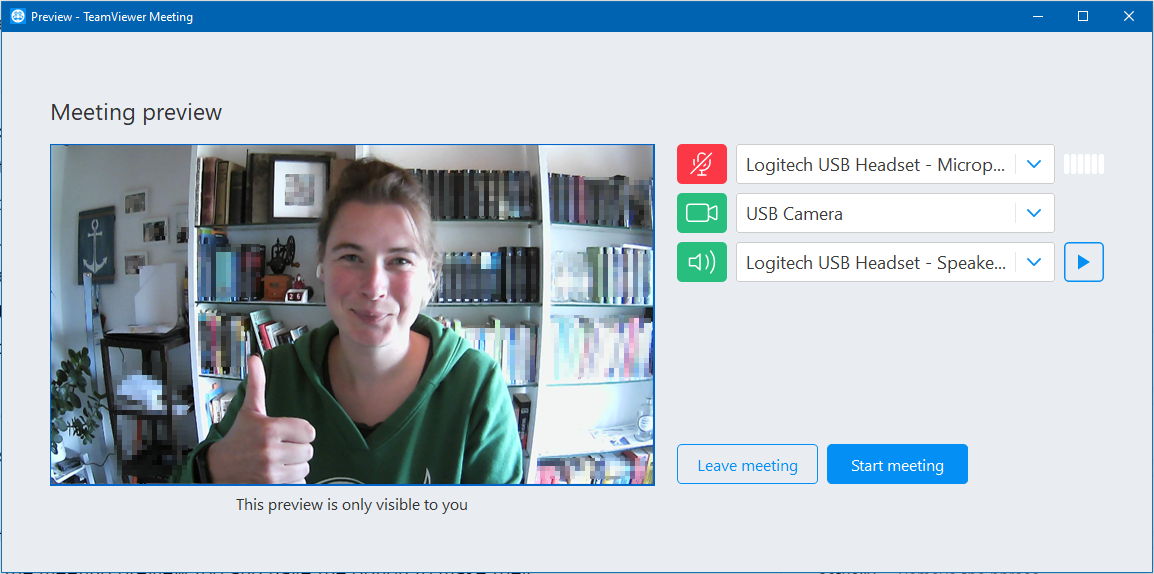
When I start a TeamViewer Meeting, I now get prompted with the new Preview Window. Here I can make a couple of decisions and settings for my meeting (that's what they called "various options in advance" in the Change Log).
The various options are about Audio and Video mostly. See the below screenshot for a quick overview of the default setting and then - let´s go into the details:

Looks great, right? Ok - I am starting to go through the settings on the right side first:
1) Microphone
Ok - the default is mute as you can clearly see by the red button with the strike-through microphone.
Why mute is the default is due to privacy reasons as I need to be the one allowing the tool to transmit my voice. But that´s permission is easily given by clicking the button. It will turn green indicating me being unmuted (don´t worry - the voice will not be transmitted to the meeting yet).
Actually, the button even has a fancy hover effect telling you what is going to happen if you tab it (hover effect in blue):

Via a dropdown, I can choose my microphone of choice based on what TeamViewer can find on my computer, like my integrated microphone or a USB device. I can even check whether the system can track my voice with the microphone output level. It's just soo smooth as I always know whether my mic works as expected 🤩

For me, it is clear: I unmute myself before the meeting starts to avoid awkward silence when the meeting starts. That´s my pro-tip for you 😉
2) Video
How do I want to present myself in the meeting? With a video or an image?
It´s my choice - and the great thing: the preview will show me exactly how the meeting participants will see me.
However - the default setting is that the video is turned off.
A turned-off camera means that the software will take my profile picture from the TeamViewer Account. And: It will give me the written confirmation that the video is OFF.

If I am not logged in to my account or have not uploaded an image yet, it will show the default image:

However - that's boring: Upload a profile picture! Please 🙌
The preview window allows me to change the camera setting easily: I can enable the video by activating my camera.
👉In case you have multiple cameras, you can choose the one that shows you at the best angle from the drop-down).
And on the large preview on the left, I can see how I will look like for the meeting participants - before they actually see me. Now it's the time for making the last adjustments to lightning or angle or whatever I feel needs to be adjusted.
And don´t worry - your preview is only for you and the meeting participant won´t see you or what you are doing in the preparation of the video until you click Start Meeting.
3) Speaker
Audio is more than speaking: it's hearing too. The preview allows me to define the speakers and whether or not I want to have the speaker enabled when the meeting starts.
The default here is that the speakers are enabled. Which makes sense for around 99% of my meetings.
I can even make a test to check whether my speakers work correctly and press the play button to hear a test tone:

All set
Yes - now I am all set. I´ve configured all the settings, I feel are most relevant for having efficient meetings that do not waste my time. Now, I only need to click Start Meeting to kick the meeting off.
And if you are wondering how the participants can do all this, let me tell you:
The same applies to all participants of the meeting. All of them will see the meeting preview too and have the option to make their desired settings.
They even have some more valuable information available like
- Who organized the meeting and
- They can insert the meeting password the host gave them as a preparation for the meeting (if the meeting is password protected):
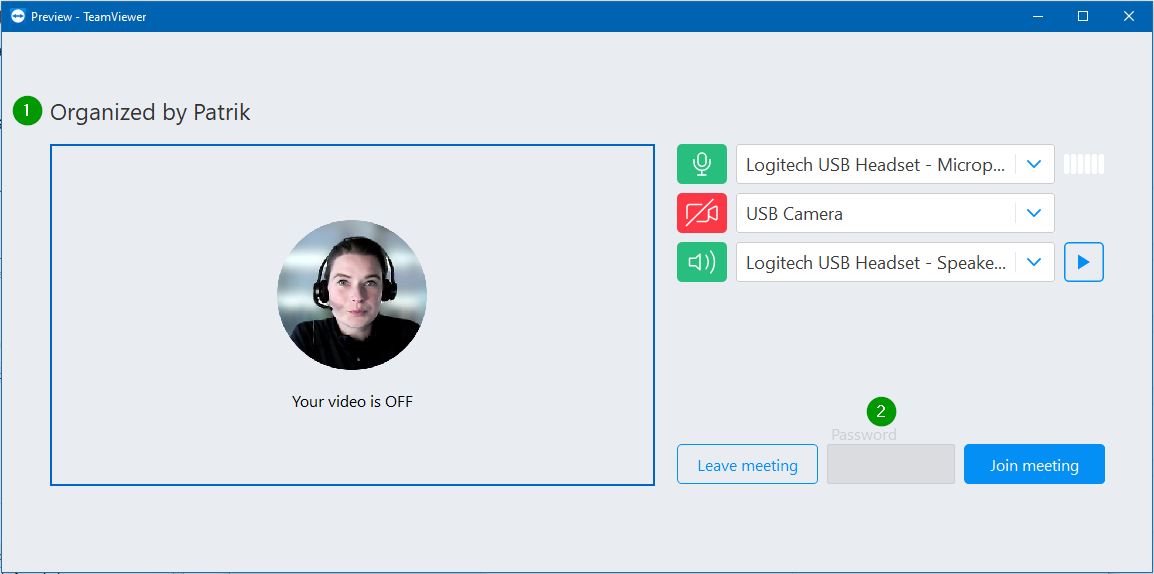
Once they click on Join meeting, they will enter your meeting with their chosen settings.
One last thing
One feature I love the most during the meeting is to mute or unmute myself by tapping the `m´ on my keyboard (for Windows). On your mac, the same will work with pressing cmd + shift + m.
This is just so convenient!!
Ok, folks - I hope you enjoy the preview as much as I do, and let´s see what else our UX team will come up with to allow us to benefit from an even smoother meeting experience going forward!
Thanks and have a great day ahead,
Esther