Today I want to highlight a feature that was introduced in the early years of TeamViewers’ existence: the Record a Session feature.
The feature name basically speaks for itself, it allows you to record a TeamViewer session. Both, for a meeting or remote-control session.
There are two different options on how to record a session to cover your individual use case:
You can choose to have your session recorded automatically (1) with every connection you make, or manually (2) choose which session you want to record after making a connection with the remote computer.
To make things easier, here's a nice and simple 5 step tutorial, complete with screenshots:
Step 1 – establish a remote connection and take a minute to check out the beautiful toolbar we have.

Step 2 – after some moments of admiration, click on Files & Extras.

Step 3 – click on Start session recording to begin recording your session.

Step 4 – you can Pause/Stop and save the recording by pressing the red button and choosing your option.

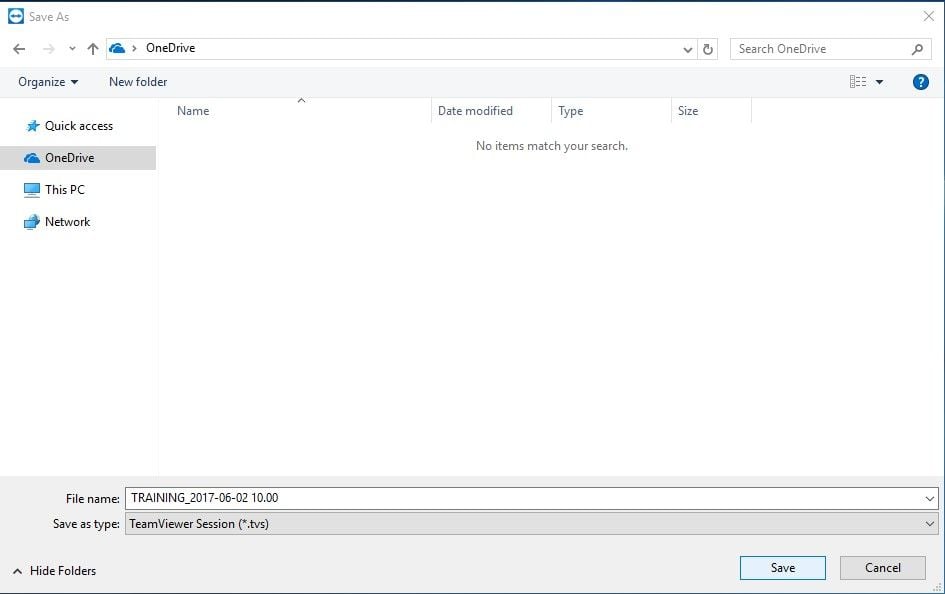
Step 5 – your session automatically gets saved in TeamViewer´s own .tvs-format and a pop up dialog box prompts you to select a location where you might want to store your file. Choose your preferred destination.

As I mentioned earlier, you can also enable TeamViewer to automatically record all your sessions. Let me explain it with a nice 3 step tutorial. Also, complete with screenshots.
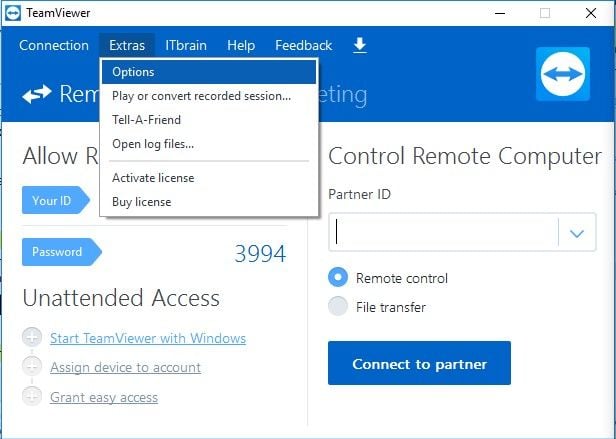
Step 1 – Open your TeamViewer software and click on Options which is right under the Extras tab. (When you are using TeamViewer´s new interface, click on Menu --> Options)

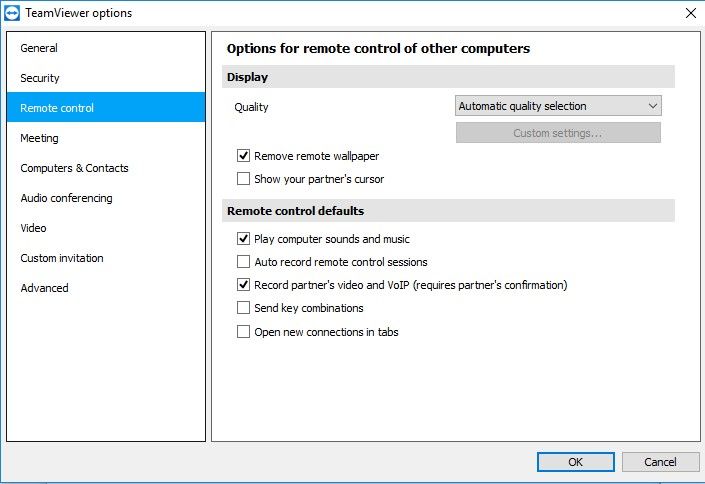
Step 2- Choose the Remote control tab.

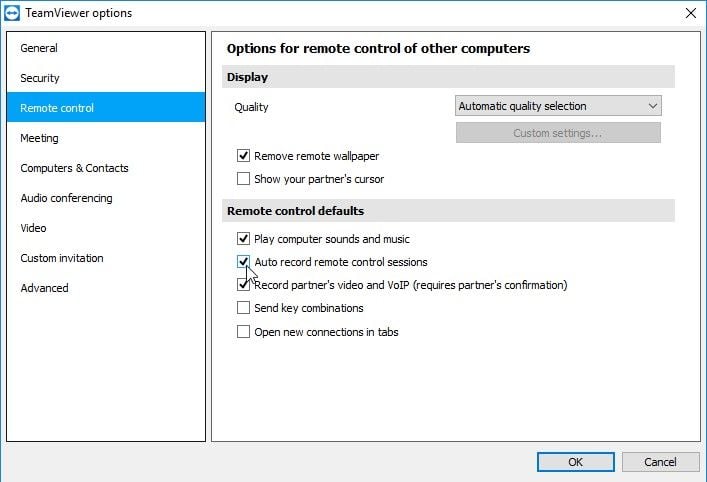
Step 3 – Put a tick mark on the box that says Auto record remote control sessions and OK to save your settings.

Other things you can do with the recording a session feature includes:
- converting a recorded session into the .avi-format
- and playing the recorded session directly via the software with no need of third-party media players.
For more information, you can always refer to chapter 9 of the TeamViewer Manual for Remote Control.
Why Should We Record A Session?
After establishing how we can fully make use of the session recording feature, we should also talk about how we can benefit from this feature.
Amongst many, I have personally handpicked 3 of my favorites.
For training purposes
This would be most beneficial for people, companies/agencies and businesses that provide training to others. The recorded session can be played with any media player (after conversion) and will be an important help for re-using clips that can be for tutorials, how-to guides, and teaching separate groups of people.
For quality control
If you are a customer service team, this feature is a blessing. By recording sessions, the team manager can go through it repeatedly to improve the quality of the customer service team. This benefits the teams extensively for constantly being able to better their service and go over their recordings so that they can see which areas they are not performing too well in.
For protection/dispute avoidance
When connecting to a remote computer, things we do can be used against us. Which is why recording a session will not allow any disputes to happen due to avoiding ‘who did what’ moments. By having a recorded session, proper evidence is available for protection of the business from mistaken accusations.
Start recording your sessions!
Now that you know how to work around recording a TeamViewer session, feel free to give us some feedback on how you like the feature. What are your reasons to record a session? Do you have another use case than the above mentioned?