Hi there,
As a side product for making IoT devices accessible to you through their web interface, we also quickly thought about how this could work for enabling remote support. So, we dug into the code and ported our IoT Remote AppControl solution to Synology NAS boxes, making it possible to access these devices from anywhere!
When tracking the device landscape out there, there is definitively a trend to replace large standalone servers with small, easy to administer NAS boxes. They are quick to set up, do not eat up too much space and are convenient to use. So especially SMBs/SMEs and home users start to pick them up more and more for easy file sharing or backup purposes. These boxes also create add on values by offering interfaces to calendars, web mails, audio players, photo collections and more. And now, you can easily access everything on there just by double clicking a device in your TeamViewer Computers & Contacts List.
To support you more, the first two devices are free of charge. For adding more devices or to get more information please go here
And here is how you start:
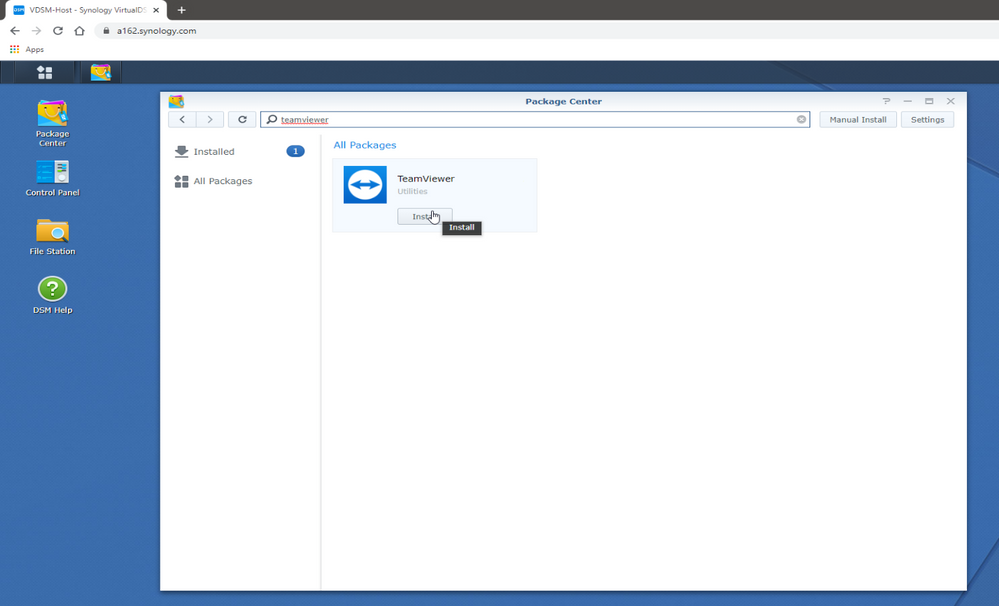
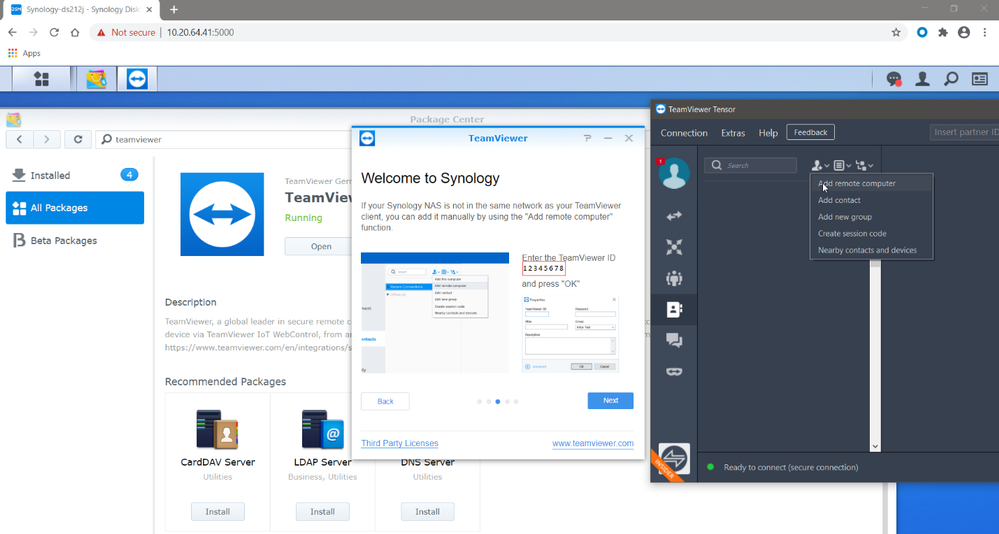
Connect to you Synology NAS and open the Package Center application.
Search for TeamViewer application and install. If it does not show up in the Package Center, please visit the Synology Add-on Packages Website and check if your model is supported.

Once you finish the installation, the Assignment Wizard will start if you had previously selected the run after installation checkbox in the last screen or just open TeamViewer on the NAS from the Main Menu.
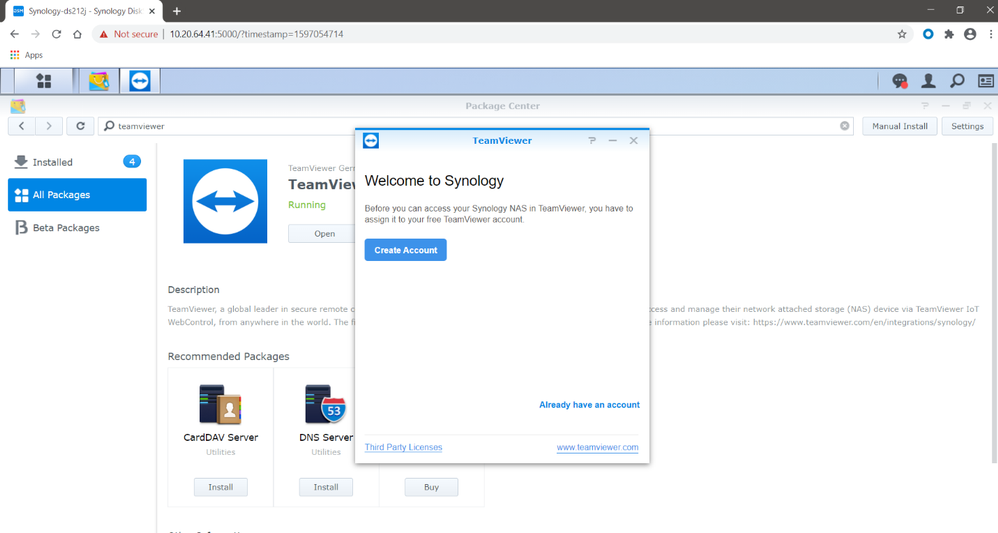
There are two ways to do the Assignment:
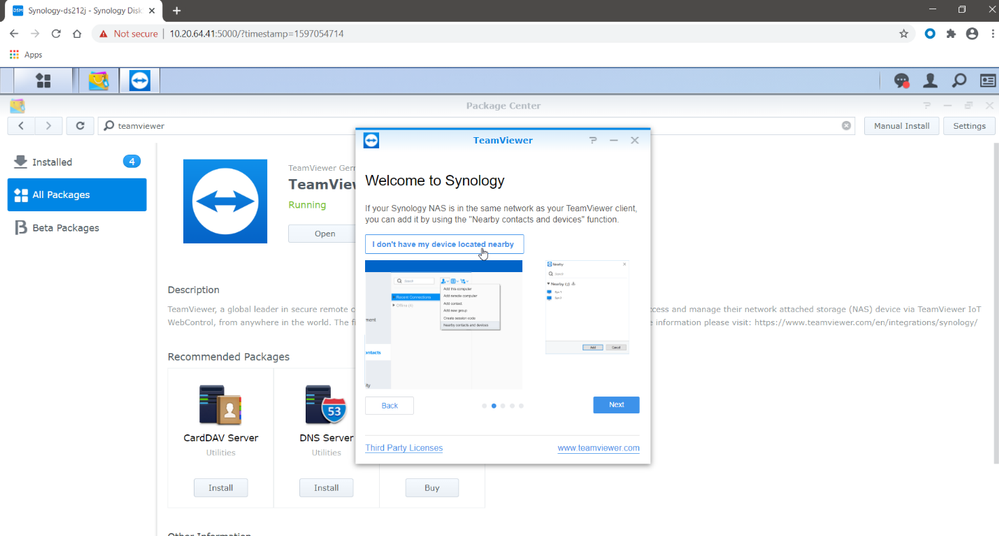
As the easiest way, if your device is in the same subnet/network, you can use the Nearby contacts and devices feature of TeamViewer.

Just click the “Add item”- button in your TeamViewer Computers & Contacts List and select Nearby contacts and devices. A list with all devices in the same network running TeamViewer will show up and you should be able to locate your Synology NAS device in this list. Just double click on it, and you are all set: You can now directly connect to your device.
Please note that now, because the device is assigned to your account, it will no longer appear in the Nearby contacts and devices list.
If the device is not located in your subnet/network or cannot be found, you will need to do a few more clicks. In the assignment wizard click on the I don’t have my device located nearby button.
You will find Your ID in the next dialog. Add the ID to your Computers & Contacts list in Teamviewer Application by selecting Add item --> Add remote computer. Enter the ID as TeamViewer ID in the shown dialog. and press OK. The device needs to be added in a Group that you have ownership.
.
You cannot connect to your Synology NAS because the device is not assigned to your account yet.
To do this, in the Assignment Wizard click next to get the Personal Password for assignment. Enter the Password in the device's menu and from now you can connect to your Synology NAS device.


Go ahead, double click on your new entry in the Computers & Contacts list, log in and start enjoying your DiskStation from everywhere. Download files or listen to your music -- (almost) everything is possible now, and all via TeamViewer.
Please note that there are some known issues:
- Connections are currently only possible from TeamViewer 13.1 running on Windows.
- Connections to devices running DSM 7.0 are only possible from TeamViewer 15 running on Windows.
- macOS, Linux or mobile clients are not supported.
- Links opening a new browser window will not work, so MailStation or VideoStation (just to name a few), will not be able to run.
Best,
Andreas