Do your parents have trouble installing TeamViewer even though you instruct them thoroughly?
Don’t fret: Here’s the easy way to provide remote IT support to your parents!
Thanks to TeamViewer’s freemium model, many of you first got into contact with the software when you used it for private purposes, for example to fix your parents´ PC from anywhere across the globe.
In fact, it makes me very proud and happy to frequently read users comments on social media in which they thank TeamViewer for that.
It is also the reason why I thought it was time to teach those of you who support their loved, but not so tech-savvy family and friends the easiest way of doing that.
After all, even if you know your way around computers, you might be new to the software just as much as they are, when you read this.
You might not be aware of them yet, but TeamViewer has some features that eliminate the frustrating process of guiding your parents through TeamViewer’s fairly easy installation process.
And let’s be honest: If your parents aren’t native English speakers, guidance already starts with spelling T E A M V I E W E R and explaining where to enter that dubious word.
The good news is, you can simply take the matter into your own hands by making use of the QuickSupport module and then installing either a Host module or the full version of TeamViewer.
So let’s not keep your friends and parents waiting and get to the tutorial part!
Installing TeamViewer on Behalf of Your Connection Partner
To install a TeamViewer full version (or Host module), follow these instructions.
It’s assumed, that you have the free version of TeamViewer (with a Computer & Contacts list) installed on your device.
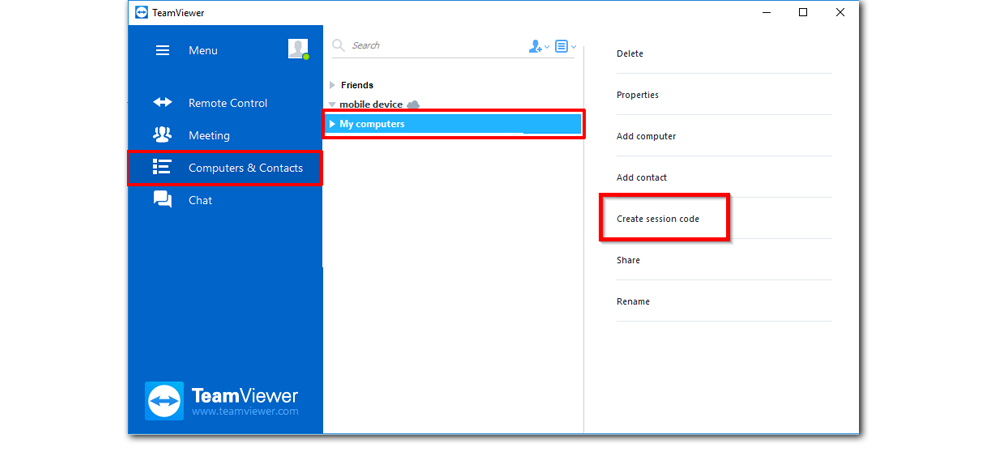
1. First, open your Computer & Contacts list and click on one of your groups. Click on Create session code

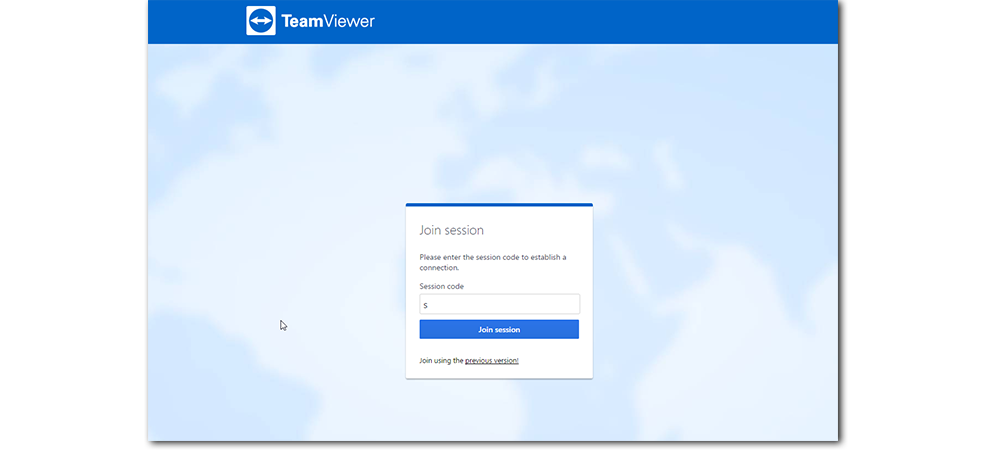
--> Ask your connection partner to visit this link (https://get.teamviewer.com).
--> They will see the following screen:

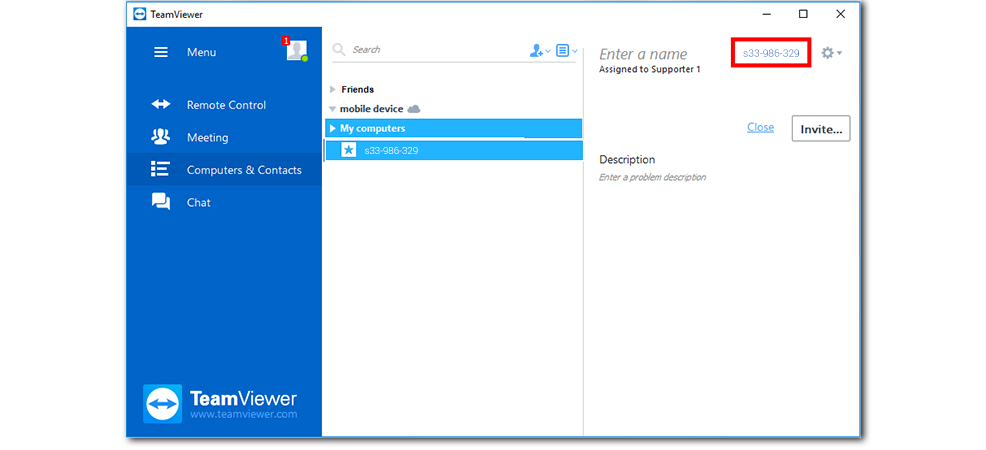
--> Tell them to insert the Session Code number you just created. You can find it here in your TeamViewer client.

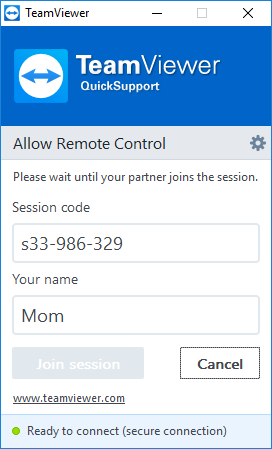
--> They will be prompted to download a file whose name begins with “TeamViewerQS”. They need to run or open this file after it has downloaded.
--> When they run the file, a window will appear on their screen that looks like this, with your Session Code number already entered there:

--> The star icon turns green when your parents’ computer is ready to connect.
2. Connect to their computer with a double click on the session code in your Computers & Contacts list. Your connection partner needs to accept your request by clicking on OK.
--> You will be connected to your partner and be able to control their device as if you were sitting right in front of it.
3. To now upgrade their device with a TeamViewer full version, go to Files & Extras in the remote control tool bar and click Install (marked with a TeamViewer logo).

4. I recommend to install the default TeamViewer full version. By doing so, you will get the possibility to install TeamViewer as a service to get access to your partner’s computer whenever they need your help and they will also have the possibility to join a meeting or make a TeamViewer videocall.
5. The installation will start automatically and once it’s finished, you can easily re-connect.
6. Now you can also save their computer in your Computers & contacts list for easy-to-start connections in the future.
Supporting Friends and Family Has Never Been Easier
So now you know a neat little trick to avoid the long-winded explanation process that you potentially face when trying to help someone who is not tech-savvy at all with their TeamViewer installation.
You can connect to them with only as much as a click and help them out whenever they need you.
If, on the other hand, you’d like to try an approach that is more focused on self-help, teaching your partner how to deal with small problems themselves, you might enjoy eg. the white board feature.
How long did it take you to get your parents set up with TeamViewer? Let’s share experiences in the comment section below!