Read this article in Japanese
This article applies to all TeamViewer customers with a Tensor license.
Beginners guide
Step 1: Visit teamviewer.com/download
Download TeamViewer from our homepage at www.teamviewer.com/download:
- Choose your operating system (OS) to continue the download by clicking on the icon for your OS.
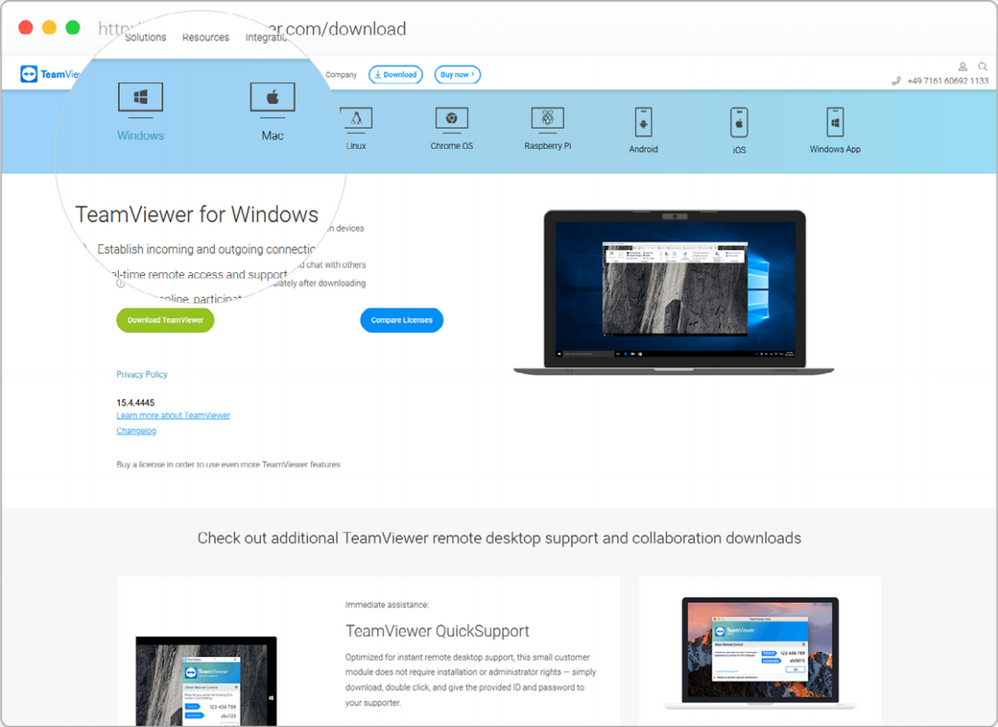
Step 2: Download and save TeamViewer
Click on the download button (e.g. Windows as in the example herein). You will be prompted to save the .exe file. Save it to your desktop. 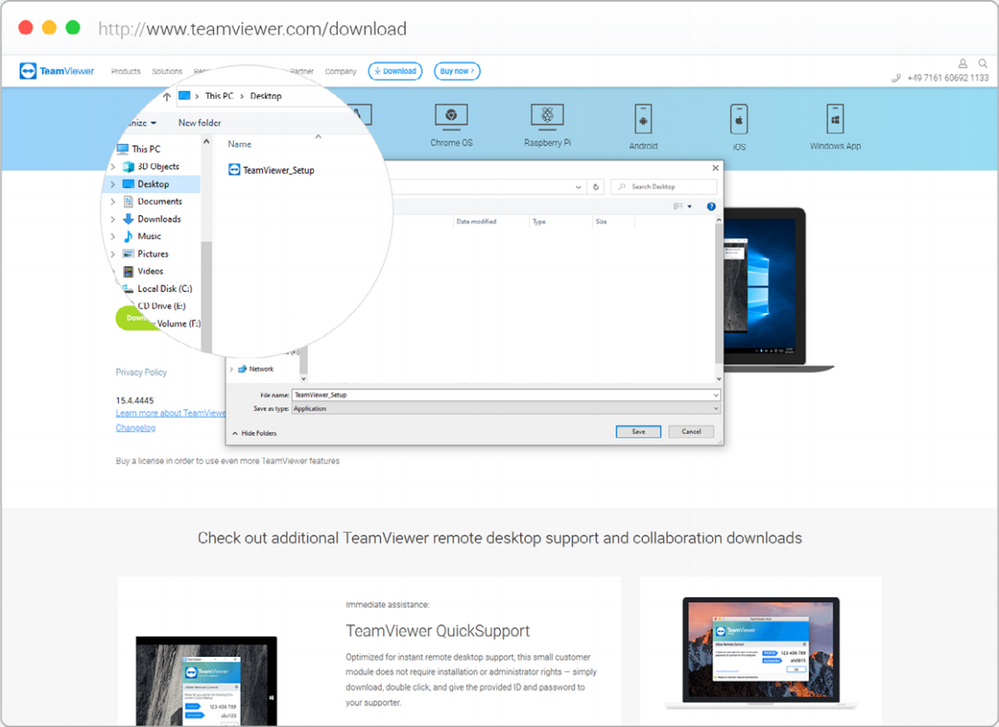
Step 3: Install TeamViewer
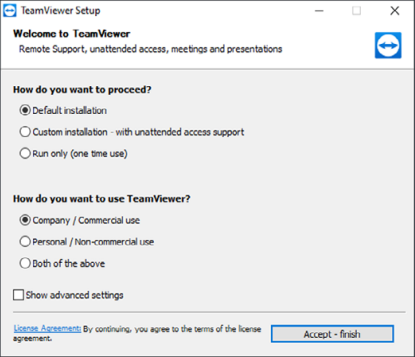
Run the .exe file freshly downloaded. A prompt will show up as below. Select default Installation and Company / Commercial use.
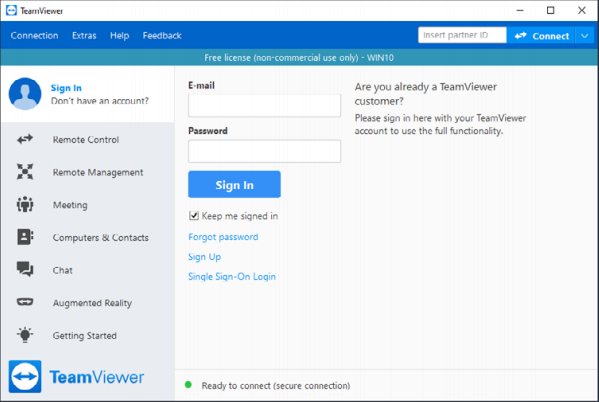
Step 4: Sign in
Once the installation finished, enter your e-mail address and password and click the Sign in button.
Step 5: Make a connection
Enter the ID of your office desktop computer and click Connect. 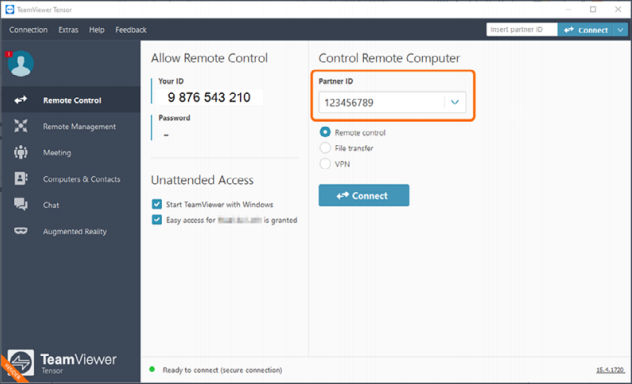
Step 6: TeamViewer or Windows authentication
Use one of the two options to proceed with your login.
- Enter the password of the desktop computer that you received from your IT admin and click Log On

-
Log in using your Windows credentials.
-
Click the Advanced Button 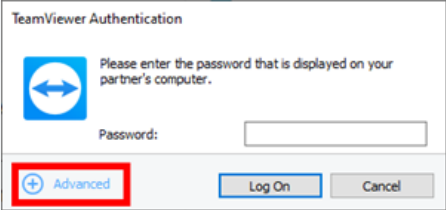
-
Enter your Windows user name login and password.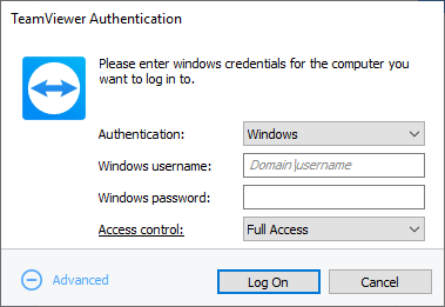
You are now connected with your remote device.