<main>
<article class="userContent">
<p>Navigation path: <code class="code codeInline" spellcheck="false" tabindex="0">Plugins > Webchat</code></p><p>
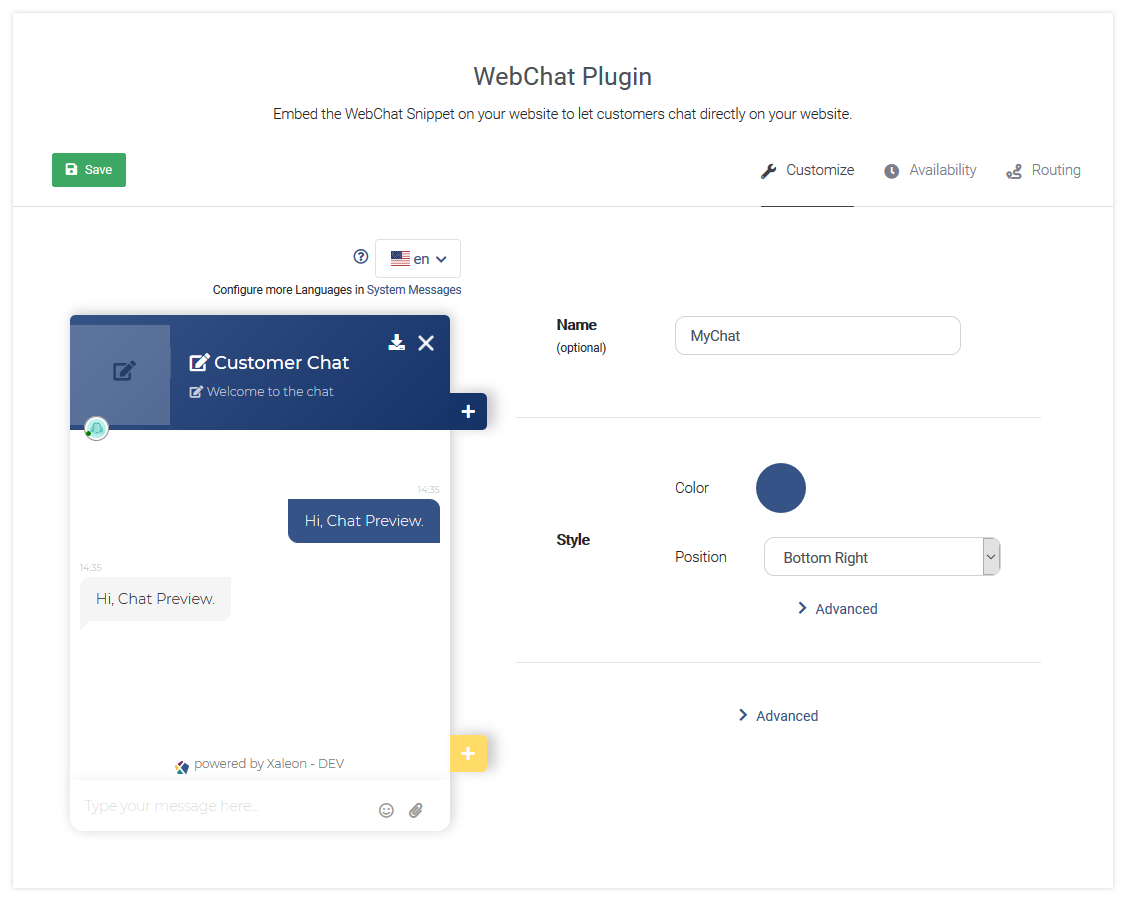
After creating a new webchat plugin or editing the existing one, you find yourself on following view:
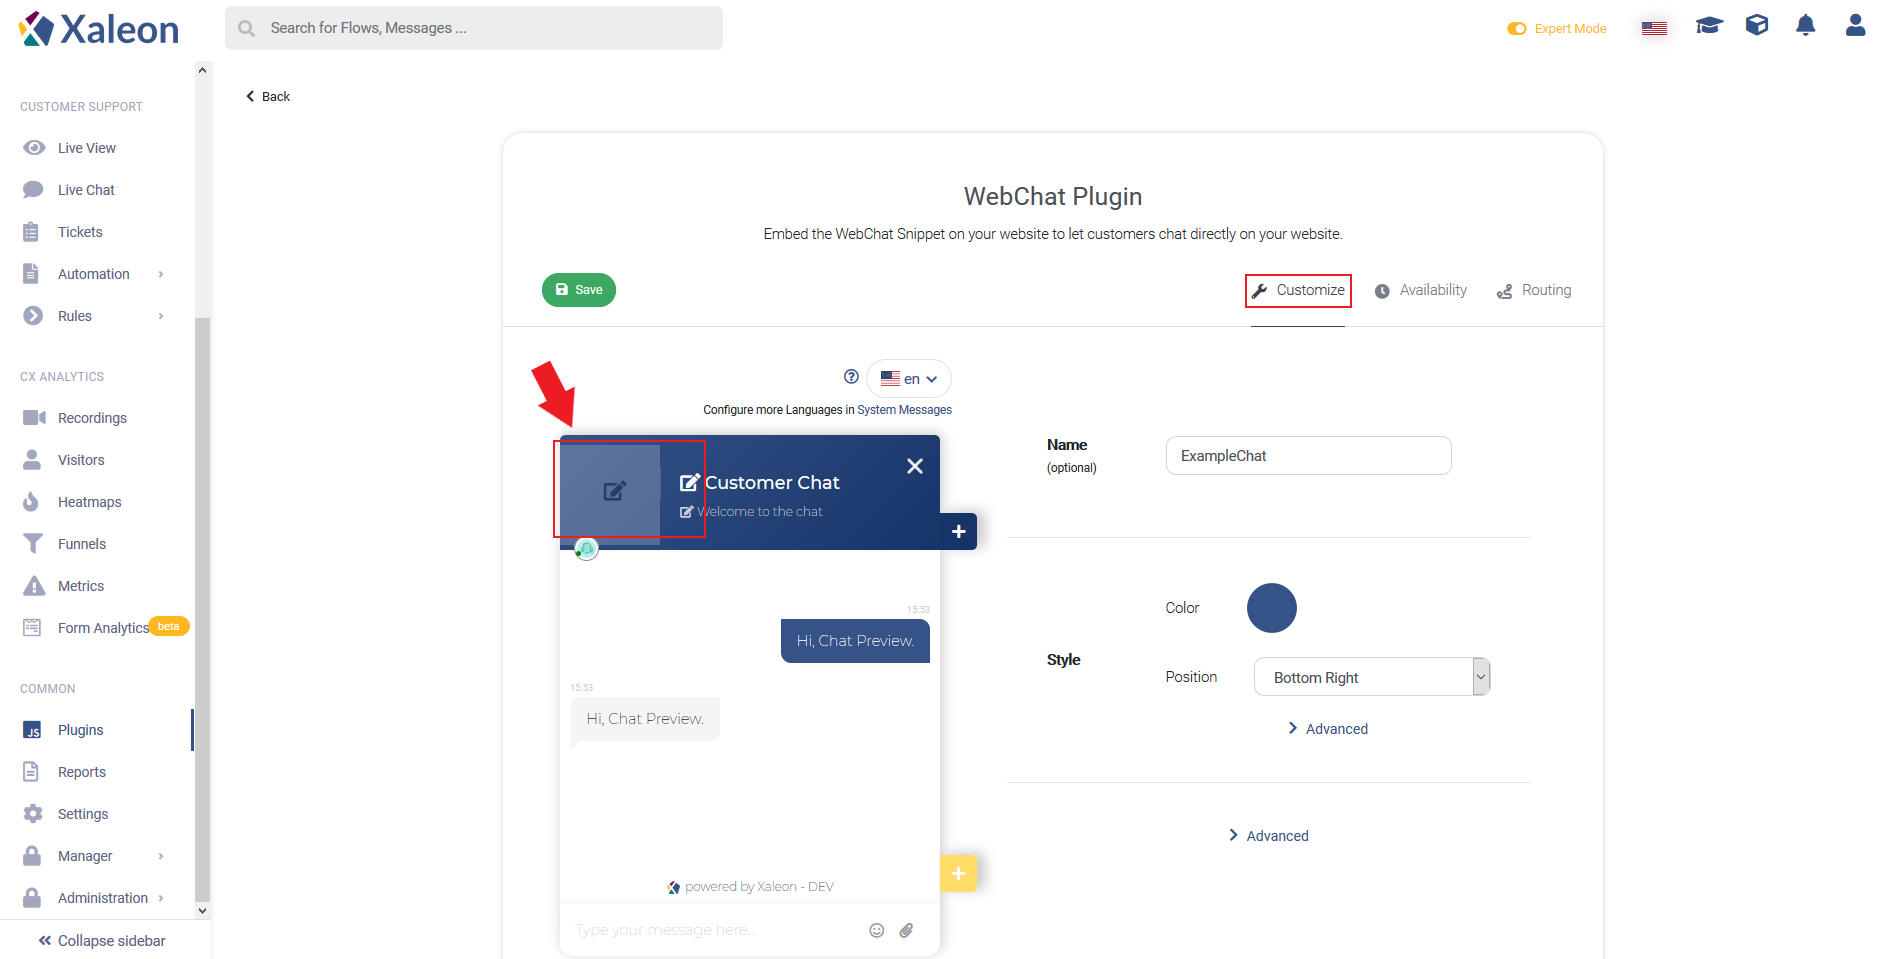
</p><div class="embedExternal embedImage display-large float-none">
<div class="embedExternal-content">
<a class="embedImage-link" href="https://docs.chatvisor.com/img/newdocsimg202011/sus_web_chat-plugin.png" rel="nofollow noreferrer noopener ugc" target="_blank">
<img class="embedImage-img" src="https://docs.chatvisor.com/img/newdocsimg202011/sus_web_chat-plugin.png" alt="alt-text" height="180" width="320" loading="lazy" data-display-size="large" data-float="none"></img></a>
</div>
</div>
<p><br></p><h3></h3><h2 data-id="tab%3A-customize">Tab: Customize</h2><div class="embedExternal embedImage display-large float-none">
<div class="embedExternal-content">
<a class="embedImage-link" href="https://docs.chatvisor.com/img/newdocsimg/css_plugin-webchat.png" rel="nofollow noreferrer noopener ugc" target="_blank">
<img class="embedImage-img" src="https://docs.chatvisor.com/img/newdocsimg/css_plugin-webchat.png" alt="alt-text" height="180" width="320" loading="lazy" data-display-size="large" data-float="none"></img></a>
</div>
</div>
<p><br></p><h3 data-id="-1"></h3><h2 data-id="chat">Chat</h2><p>
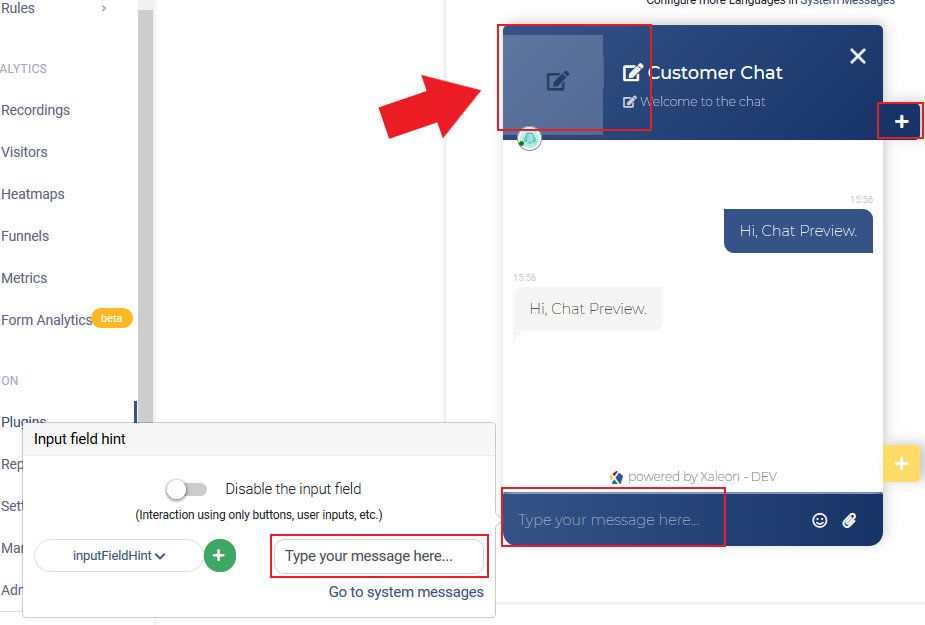
Use our visualized editor to add a chat title, welcome description, chat buttons and the input field hint. Chat buttons can trigger <a href="https://docs.chatvisor.com/docs/config06_css_flows/" rel="nofollow noreferrer ugc">Flows</a>.</p><div class="embedExternal embedImage display-large float-none">
<div class="embedExternal-content">
<a class="embedImage-link" href="https://docs.chatvisor.com/img/newdocsimg/css_plugin-webchat-customization.png" rel="nofollow noreferrer noopener ugc" target="_blank">
<img class="embedImage-img" src="https://docs.chatvisor.com/img/newdocsimg/css_plugin-webchat-customization.png" alt="alt-text" height="180" width="320" loading="lazy" data-display-size="large" data-float="none"></img></a>
</div>
</div>
<p><br></p><h3 data-id="-2"></h3><h2 data-id="style">Style</h2><p>Change the chat's according your corporate colors and position the chat circle either bottom right or bottom left. Click <code class="code codeInline" spellcheck="false" tabindex="0">Advanced</code> and reference to a custom CSS URL to add further customizations.</p><p><br></p><h3 data-id="-3"></h3><h2 data-id="advanced-settings">Advanced Settings</h2><p>Through <code class="code codeInline" spellcheck="false" tabindex="0">Advanced</code>, following options appear:</p><ul><li>Session based visitor id: The visitor id is now session based, which means when the user closes the browser tab, a new id is assigned to the user</li><li>Automatically append HTML: Only the JavaScript snippet has to be inserted, the HTML is automatically appended</li><li>Trigger a <a href="https://docs.chatvisor.com/docs/admin-manual/support-suite/chat-ops_forms" rel="nofollow noreferrer ugc">Form</a> once a customer is marked as done</li><li>Hide button (chat can be opened using API)</li><li>Hide online status of agent in header: Hides the current online status of the agent in the header of the Chat
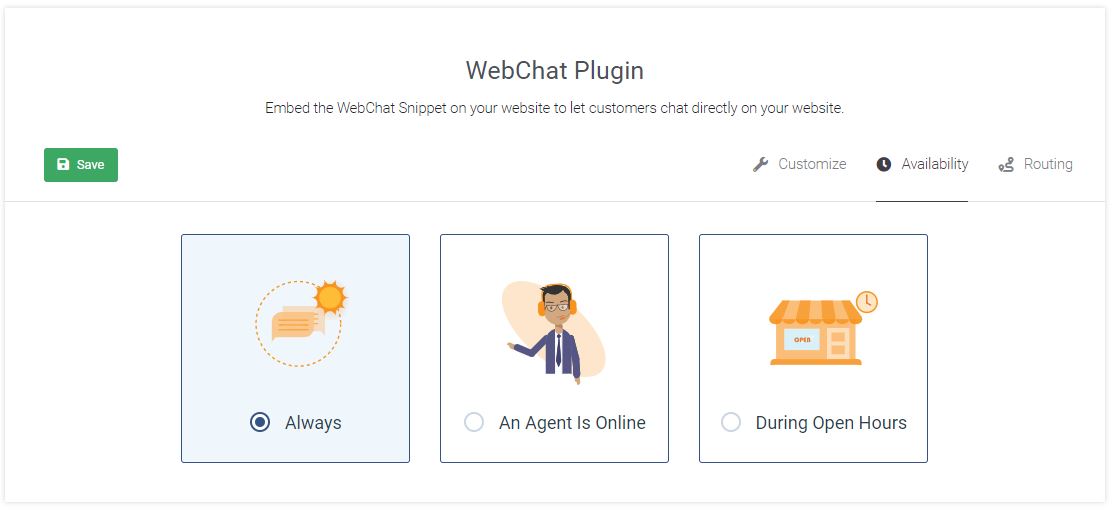
</li></ul><p><br></p><h3 data-id="-4"></h3><h2 data-id="tab%3A-availability">Tab: Availability</h2><div class="embedExternal embedImage display-large float-none">
<div class="embedExternal-content">
<a class="embedImage-link" href="https://docs.chatvisor.com/img/newdocsimg/css_plugin-webchat-availability.jpg" rel="nofollow noreferrer noopener ugc" target="_blank">
<img class="embedImage-img" src="https://docs.chatvisor.com/img/newdocsimg/css_plugin-webchat-availability.jpg" alt="alt-text" height="180" width="320" loading="lazy" data-display-size="large" data-float="none"></img></a>
</div>
</div>
<p><br></p><p>In <code class="code codeInline" spellcheck="false" tabindex="0">Availability</code> you find three standard options to define at what times the chat shall be visible to your customers.</p><ul><li>Always - chat 24/7 visible, customers can text you anytime</li><li>An Agent Is Online</li><li>During Open Hours - set your open hours, the chat will be visible only then</li></ul><h3 data-id="an-agent-is-online">An Agent Is Online</h3><p>Through the <code class="code codeInline" spellcheck="false" tabindex="0">Go online</code> button on the top right of the TeamViewer Engage platform, agents can go online or offline. Agents that set their state to "online" can be specifically targeted with incoming messages using <a href="https://docs.chatvisor.com/docs/admin-manual/support-suite/chat-ops_routing-rules" rel="nofollow noreferrer ugc">Routing Rules</a>.</p><div class="embedExternal embedImage display-large float-none">
<div class="embedExternal-content">
<a class="embedImage-link" href="https://docs.chatvisor.com/img/newdocsimg/css_plugin-webchat-go-online.jpg" rel="nofollow noreferrer noopener ugc" target="_blank">
<img class="embedImage-img" src="https://docs.chatvisor.com/img/newdocsimg/css_plugin-webchat-go-online.jpg" alt="alt-text" height="180" width="320" loading="lazy" data-display-size="large" data-float="none"></img></a>
</div>
</div>
<p></p><p><br></p><h2 data-id="continue-reading-here">Continue reading here</h2><ul><li><a href="https://community.teamviewer.com/English/kb/articles/108743-plugins-03-co-browsing" rel="nofollow noreferrer ugc">Plugins - 03 Co-Browsing</a></li></ul>
</article>
</main>