Activate your Premium/Corporate license - TeamViewer Support
<main>
<article class="userContent">
<h2 data-id="general">General</h2><div class="blockquote"><div class="blockquote-content"><p class="blockquote-line"><em>This article applies to all Premium and Corporate license holders.</em></p></div></div><p>This article explains how to activate and set up your TeamViewer Premium or Corporate License.</p><p><br></p><h3></h3><h2 data-id="license-activation">License Activation</h2><p>We highly recommend <strong>activating the license on a master account</strong>.</p><p>⚠The TeamViewer account on which you activate the license <strong>will be automatically classified as Administrator</strong>. Therefore, we highly recommend using an impersonal e-mail address to create a master account for your company profile</p><p>👉 For example <strong>administration@yourcompany.com</strong></p><p>Please find out more information here:</p><div class="js-embed embedResponsive" data-embedjson="{"body":"This article applies to users with a Premium- or Corporate license. General In the TeamViewer Management Console, it is possible to create an online company which allows you to use additional features to manage your license, groups, modules, user etc. in an easy and secure environment. In this article, you learn our best…","photoUrl":"https:\/\/us.v-cdn.net\/6032394\/uploads\/DBWEDO0SC62R\/tv-community-rgb.png","url":"https:\/\/community.teamviewer.com\/English\/kb\/articles\/24321-using-a-master-account-for-the-teamviewer-management-console#toc-hId--1329497001","embedType":"link","name":"Using a Master Account for the TeamViewer Management Console - TeamViewer Support"}">
<a href="https://community.teamviewer.com/English/kb/articles/24321-using-a-master-account-for-the-teamviewer-management-console#toc-hId--1329497001" rel="nofollow noreferrer ugc">
https://community.teamviewer.com/English/kb/articles/24321-using-a-master-account-for-the-teamviewer-management-console#toc-hId--1329497001
</a>
</div><h3 data-id="step-1">Step 1</h3><p>Download and install TeamViewer on your device:</p><div class="js-embed embedResponsive" data-embedjson="{"body":"Download TeamViewer now to connect to remote desktops, provide remote support and collaborate with online meetings and video conferencing.","photoUrl":"https:\/\/static.teamviewer.com\/resources\/2018\/12\/Facebook_v1.png","url":"https:\/\/www.teamviewer.com\/download\/?_ga=2.258371273.2100644009.1618211161-1257128271.1606319033","embedType":"link","name":"TeamViewer Windows Download for Remote Desktop access and collaboration"}">
<a href="https://www.teamviewer.com/download/?_ga=2.258371273.2100644009.1618211161-1257128271.1606319033" rel="nofollow noreferrer ugc">
https://www.teamviewer.com/download/?_ga=2.258371273.2100644009.1618211161-1257128271.1606319033
</a>
</div><h3 data-id="step-2">Step 2</h3><p>Open the License Activation email that was sent to the email account used to purchase the license. Click "Activate".</p><p><strong>📌Note: </strong>If you have purchased more than one product, each license must be individually activated.</p><div class="embedExternal embedImage display-large float-none">
<div class="embedExternal-content">
<a class="embedImage-link" href="https://us.v-cdn.net/6032394/uploads/LTR9RLZI2WMV/image.png" rel="nofollow noreferrer noopener ugc" target="_blank">
<img class="embedImage-img" src="https://us.v-cdn.net/6032394/uploads/LTR9RLZI2WMV/image.png" alt="image.png" height="576" width="650" loading="lazy" data-display-size="large" data-float="none"></img></a>
</div>
</div>
<h3 data-id="step-3-follow-a-or-b">Step 3 - Follow A or B</h3><h4 data-id="a%3A-if-you-already-have-a-teamviewer-account">A: If you already have a TeamViewer account</h4><p>Sign in with your existing TeamViewer account, click <strong>Activate</strong> and go to Step 4.</p><div class="embedExternal embedImage display-large float-none">
<div class="embedExternal-content">
<a class="embedImage-link" href="https://us.v-cdn.net/6032394/uploads/M99AEFHSULT6/image.png" rel="nofollow noreferrer noopener ugc" target="_blank">
<img class="embedImage-img" src="https://us.v-cdn.net/6032394/uploads/M99AEFHSULT6/image.png" alt="image.png" height="576" width="650" loading="lazy" data-display-size="large" data-float="none"></img></a>
</div>
</div>
<h4 data-id="b%3A-if-you-do-not-have-a-teamviewer-account">B: If you do not have a TeamViewer account</h4><p>1) Create an account by clicking <strong>Sign Up</strong>.</p><div class="embedExternal embedImage display-large float-none">
<div class="embedExternal-content">
<a class="embedImage-link" href="https://us.v-cdn.net/6032394/uploads/VYVAIM1JFSG1/image.png" rel="nofollow noreferrer noopener ugc" target="_blank">
<img class="embedImage-img" src="https://us.v-cdn.net/6032394/uploads/VYVAIM1JFSG1/image.png" alt="image.png" height="576" width="650" loading="lazy" data-display-size="large" data-float="none"></img></a>
</div>
</div>
<p>2) Enter your email address, name and create a password. Read and accept the EULA and mark the captcha box. Click <strong>Activate</strong>.</p><div class="embedExternal embedImage display-large float-none">
<div class="embedExternal-content">
<a class="embedImage-link" href="https://us.v-cdn.net/6032394/uploads/MXJ2ONULJFKL/image.png" rel="nofollow noreferrer noopener ugc" target="_blank">
<img class="embedImage-img" src="https://us.v-cdn.net/6032394/uploads/MXJ2ONULJFKL/image.png" alt="image.png" height="576" width="650" loading="lazy" data-display-size="large" data-float="none"></img></a>
</div>
</div>
<p><br></p><p>3) An email has been sent to your inbox for account verification. Click the link in the email to verify your account and complete your license activation.</p><div class="embedExternal embedImage display-large float-none">
<div class="embedExternal-content">
<a class="embedImage-link" href="https://us.v-cdn.net/6032394/uploads/Y66D651IYZTL/image.png" rel="nofollow noreferrer noopener ugc" target="_blank">
<img class="embedImage-img" src="https://us.v-cdn.net/6032394/uploads/Y66D651IYZTL/image.png" alt="image.png" height="576" width="650" loading="lazy" data-display-size="large" data-float="none"></img></a>
</div>
</div>
<h3 data-id="step-4">Step 4</h3><p>You will be redirected to the Management Console where a pop-up confirms your license was successfully activated. Click <strong>OK</strong>.</p><div class="embedExternal embedImage display-large float-none">
<div class="embedExternal-content">
<a class="embedImage-link" href="https://us.v-cdn.net/6032394/uploads/RWLDW3KM7OOM/image.png" rel="nofollow noreferrer noopener ugc" target="_blank">
<img class="embedImage-img" src="https://us.v-cdn.net/6032394/uploads/RWLDW3KM7OOM/image.png" alt="image.png" height="576" width="650" loading="lazy" data-display-size="large" data-float="none"></img></a>
</div>
</div>
<h3 data-id="step-5">Step 5</h3><p>A pop-up is displayed with the option to open the TeamViewer application. Click <strong>Open TeamViewer</strong>.</p><div class="embedExternal embedImage display-large float-none">
<div class="embedExternal-content">
<a class="embedImage-link" href="https://us.v-cdn.net/6032394/uploads/B5D2PVWNN6W0/image.png" rel="nofollow noreferrer noopener ugc" target="_blank">
<img class="embedImage-img" src="https://us.v-cdn.net/6032394/uploads/B5D2PVWNN6W0/image.png" alt="image.png" height="576" width="650" loading="lazy" data-display-size="large" data-float="none"></img></a>
</div>
</div>
<p>You are now signed into your TeamViewer account and have successfully activated your license.</p><p>📌<strong>Note</strong>: Please keep in mind that you must be <strong>signed in to your licensed TeamViewer Account </strong>to have licensed connections. Otherwise, you will be running with the free version. You can use the "Keep me signed in" option for the computer to remember your login details and automatically sign in when you next use TeamViewer.</p><p>📌<strong>Note</strong>: You only need to sign in on the computer that you are connecting from. Login on the remote device is not required.</p><div class="embedExternal embedImage display-large float-none">
<div class="embedExternal-content">
<a class="embedImage-link" href="https://us.v-cdn.net/6032394/uploads/G7T0WFVPUQGN/en-tv-gui-logged-in.png" rel="nofollow noreferrer noopener ugc" target="_blank">
<img class="embedImage-img" src="https://us.v-cdn.net/6032394/uploads/G7T0WFVPUQGN/en-tv-gui-logged-in.png" alt="EN_TV_GUI_Logged in.png" height="642" width="1146" loading="lazy" data-display-size="large" data-float="none"></img></a>
</div>
</div>
<p><br></p><h3 data-id="-1"></h3><h2 data-id="setting-up-the-license">Setting up the license</h2><p>To create a company profile to benefit from its features do this: </p><p><strong>💡Hint</strong>: We recommend you use an impersonal e-mail address (like administration@yourcompanydomain.com) to create a master account for your company profile</p><ol><li>Log on <a href="https://login.teamviewer.com/LogOn" rel="nofollow noreferrer ugc">login.teamviewer.com</a> with the impersonal e-mail address and click on <strong>User Management</strong> and click <strong>Get Started Now!</strong> </li><li>Enter the desired name of your online company in the <strong>Company Name</strong> field and click on <strong>Create</strong>.</li></ol><p>You can use this Master Account for the administration of TeamViewer IDs, TeamViewer accounts and modules. From this account, you can share groups with your colleagues so that they will have access to the machines in the groups. If the groups are shared to an account of a colleague you are able to see in the connection protocol of the group when they make a connection to that machine (when the account is part of the company profile).</p><h3 data-id="adding-the-users">Adding the users </h3><p>After creating the Master Account which created the online company you can create the accounts of the users or connect the already existing user account to the company profile.</p><p><strong>📌Note</strong>: We recommend that every user in your company using TeamViewer should have their own TeamViewer account, connected to the online company profile in the Management Console.</p><p> 
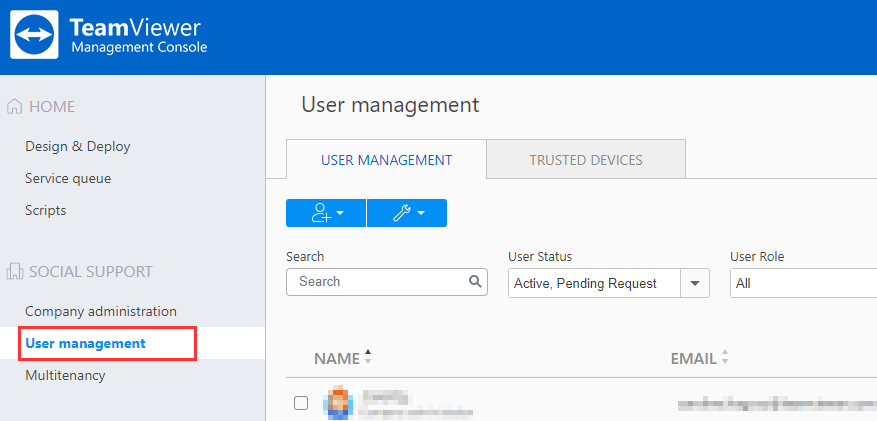
To add users to your company profile, please connect to your Management Console via <a href="https://login.teamviewer.com/" rel="nofollow noreferrer ugc">https://login.teamviewer.com/</a> and select the <strong>User Management tab</strong>:</p><div class="embedExternal embedImage display-large float-none">
<div class="embedExternal-content">
<a class="embedImage-link" href="https://us.v-cdn.net/6032394/uploads/B1BA41G0GJ1S/image.png" rel="nofollow noreferrer noopener ugc" target="_blank">
<img class="embedImage-img" src="https://us.v-cdn.net/6032394/uploads/B1BA41G0GJ1S/image.png" alt="image.png" height="421" width="877" loading="lazy" data-display-size="large" data-float="none"></img></a>
</div>
</div>
<p>There are two ways to add users: </p><ol><li><strong>Add User</strong>, this option is used if your colleague has not yet created any TeamViewer account.</li><li><strong>Add existing account</strong>, this option is used if your colleague has an existing TeamViewer account.</li></ol><div class="embedExternal embedImage display-large float-none">
<div class="embedExternal-content">
<a class="embedImage-link" href="https://us.v-cdn.net/6032394/uploads/L3ELKUPUFVPJ/image.png" rel="nofollow noreferrer noopener ugc" target="_blank">
<img class="embedImage-img" src="https://us.v-cdn.net/6032394/uploads/L3ELKUPUFVPJ/image.png" alt="image.png" height="427" width="529" loading="lazy" data-display-size="large" data-float="none"></img></a>
</div>
</div>
<p>Please find our guide about how to add users here:</p><p><a href="https://community.teamviewer.com/English/kb/articles/3573-all-about-the-teamviewer-company-profile#add-users-to-your-company-profile" rel="nofollow noreferrer ugc">Add users to your company profile</a></p><p><strong>📌Note</strong>: Do you use Active Directory? If so, you can easily create TeamViewer accounts for all of your colleagues: <a href="https://www.teamviewer.com/en/integrations/active-directory/" rel="nofollow noreferrer ugc">https://www.teamviewer.com/en/integrations/active-directory/</a> </p><p><br></p><h3 data-id="-2"></h3><h2 data-id="enable-all-security-features">Enable all security features</h2><p>In order to make sure you are setting up your TeamViewer license in a secure way, please follow our security recommendations of the following article:</p><div class="js-embed embedResponsive" data-embedjson="{"body":"As already discussed in the previous chapter it is in general only possible to make a connection to a device if the TeamViewer ID and the associated password is known or if the access is confirmed via Easy Access or the connection partner confirmed the access manually. If non of the above points is given, it…","photoUrl":"https:\/\/us.v-cdn.net\/6032394\/uploads\/DBWEDO0SC62R\/tv-community-rgb.png","url":"https:\/\/community.teamviewer.com\/English\/kb\/articles\/108697-manage-access-for-users-in-your-company","embedType":"link","name":"Manage access for users in your company - TeamViewer Support"}">
<a href="https://community.teamviewer.com/English/kb/articles/108697-manage-access-for-users-in-your-company" rel="nofollow noreferrer ugc">
https://community.teamviewer.com/English/kb/articles/108697-manage-access-for-users-in-your-company
</a>
</div><p><br></p><h3 data-id="-3"></h3><h2 data-id="additional-information-for-the-premium-and-corporate-license">Additional information for the Premium and Corporate license</h2><p>You can use TeamViewer on unlimited devices to connect to remote devices (the number of concurrent sessions depends on the number of channels belonging to your license).</p><p>Please find out what channels are and how to manage them in these articles:</p><div class="js-embed embedResponsive" data-embedjson="{"body":"This article applies to all TeamViewer customers with a Premium or Corporate plan. General AddOn Channels pertain to the Premium and Corporate plan: The number of channels determines how many devices sessions can be started concurrently from different devices. Premium plan The Premium plan has one session channel and an…","photoUrl":"https:\/\/us.v-cdn.net\/6032394\/uploads\/DBWEDO0SC62R\/tv-community-rgb.png","url":"https:\/\/community.teamviewer.com\/English\/kb\/articles\/4765-what-is-an-addon-channel","embedType":"link","name":"What is an \"AddOn channel\"? - TeamViewer Support"}">
<a href="https://community.teamviewer.com/English/kb/articles/4765-what-is-an-addon-channel" rel="nofollow noreferrer ugc">
https://community.teamviewer.com/English/kb/articles/4765-what-is-an-addon-channel
</a>
</div><div class="js-embed embedResponsive" data-embedjson="{"body":"This article applies to all platforms and users with a Premium or Corporate licenses. General Use channel groups to assign the TeamViewer channels of your license to users from your company profile. There are various use cases to bundle your use your company's TeamViewer channels into groups: Bundle single TeamViewer…","photoUrl":"https:\/\/us.v-cdn.net\/6032394\/uploads\/DBWEDO0SC62R\/tv-community-rgb.png","url":"https:\/\/community.teamviewer.com\/English\/kb\/articles\/6458-what-are-channel-groups","embedType":"link","name":"What are Channel Groups? - TeamViewer Support"}">
<a href="https://community.teamviewer.com/English/kb/articles/6458-what-are-channel-groups" rel="nofollow noreferrer ugc">
https://community.teamviewer.com/English/kb/articles/6458-what-are-channel-groups
</a>
</div><p><br></p>
</article>
</main>